
Gatemi Registration Fields adds your own questions to WooCommerce's registration form — a company name, a VAT number, a "yes, I am a trade account" box. The answers are stored on the customer's account and shown on their profile.
These docs cover both editions:
- Gatemi Registration Fields — the free edition, coming to wordpress.org. Up to three text or checkbox fields, required or not.
- Gatemi Registration Fields for WooCommerce — the full edition, sold on gatemi.com. As many fields as you need, nine field types, conditional display, answers the customer can edit in My Account, and a column on the Users screen.
Anything marked Full edition is only in the paid plugin.
Requirements
| Free edition | Full edition | |
|---|---|---|
| WordPress | 6.4 or later | 6.4 or later |
| PHP | 7.4 or later | 7.4 or later |
| WooCommerce | 8.0 or later | 8.0 or later |
Both editions declare compatibility with High-Performance Order Storage (HPOS) and with the Cart and Checkout blocks.
Your store needs WooCommerce's own registration switched on — under WooCommerce → Settings → Accounts & Privacy, tick Allow customers to create an account on the "My account" page and/or during checkout. The plugin adds to WooCommerce's registration form; it does not create one.
1. Install
Free edition: coming to wordpress.org. Until it is listed, install the zip through Plugins → Add New → Upload Plugin and activate it.
Full edition: download the zip from your gatemi.com account, go to Plugins → Add New → Upload Plugin, upload and activate. Then open WooCommerce → Registration Fields and enter your licence key in the License & updates card. The plugin works without a key; the key switches on one-click updates and support.
You only need one edition. If both are active, the free edition stands down and says so on the Plugins screen. Both read the same field list and store answers in the same place.
2. Add a field
- Go to WooCommerce → Registration Fields (capability
manage_woocommerce). - In the Field 1 row, type a Label — what the customer reads, for example "Company name".
- Optionally type a Key — the field's internal name, letters, digits,
_and-. Leave it empty and it is made from the label. Either way it gets the prefixgmrf_, so "company" becomesgmrf_company. - Choose a Type: Text or Checkbox.
- Tick Required if the account must not be created without it.
- Press Save fields.
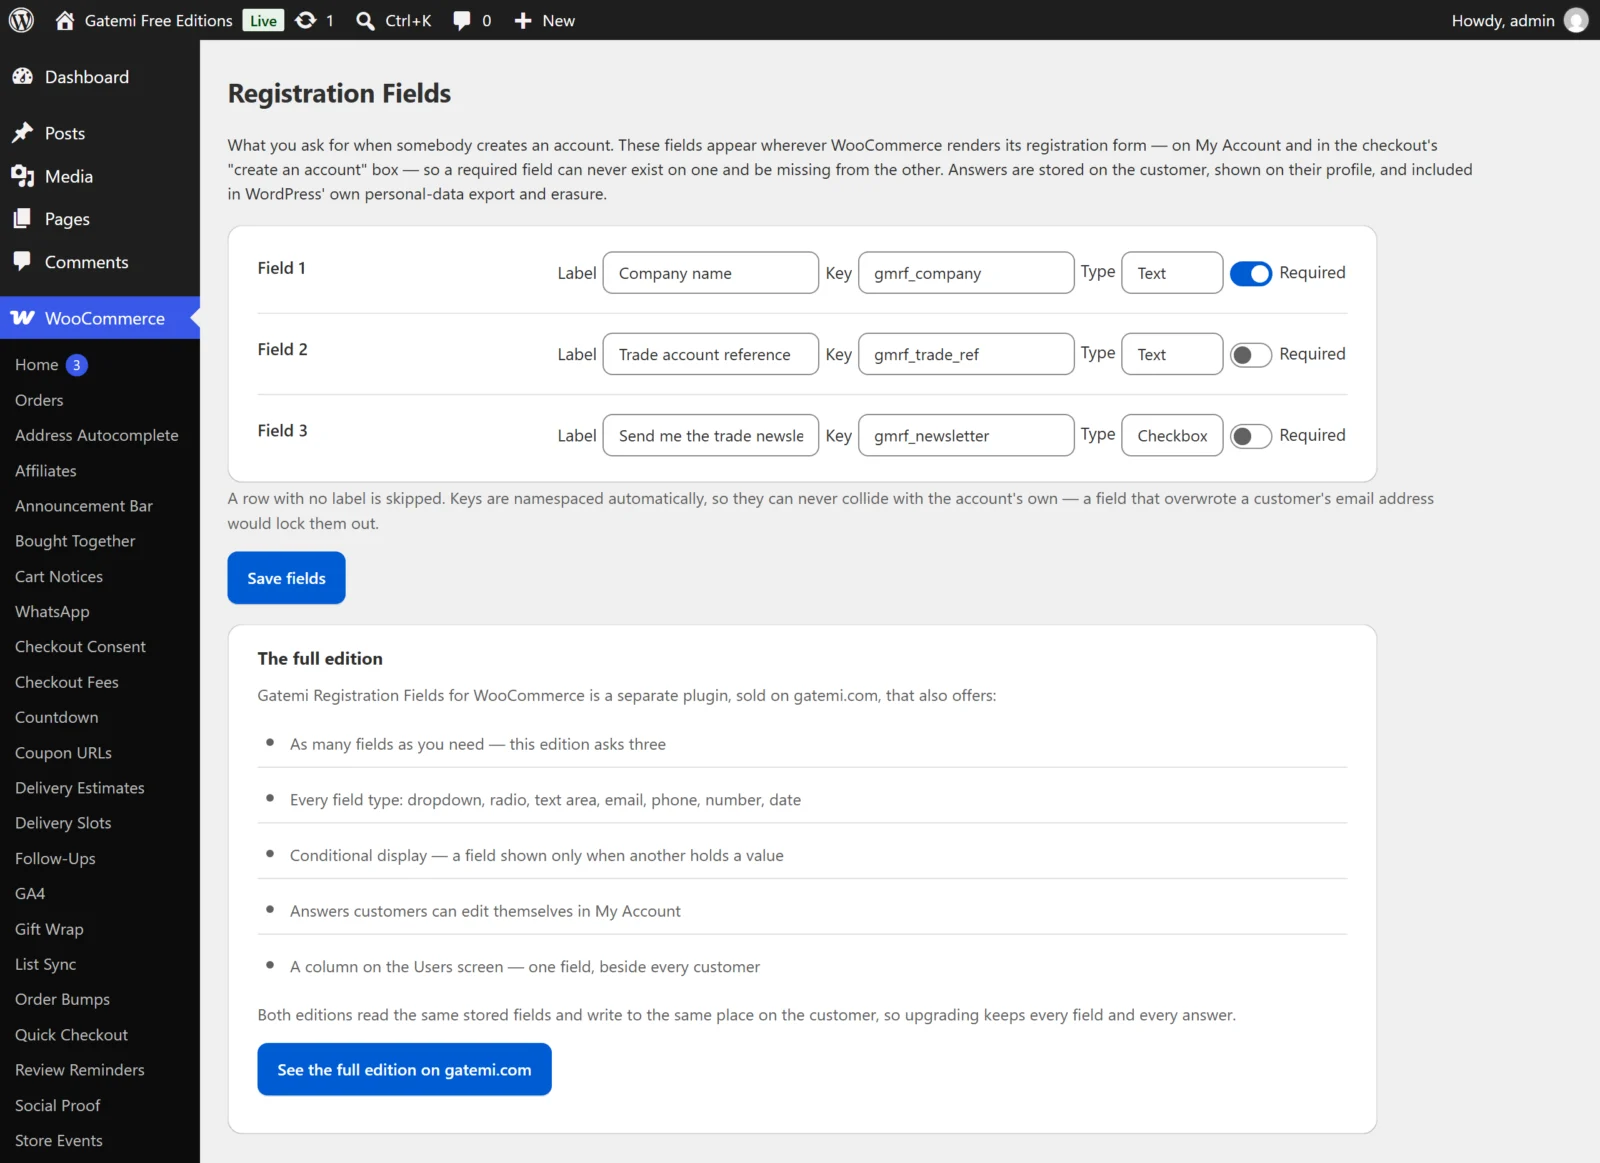
Full edition: press Add another field for each field; each row also has a placeholder, an order, options for dropdowns and radio buttons, a condition, and switches for the profile and My Account. See Settings.
3. Check it works
-
Open My Account in a private window, where you are not signed in.
-
The Register form shows your field after WooCommerce's own fields.
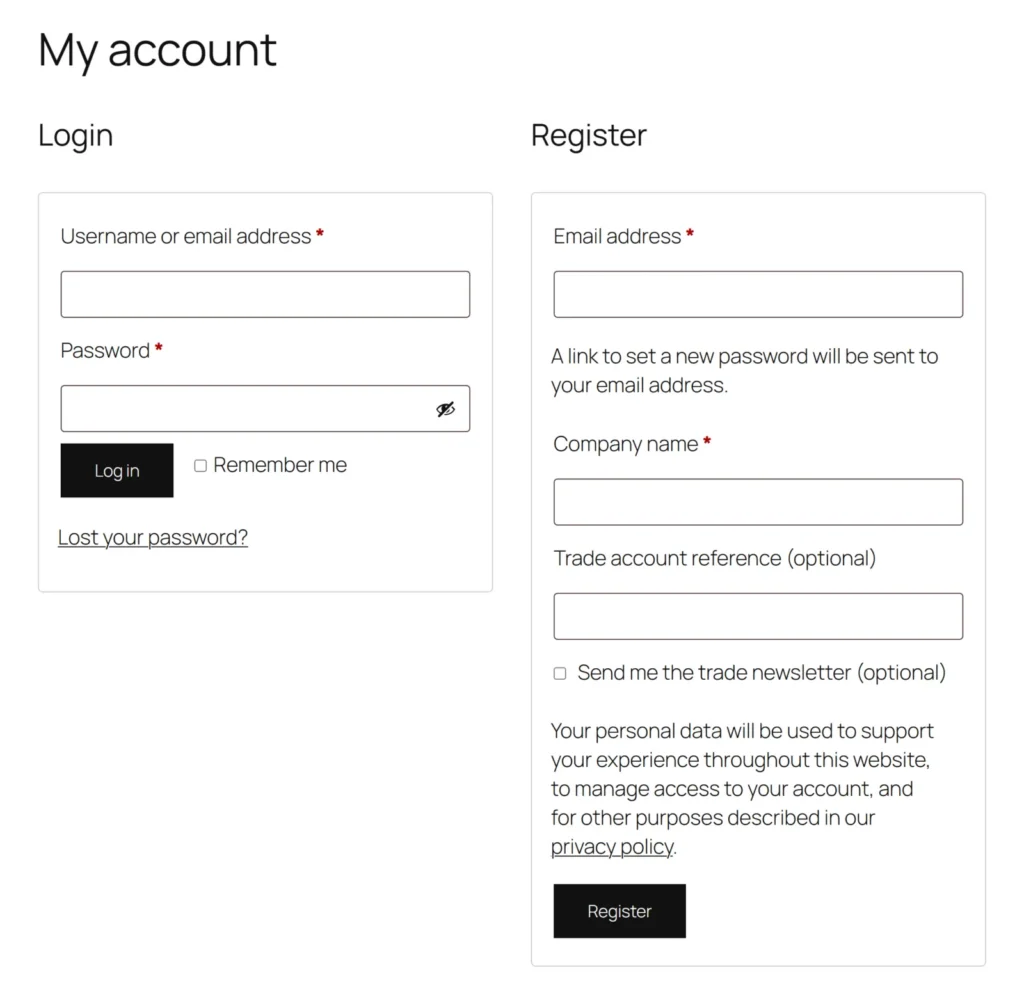
Your fields on WooCommerce’s own registration form. -
Leave a required field empty and press Register. The form comes back with "Company name is a required field." — and everything you typed is still there.
-
Fill it in and register.
-
In the admin, go to Users, edit the new customer, and scroll to Registration details. The answer is there.
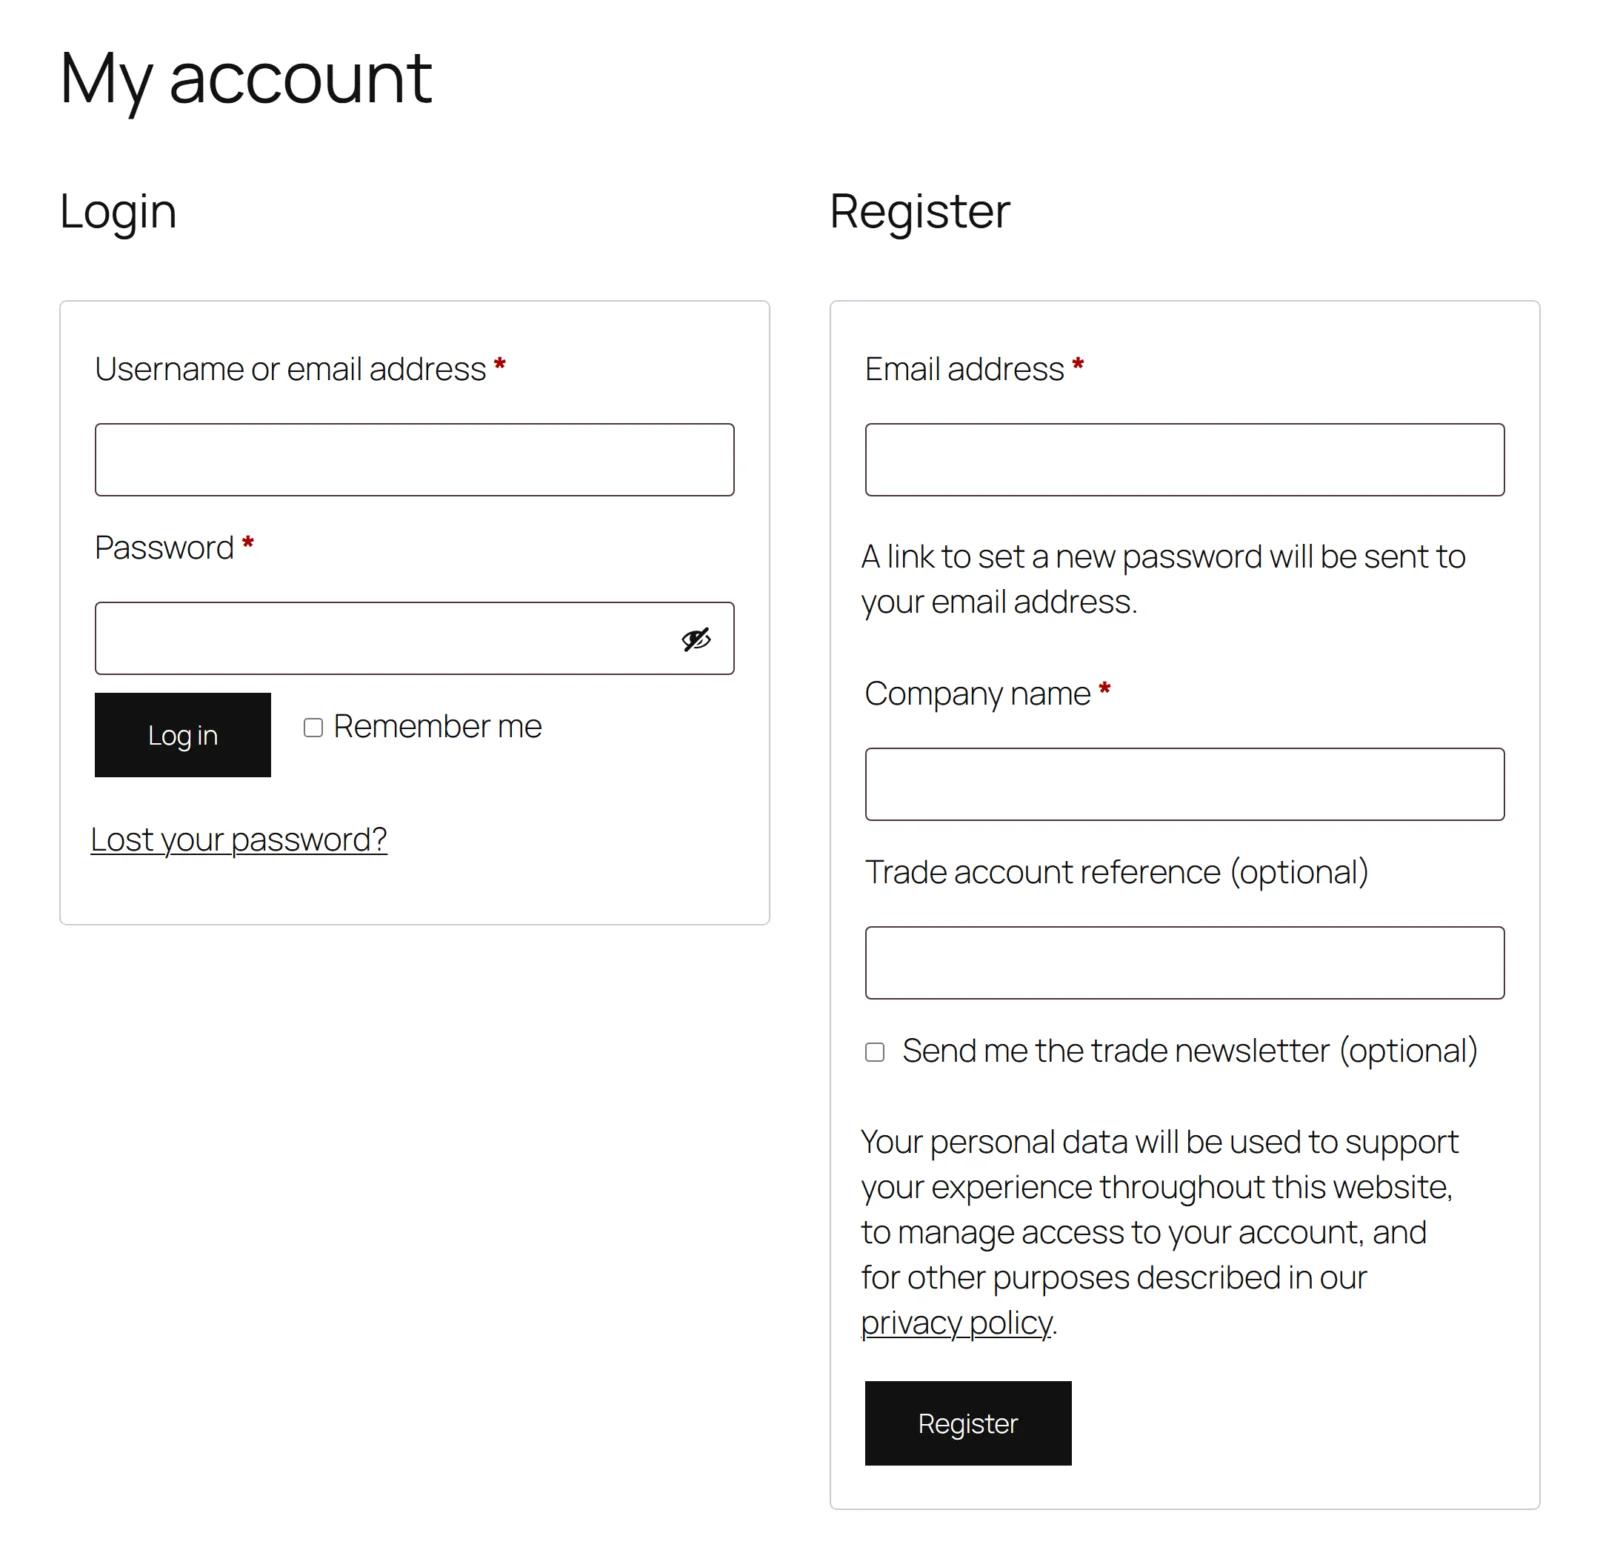
The fields appear on the My Account registration form and in the classic checkout's "create an account" box. The block checkout has no place for them, and an account created there is never refused for a required field it did not show — see Required fields and checkout accounts.
Next steps
- Settings
- How it works — where answers are stored, and how personal data is handled.
- FAQ and troubleshooting
- Developer reference