
Gatemi Product Gallery replaces WooCommerce's image gallery on the product page with a slider you can swipe, thumbnails and a full-size lightbox. It uses the images already on each product — the product image and the product gallery — so there is nothing to upload again.
These docs cover both editions:
- Gatemi Product Gallery — the free edition, coming to wordpress.org. The slider, thumbnails below the image and the lightbox.
- Gatemi Product Gallery for WooCommerce — the full edition, sold on gatemi.com. Adds hover zoom, thumbnails beside the image, looping, and a separate set of images for each variation.
Anything marked Full edition is only in the paid plugin.
Requirements
| Free edition | Full edition | |
|---|---|---|
| WordPress | 6.4 or later | 6.4 or later |
| PHP | 7.4 or later | 7.4 or later |
| WooCommerce | 8.0 or later (tested to 10.9) | 8.0 or later (tested to 10.9) |
The gallery takes over WooCommerce's classic product gallery. On a block theme it works when the Single Product template uses WooCommerce's Classic Template block; when the template has WooCommerce's own gallery block, the plugin stands aside. See step 3.
1. Install
Free edition: coming to wordpress.org. Until it is listed, install the zip through Plugins → Add New → Upload Plugin and activate it.
Full edition: download the zip from your gatemi.com account, upload it through Plugins → Add New → Upload Plugin and activate it. Then open WooCommerce → Product Gallery and enter your licence key in the License & updates card. The plugin works without a key; the key switches on one-click updates and support.
Use one edition at a time. If the full edition is active, the free edition stands down and says so in a row under its entry on the Plugins screen.
2. Open a product page
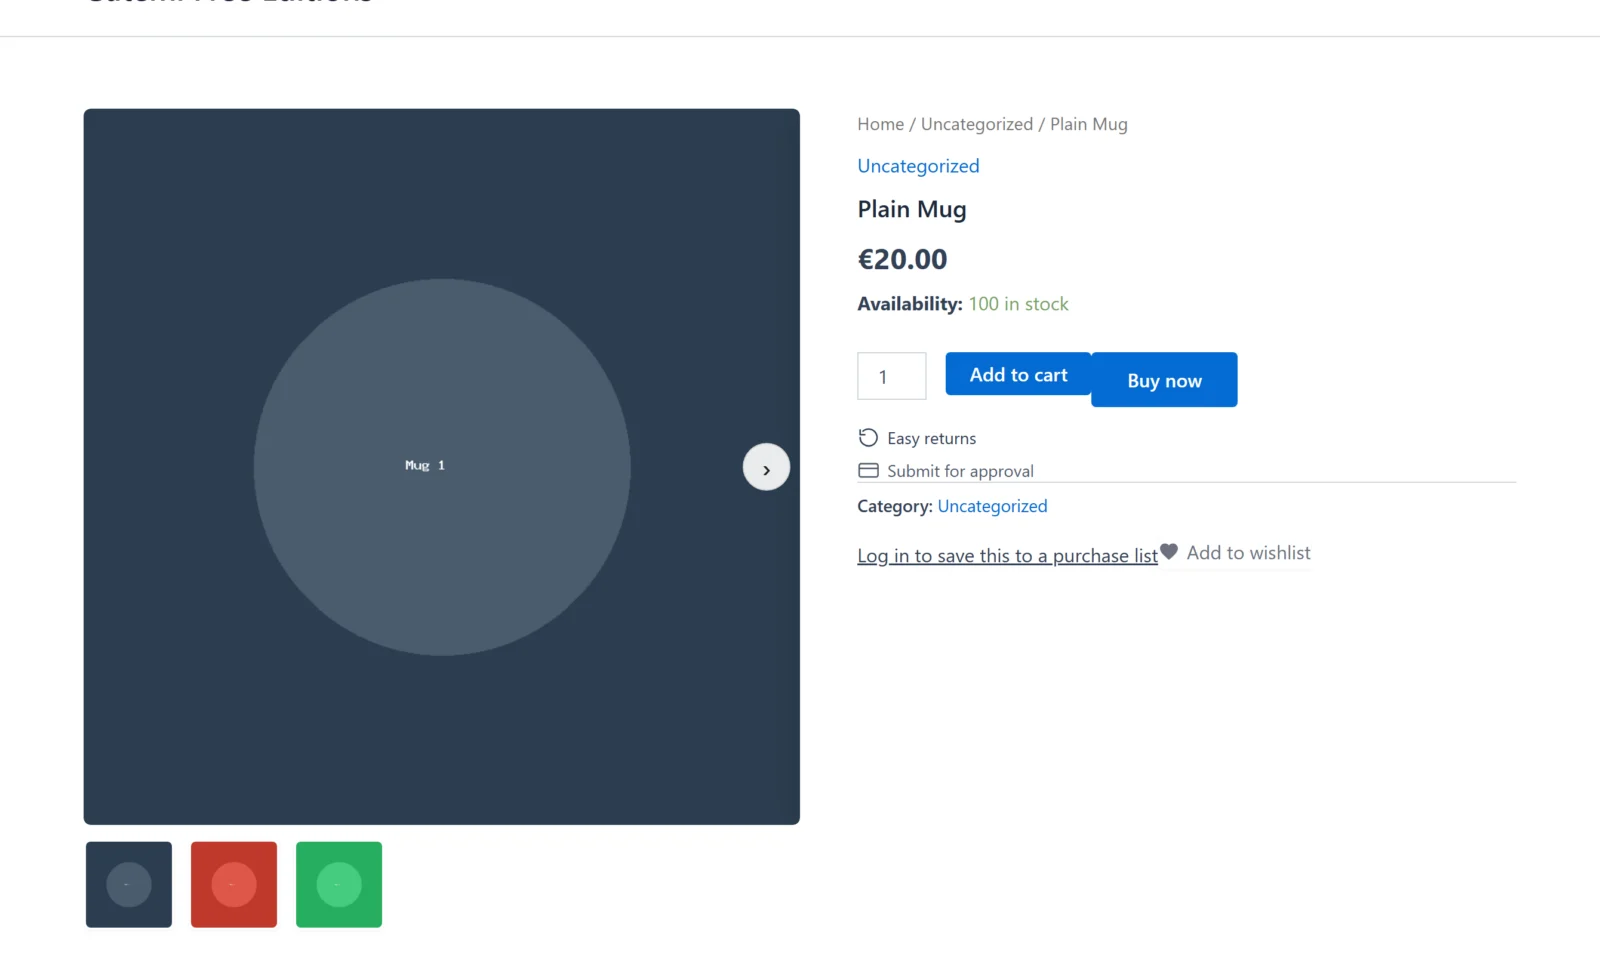
The gallery is on as soon as the plugin is active. Open any product that has a product image and a few gallery images.
You should see the main image with arrows when there is more than one image, and a row of thumbnails below it. Swipe or use the arrows; click an image to open it full size.
3. Check the status on the settings screen
Go to WooCommerce → Product Gallery. After a product page has been viewed, a status card at the top tells you what happened on it:
- The gallery is in place — the last product page rendered used it.
- Your theme renders its own product gallery. — your theme had already removed WooCommerce's gallery and draws its own. The plugin stood aside rather than add a second gallery. Switch the theme's own gallery off (its customizer usually has the setting) or ask the theme author which hook it uses.
- Your Single Product template draws its own gallery. — your block theme's Single Product template contains WooCommerce's gallery block. The plugin stood aside. To use it, open Appearance → Editor → Templates → Single Product and build the template around WooCommerce's Classic Template block.
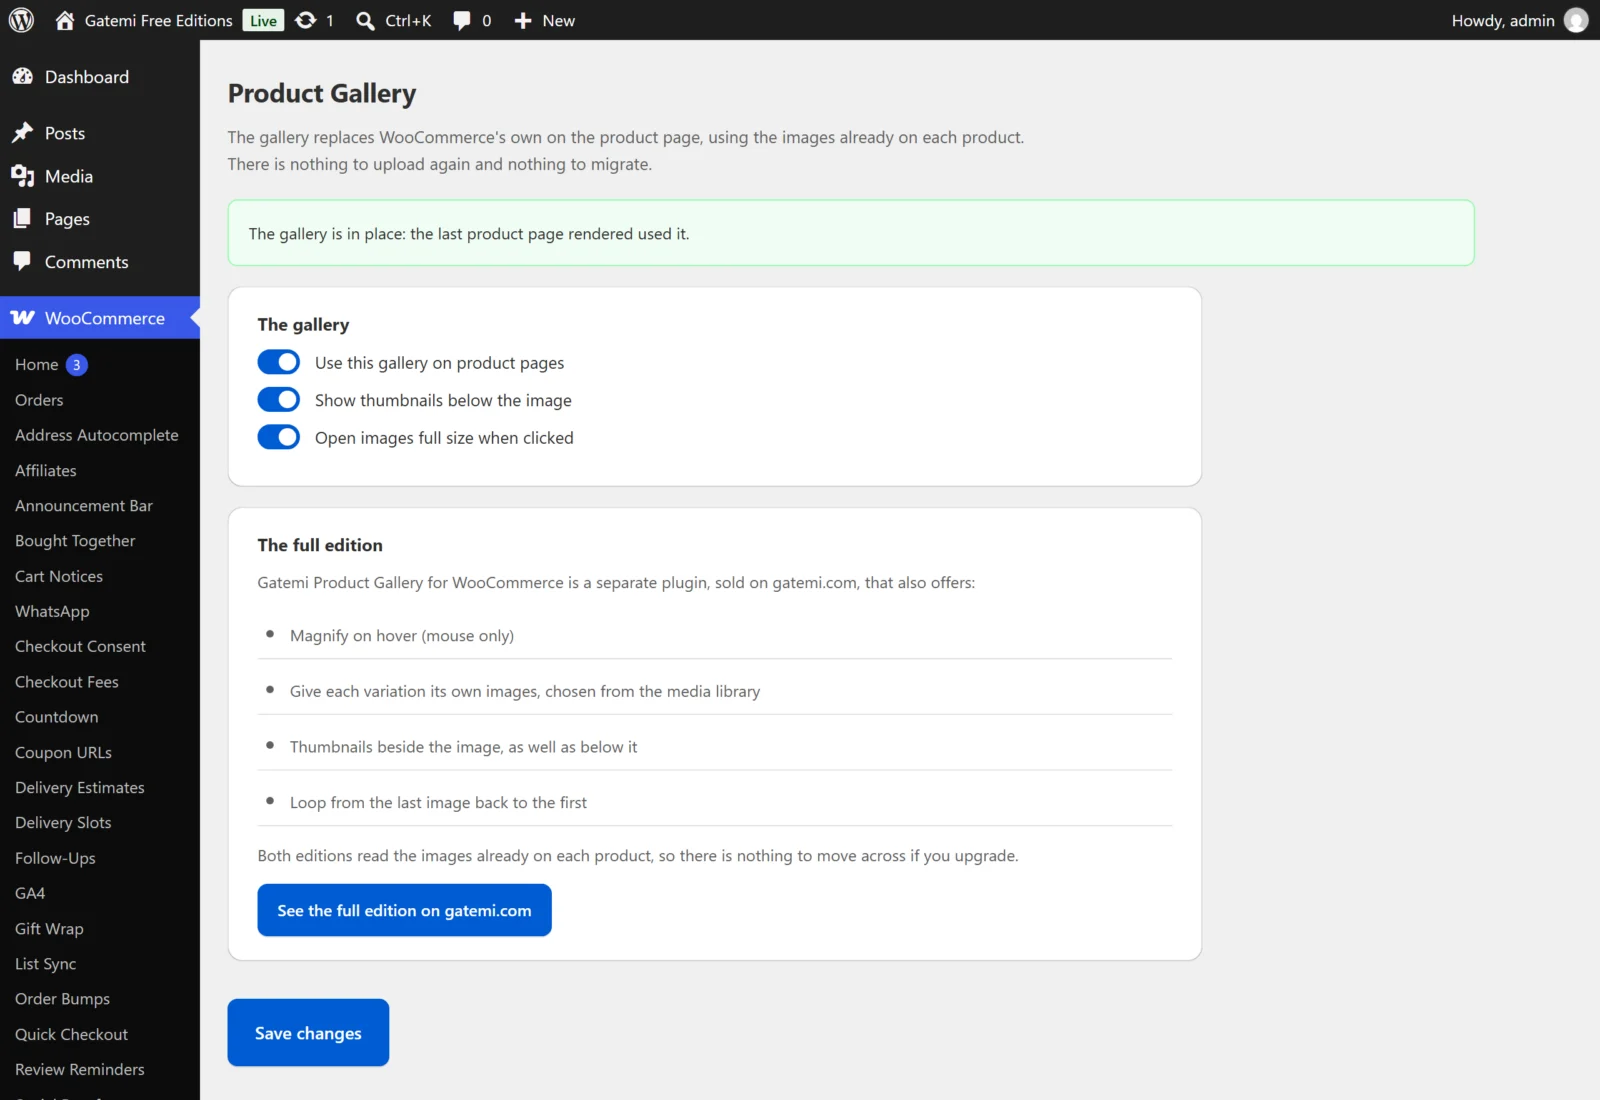
The status is only written after a product page has been viewed, so the card is missing on a fresh install until you open one.
4. Choose the settings
The free edition has three switches; all are on by default. See Settings.
Full edition: to give a variation its own images, edit the variable product, open Variations, expand a variation and use Choose images under Gallery images for this variation.
Next steps
- Settings
- How it works — the take-over and the stand-aside rules.
- FAQ and troubleshooting
- Developer reference