
Gatemi Thank You lets you write the page a customer sees straight after paying. You add blocks — a heading in the customer's own name, a paragraph, WooCommerce's order details, a button — to WooCommerce's own order-received page. The page itself is not replaced, so your theme, your tracking pixels, your invoice plugin and your analytics keep working.
These docs cover both editions:
- Gatemi Thank You — the free edition, coming to wordpress.org.
- Gatemi Thank You for WooCommerce — the full edition, sold on gatemi.com.
Anything marked Full edition is only in the paid plugin. Everything else is in both.
Requirements
| Free edition | Full edition | |
|---|---|---|
| WordPress | 6.4 or later | 6.4 or later |
| PHP | 7.4 or later | 7.4 or later |
| WooCommerce | 8.0 or later | 8.0 or later |
Both editions declare compatibility with High-Performance Order Storage (HPOS) and with the Cart and Checkout blocks. Neither loads any JavaScript on the storefront.
1. Install
Free edition: coming to wordpress.org. Until it is listed, install the zip through Plugins → Add New → Upload Plugin and activate it.
Full edition: download the zip from your gatemi.com account, go to Plugins → Add New → Upload Plugin, upload and activate. Then open WooCommerce → Thank-you page and enter your licence key in the License & updates card. The plugin works without a key; the key switches on one-click updates and support.
You only need one edition. If both are active, the free edition stands down and says so in a row under its entry on the Plugins screen. Both read the same layouts and print them through the same hook, so two running at once would put two messages on one page.
Nothing is created on activation: no table, no page, nothing on any order.
2. Write your page
Go to WooCommerce → Thank-you page. You need the manage_woocommerce capability.
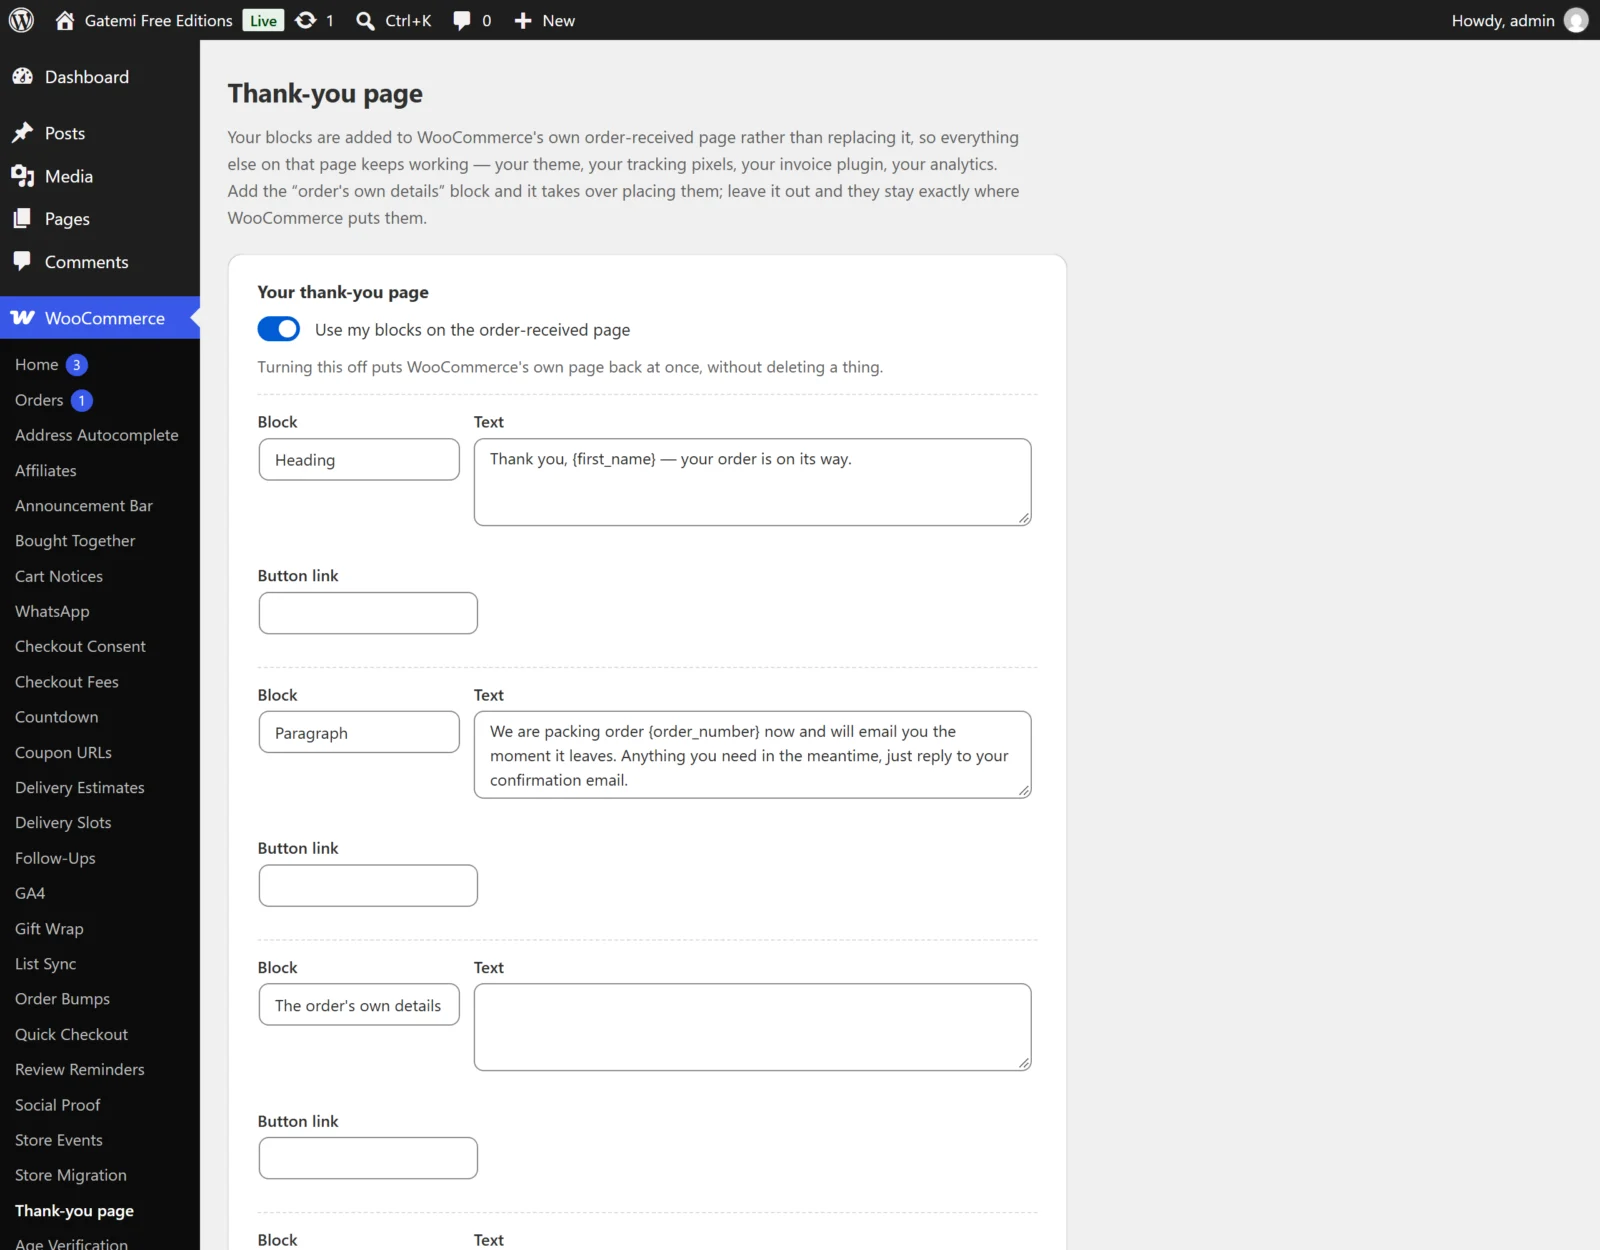
- Leave Use my blocks on the order-received page ticked (it is on by default).
- In the first row, choose Heading and write
Thank you, {first_name}!in Text. - In the second row, choose Paragraph and write what happens next, for example:
We pack orders every weekday morning. You will get a tracking email when order {order_number} leaves us. - In the third row, choose A button, write
Read our care guidein Text and a full address such ashttps://example.com/care/in Button link. - Leave the fourth row on — none — and press Save Changes.
The free edition has four fixed rows; an empty row is simply not saved. In the Full edition the screen holds as many layouts as you like, each with as many blocks as you want, added with Add a block and Add another layout — see Settings.
3. Test it
- Place a test order on the storefront (a cash-on-delivery or bank transfer order is enough).
- After checkout you land on the order-received page. Your heading reads "Thank you, their first name!", your paragraph shows the real order number, and the button sits below it.
- WooCommerce's own order summary and customer details are still on the page, where WooCommerce puts them — you did not add the The order's own details block, so the plugin did not move them.
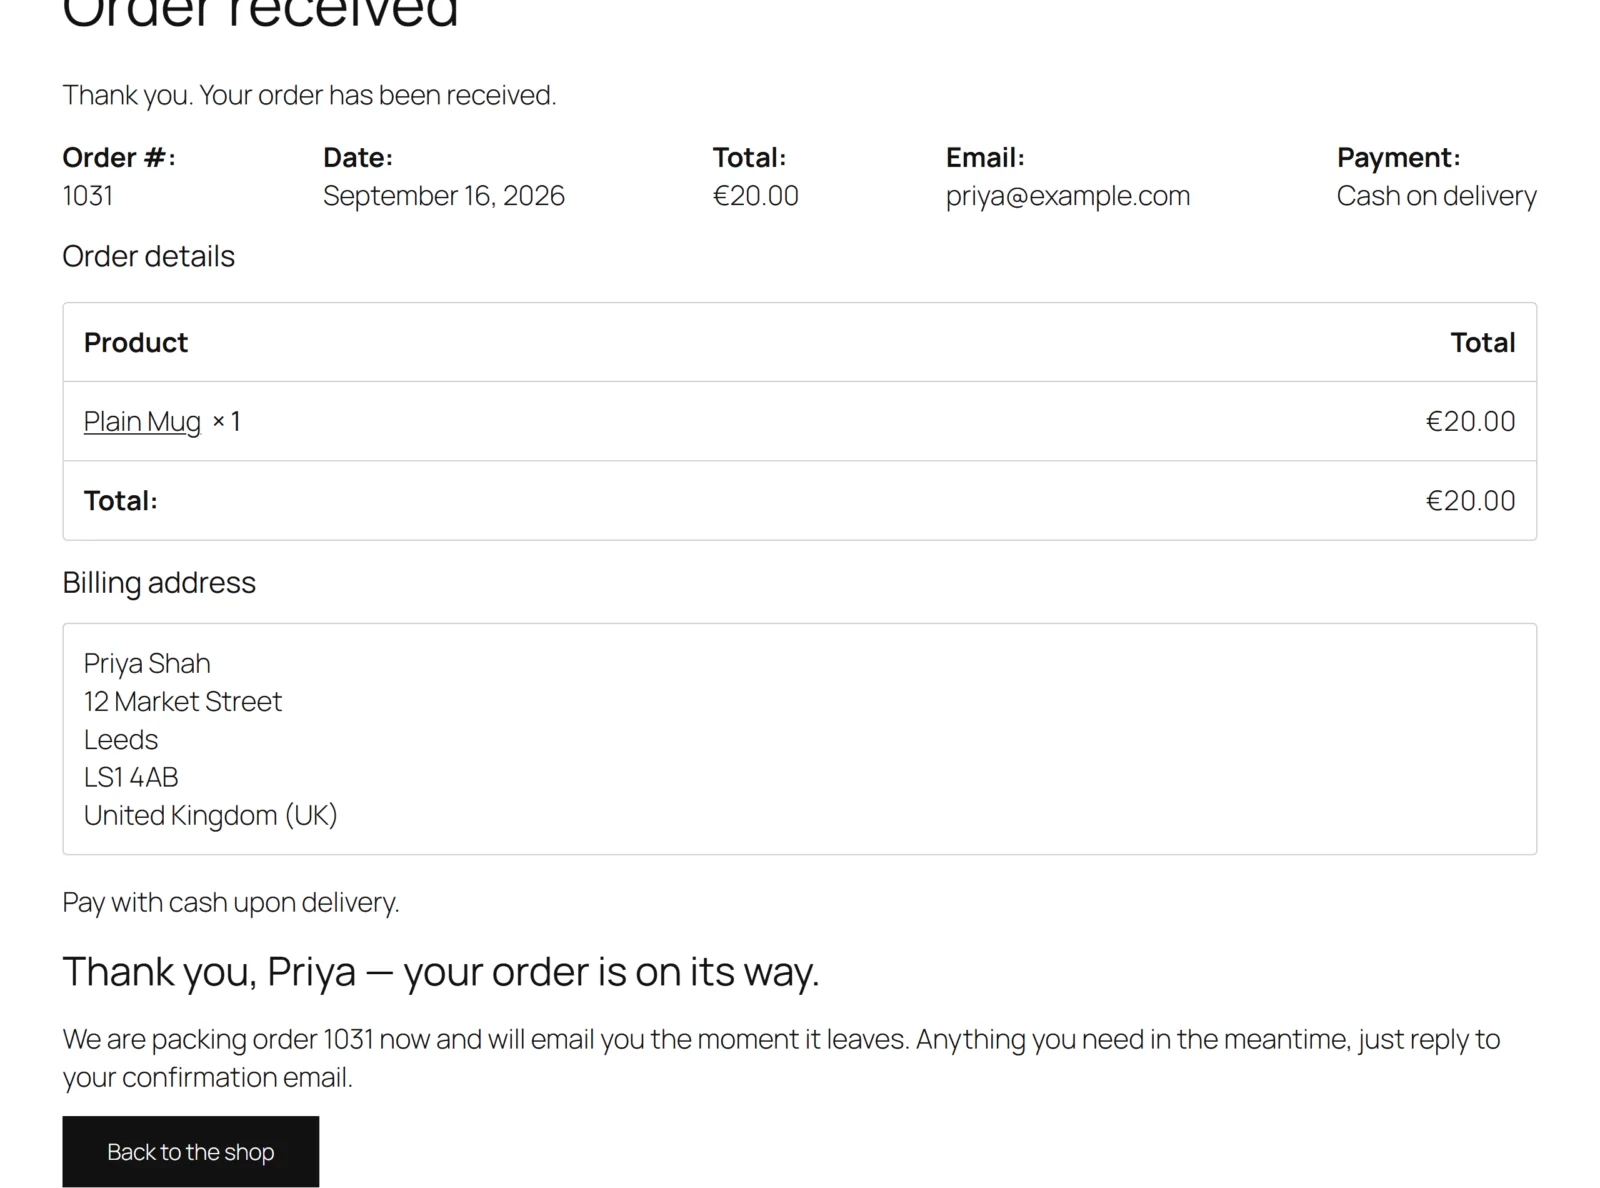
If nothing shows, check that the switch is on and that at least one block has text. A heading or paragraph with no text, and a button with no text or no valid link, render nothing at all — see FAQ and troubleshooting.
Where the blocks appear
The blocks print through WooCommerce's woocommerce_thankyou hook, at priority 5. On a classic theme that is inside the order-received template, just before WooCommerce's order details. On a block theme, WooCommerce's Order Confirmation template fires the same hook near the bottom of the page.
They print only when WooCommerce has resolved a real order from the page address (the order id and its key). A visitor who opens the page without a valid key sees WooCommerce's own page and nothing from this plugin.
Next steps
- Settings — every field on the screen.
- How it works — the decorate-never-replace rule, placeholders and (full edition) choosing a layout.
- FAQ and troubleshooting
- Developer reference