
Gatemi Shipment Tracking puts a tracking number on an order and shows it where your customer looks: on their order in My Account, on the thank-you page, and inside every customer email WooCommerce sends about the order. The number links straight to the carrier's own tracking page. There is no theme to edit and nothing to configure before it works.
There are two editions:
- Gatemi Shipment Tracking — the free edition. One tracking number and carrier per order, from a built-in list of carriers.
- Gatemi Shipment Tracking for WooCommerce — the full edition, sold on gatemi.com. Several shipments per order for split deliveries, your own carriers, bulk import of tracking numbers, moving the order to another status when tracking is added, a shortcode, and control over where tracking appears and how the heading reads.
Both editions store shipments under the same order meta key, so upgrading keeps every number.
Requirements
| Minimum | |
|---|---|
| WordPress | 6.4 |
| PHP | 7.4 |
| WooCommerce | 8.0 (tested up to 10.9) |
Both editions work on the classic order editor and the High-Performance Order Storage (HPOS) orders screen, and declare compatibility with HPOS and the Cart and Checkout blocks. The free edition makes no external requests; tracking links point at the carriers' sites and are only followed when a customer clicks them.
Install the free edition
The free edition is coming to wordpress.org. Until then:
- Go to Plugins → Add New → Upload Plugin, choose
gatemi-shipment-tracking.zipand press Install Now. - Press Activate.
Install the full edition
- Download
gatemi-shipment-tracking-for-woocommerce.zipfrom your gatemi.com account. - Upload it at Plugins → Add New → Upload Plugin and activate it.
- Go to WooCommerce → Shipment Tracking, paste your
GM-XXXXX-…key in the License & updates card and press Activate.
The free edition stands down while the full edition is active. Delete it whenever you like; your tracking numbers stay on the orders.
Add your first tracking number
- Open an order in WooCommerce → Orders.
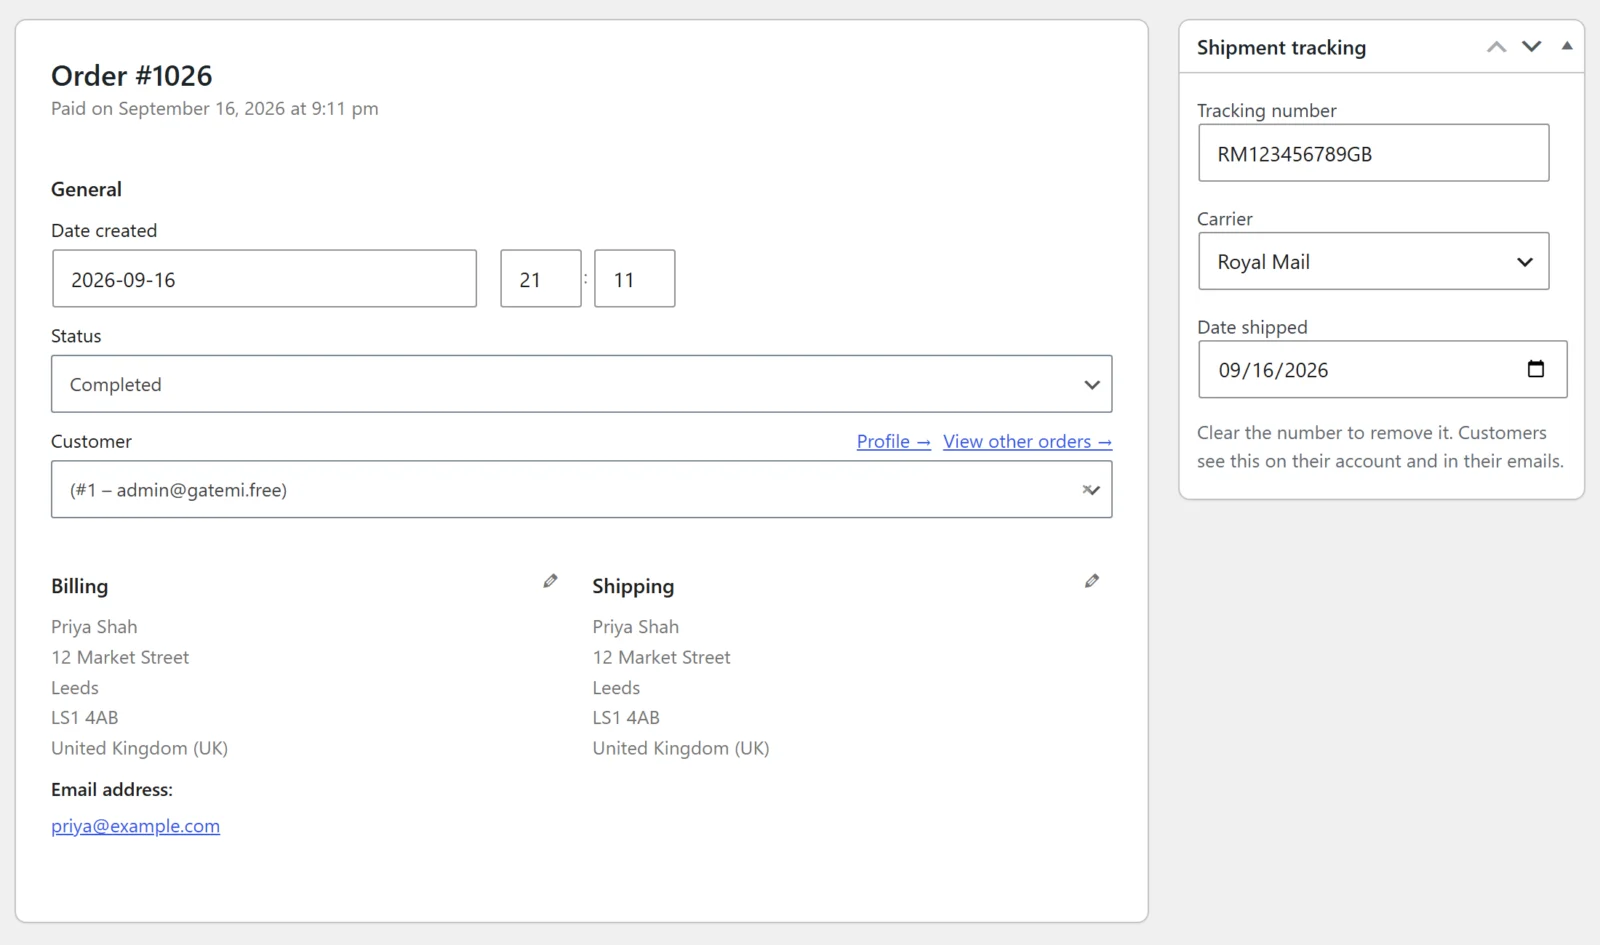
- In the Shipment tracking box in the sidebar, type the Tracking number. Spaces are removed when you save — carriers print them, but their lookups do not accept them.
- Choose the Carrier. If yours is not listed, choose Other: the number is shown as plain text rather than as a dead link.
- Optionally set Date shipped.
- Press Update (or Save) on the order.
Full edition: the box holds one row per shipment and always shows an empty row below them for the next one. Leave a number blank to remove that shipment.
Check it works
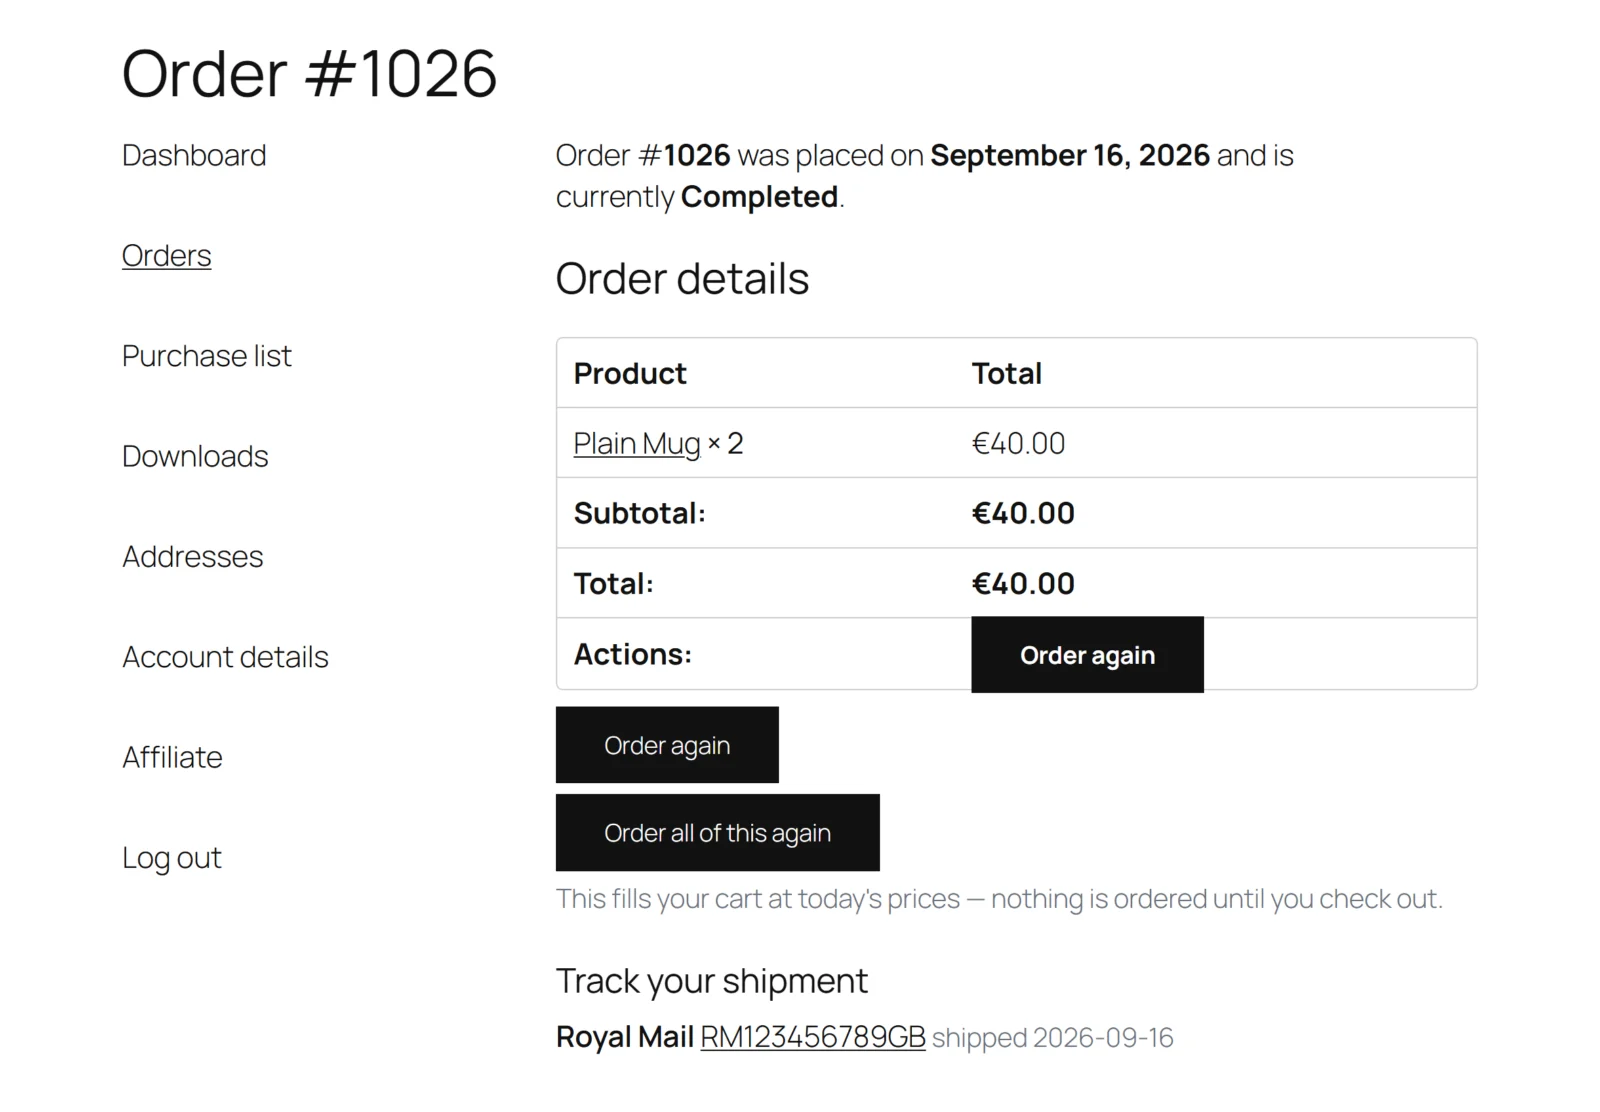
- Open the order as the customer in My Account → Orders → View. Below the order details there is a Track your shipment section with the carrier, the number as a link and "shipped" with the date.
- Change the order's status, or resend an email from the order's Order actions. The customer email carries the same section; a plain-text email carries it as text.
Next
- Settings — the carriers and, in the full edition, every setting.
- How it works — where tracking shows, how links are built, and how bulk import stays safe.