
Gatemi Returns adds the part of a return WooCommerce does not have: the customer's request, your decision, a return window and an RMA reference. The customer asks from My Account, you approve or decline on one screen, and the refund goes back through WooCommerce's own refund — so it reaches the payment method the customer paid with.
A return is never a second order. It is a request with its lines, kept in the plugin's own tables, and a real WooCommerce refund on the order it came from.
There are two editions:
- Gatemi Returns — the free edition. Requests, approve and decline, refunds, one store-wide window, your policy text and the emails.
- Gatemi Returns for WooCommerce — the full edition, sold on gatemi.com. Adds exchanges, refunds as store credit, restocking fees, windows and final-sale flags per product and per category, a list of reasons, a printable return note and the returns report.
Both keep returns in the same tables and the same settings option, so moving from one to the other keeps every return.
Requirements
| Minimum | |
|---|---|
| WordPress | 6.4 |
| PHP | 7.4 |
| WooCommerce | 8.0 (tested up to 10.9) |
Both editions declare compatibility with WooCommerce's High-Performance Order Storage (HPOS) and with the Cart and Checkout blocks. Neither loads any JavaScript, and neither calls an external service — the full edition only talks to gatemi.com to check its licence and offer updates.
Install the free edition
The free edition is coming to wordpress.org. Until then:
- Go to Plugins → Add New → Upload Plugin and choose the
gatemi-returns.zipfile. - Press Install Now, then Activate.
WooCommerce must be active. If it is not, the plugin stays idle and says so in a line under its own row on the Plugins screen.
Install the full edition
- Download
gatemi-returns-for-woocommerce.zipfrom your gatemi.com account. - Go to Plugins → Add New → Upload Plugin, upload the zip and activate it.
- Go to WooCommerce → Returns → Settings, paste your
GM-XXXXX-…licence key in the License & updates card and press Activate.
If the free edition is installed, you can leave it: while the full edition is active the free one stands down completely (it explains this under its row on the Plugins screen), so every form is drawn and every request answered once. You can deactivate and delete it whenever you like; your returns and settings stay.
First setup
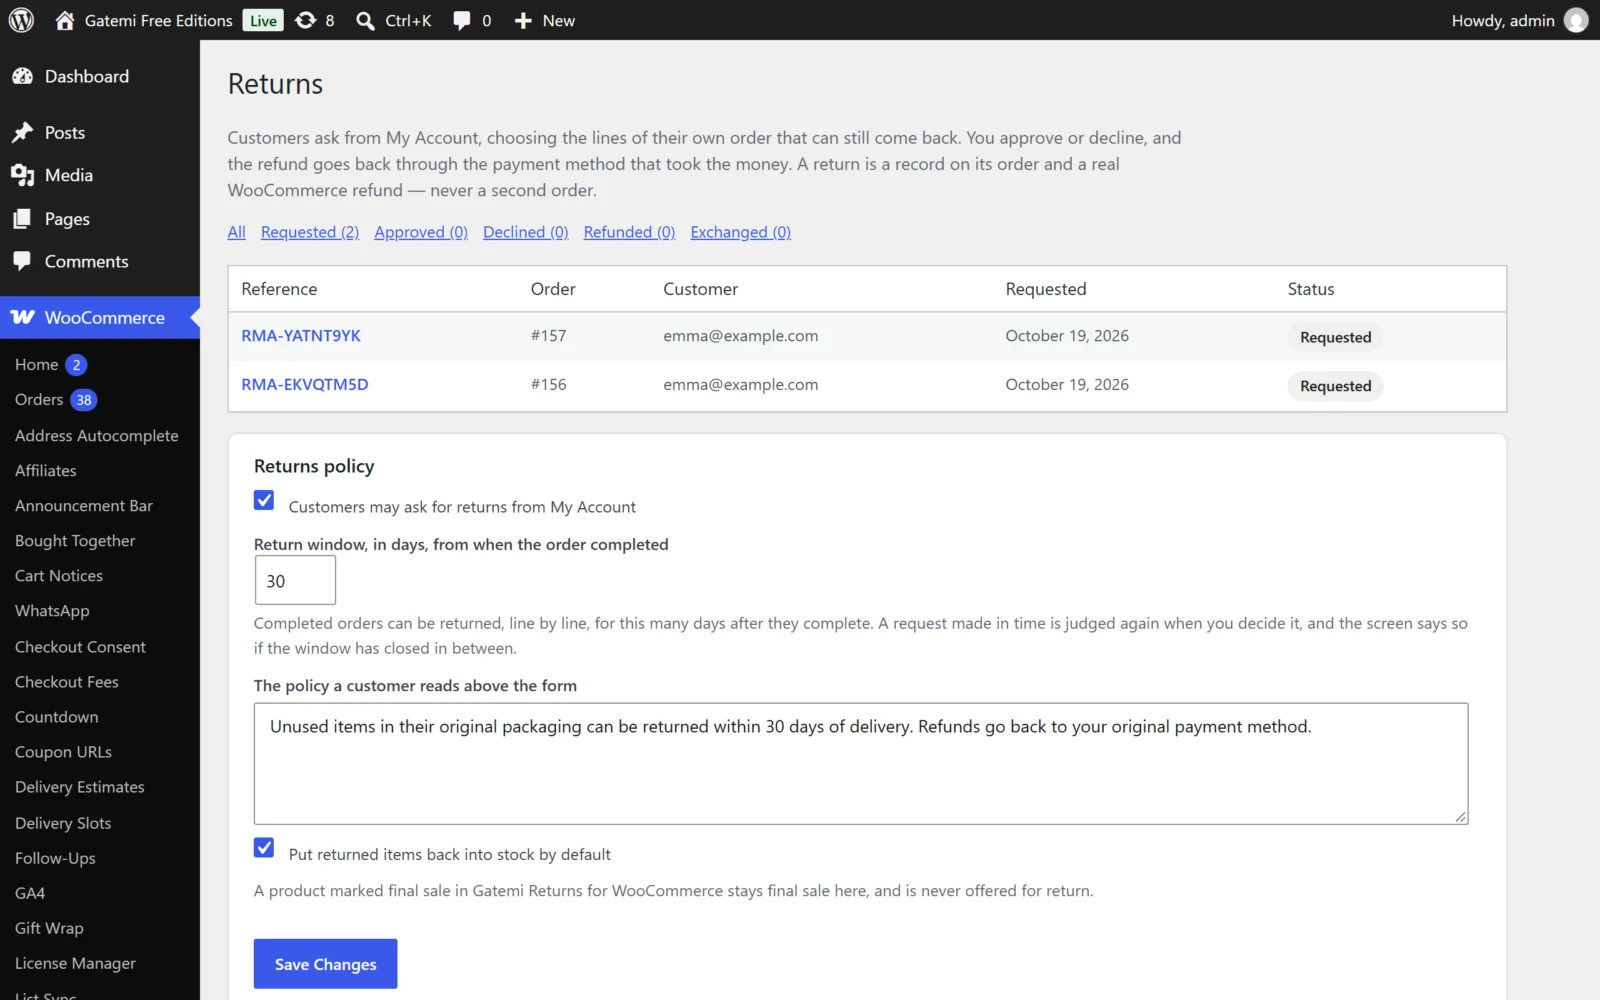
- Go to WooCommerce → Returns. In the full edition, open the Settings tab.
- Leave Customers may ask for returns from My Account ticked.
- Set Return window, in days, from when the order completed. The default is 30.
- Type your returns policy in The policy a customer reads above the form — what condition goods must be in, who pays for postage, where to send them.
- Decide whether Put returned items back into stock by default should stay ticked. It sets the default on each refund; you can change it on every decision.
- Full edition: choose the order statuses that can be returned, your reasons, whether to offer an exchange or store credit, and any restocking fee. See Settings.
- Press Save changes.
Check it works
- Place a test order and mark it Completed in WooCommerce.
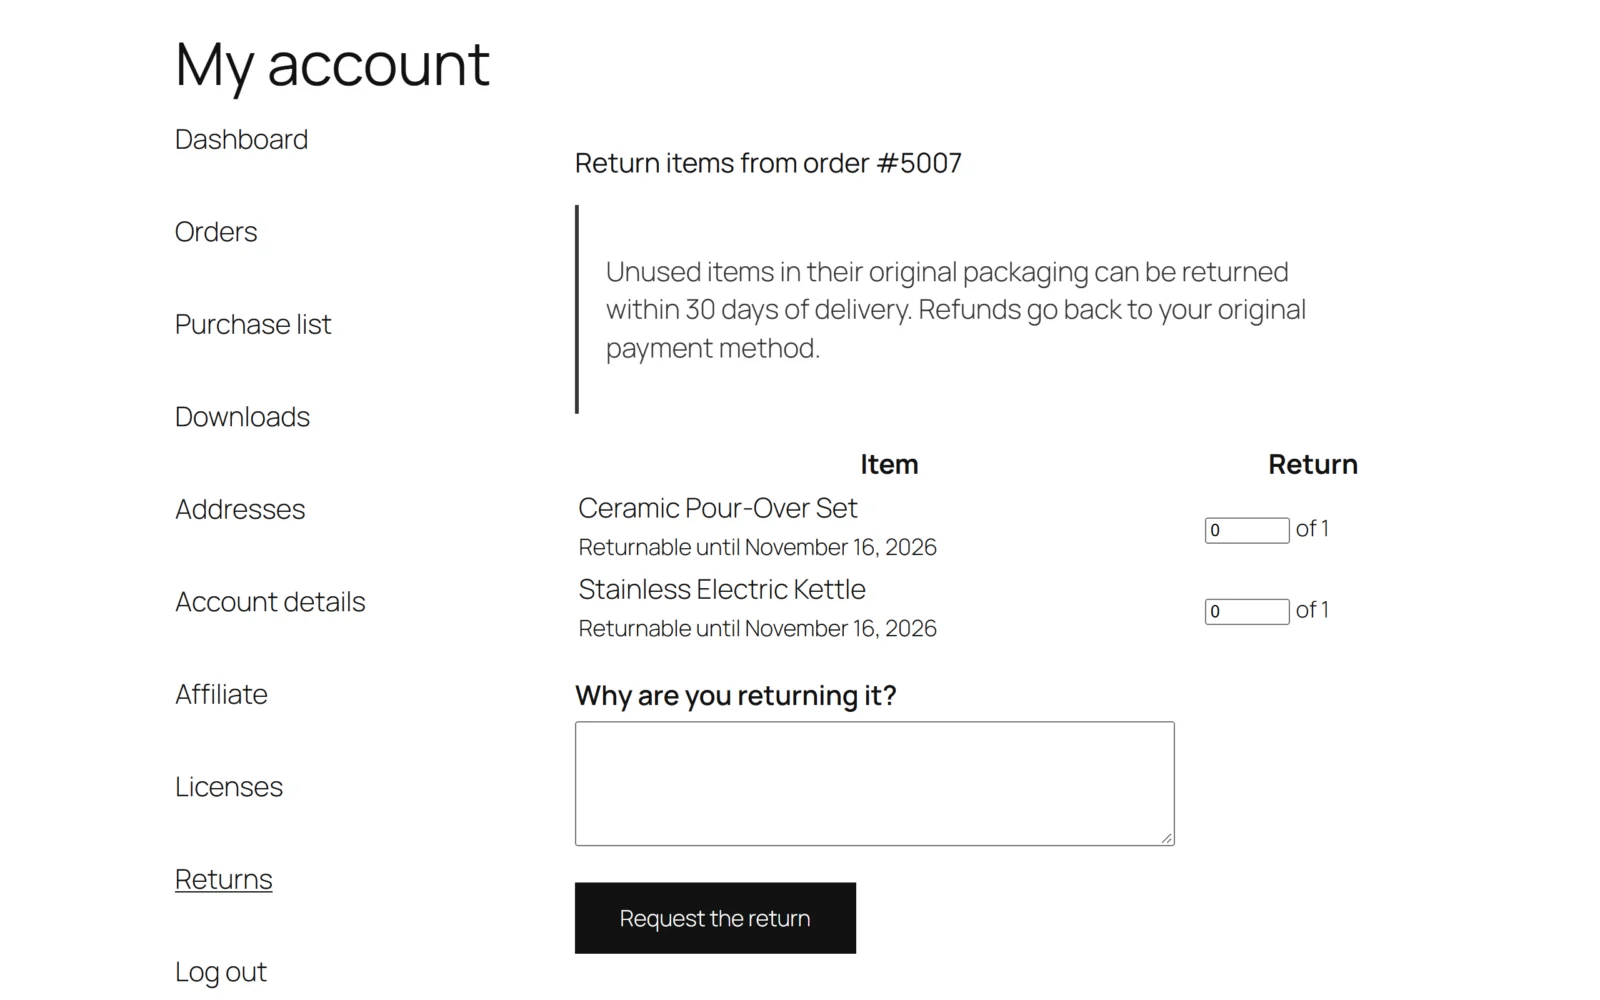
- Sign in to the shop as that customer and open My Account → Orders. The order now has a Request a return button.
- Press it, enter a quantity on one line and press Request the return. You see "Thank you — your return request RMA-XXXXXXXX is with us."
- The customer receives an email confirming the request, and the shop's admin address receives "New return request … on order #…".
- Back in WooCommerce → Returns, open the request, press Approve, then Issue the refund. The refund appears on the order.
If Request a return does not appear, see FAQ and troubleshooting.
Next
- Settings — every setting with its key and default.
- How it works — the four rules behind a return, and the flow from request to refund.