
Gatemi Purchase Lists is for the customer who buys the same things again and again. They keep a list in My Account, press one button to put the whole list into the cart, and can order any past order again.
A re-order fills the cart. It never places an order. The customer sees today's prices on the cart page and checks out as usual.
These docs cover both editions:
- Gatemi Purchase Lists — the free edition, coming to wordpress.org. One purchase list per customer, and "Order again" on past orders.
- Gatemi Purchase Lists for WooCommerce — the full edition, sold on gatemi.com. Several named lists, sharing a list by link, pasting a column of product codes, a buy-again panel, and a most-listed-products report.
Anything marked Full edition is only in the paid plugin.
Requirements
| Free edition | Full edition | |
|---|---|---|
| WordPress | 6.4 or later | 6.4 or later |
| PHP | 7.4 or later | 7.4 or later |
| WooCommerce | 8.0 or later | 8.0 or later |
Both editions declare compatibility with High-Performance Order Storage (HPOS) and with the Cart and Checkout blocks. Lists are kept for signed-in customers only, so your store needs customer accounts.
1. Install
Free edition: coming to wordpress.org. Until it is listed, install the zip through Plugins → Add New → Upload Plugin and activate it.
Full edition: download the zip from your gatemi.com account, go to Plugins → Add New → Upload Plugin, upload and activate. Then open WooCommerce → Purchase Lists and enter your licence key in the License & updates card. The plugin works without a key; the key switches on one-click updates and support.
You only need one edition. If both are active, the free edition stands down and says so on the Plugins screen. Both use the same tables, so every list carries over.
Activation creates two tables, wp_gmpl_lists and wp_gmpl_items (with your own database prefix).
2. The My Account address
The list lives at a new My Account address, /my-account/purchase-lists/. Both editions rebuild WordPress' rewrite rules once, on the first request after activation (marker option gmplf_endpoint_added in the free edition, gmpl_endpoint_added in the full edition), so there is nothing to do. If the Purchase list menu item ever leads to "page not found", go to Settings → Permalinks and press Save Changes.
3. Check the settings
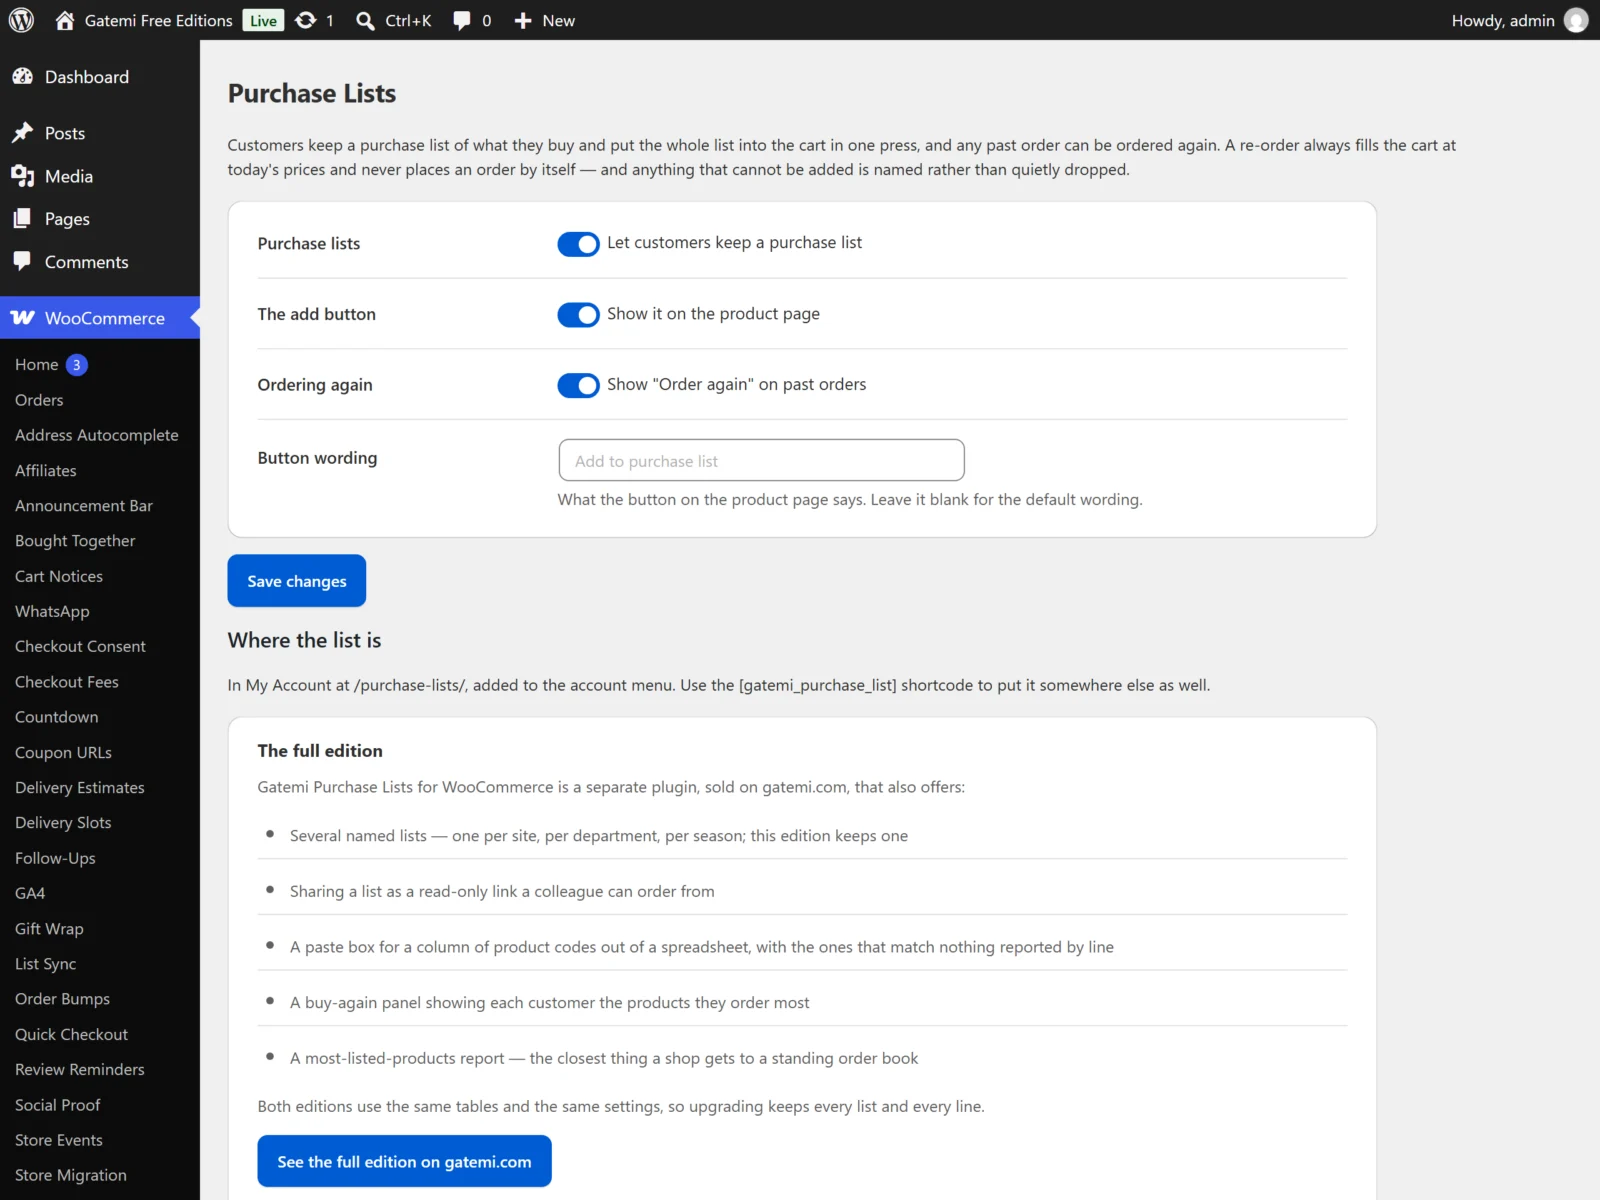
Go to WooCommerce → Purchase Lists (capability manage_woocommerce). Every switch is on by default, so there is nothing you must change. See Settings.
4. Test it
- Sign in as a customer (or create a test customer account) in a private window.
- Open a simple product. Below the add-to-cart button you see Add to purchase list. Press it. The notice reads "Added to your purchase list." (On a variable product, choose the variation in the select beside the button first.)
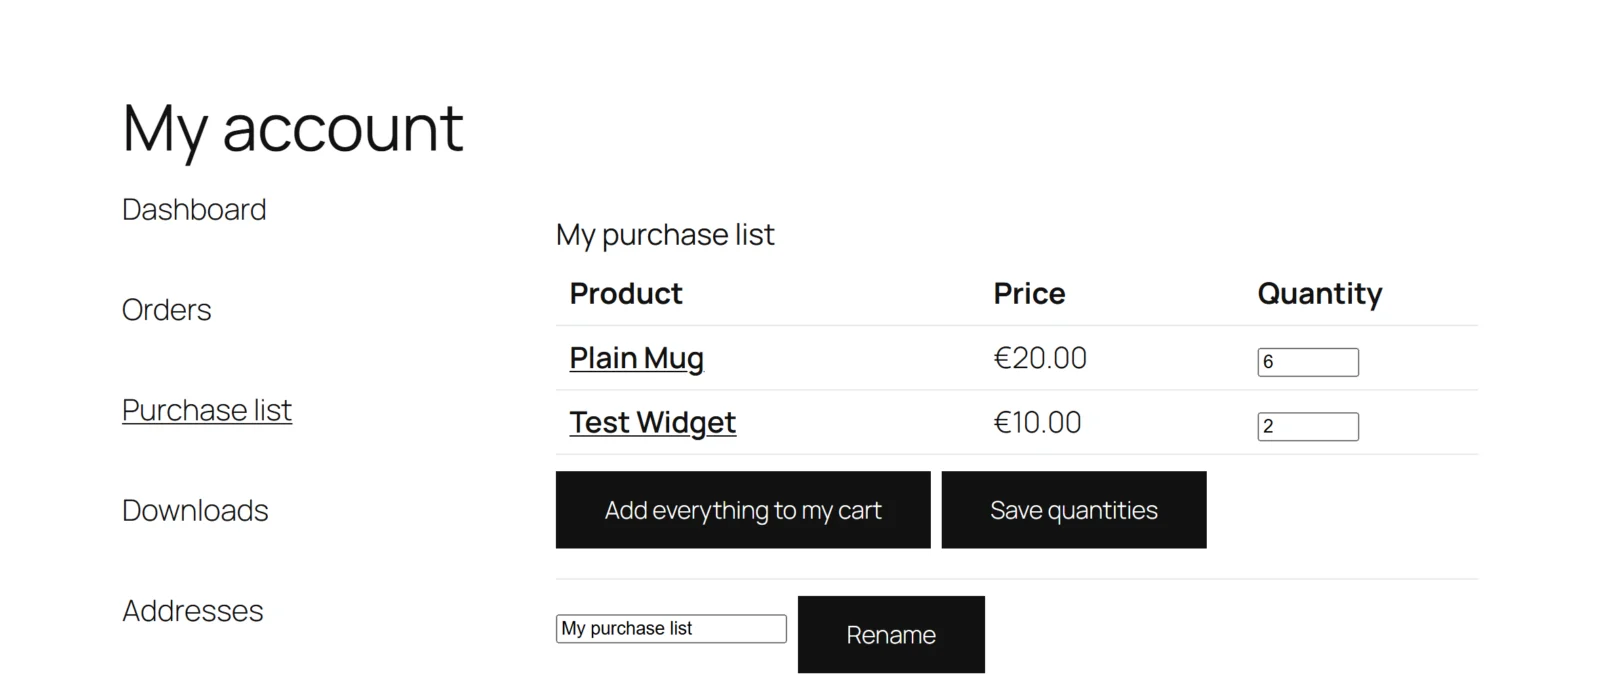
- Go to My Account → Purchase list. The product is there with its current price and a quantity box.
- Change the quantity and press Save quantities.
- Press Add everything to my cart. The notice says how many products were added; open the cart to see them at today's prices.
- Place a test order, then open My Account → Orders. The order has an Order again action. It opens the order, where Order all of this again fills the cart with the same products and quantities.
A signed-out visitor sees Log in to save this to a purchase list on the product page instead, linking to My Account.
Next steps
- Settings
- How it works — what happens to sold-out and deleted products, and why nothing is ever ordered for the customer.
- FAQ and troubleshooting
- Developer reference