
An order bump is one extra product offered on the page where a customer is already paying — "Add a matching phone case for £5 off" — taken with one tick. Gatemi Order Bumps adds the product through WooCommerce's own cart, so stock, purchasability and other plugins' rules still apply, and prices the accepted line directly rather than with a coupon.
There are two editions, and this manual covers both:
- Gatemi Order Bumps — the free edition. Two offers, one shown at a time just above the pay button, at full price or a fixed amount off.
- Gatemi Order Bumps for WooCommerce — the full edition, sold on gatemi.com. Any number of offers, conditions (products, categories, cart value, item count), four placements including the cart page, a percentage off, and a choice of how many offers to show at once.
Requirements
Both editions need:
- WordPress 6.4 or later
- PHP 7.4 or later
- WooCommerce 8.0 or later (tested up to 10.9)
Both declare High-Performance Order Storage (HPOS) compatibility.
Where the offer is shown. On WooCommerce's classic checkout (and, in the full edition, the classic cart page) it is a tick box just above the pay button. On the Checkout block (and, in the full edition, the Cart block) it is printed above the block as a Yes, add this link, because the blocks run none of the classic template hooks. See the FAQ.
Install the free edition
The free edition is coming to wordpress.org. Once it is listed there:
- Go to Plugins → Add New.
- Search for "Gatemi Order Bumps".
- Click Install Now, then Activate.
Install the full edition
- Sign in to your gatemi.com account and download the plugin zip.
- Go to Plugins → Add New → Upload Plugin, choose the zip, then Install Now and Activate.
- Go to WooCommerce → Order Bumps and find License & updates.
- Paste your licence key (
GM-XXXXX-XXXXX-XXXXX-XXXXX-XXXXX) and click Activate for one-click updates.
If the free edition is installed, it stands down while the full edition is active, and the full edition reads the offers you already wrote.
Your first offer
- Find the id of the product you want to offer: in Products → All Products, hover over it — the id is shown under its name. Use a simple product (a variable product cannot be added with one tick).
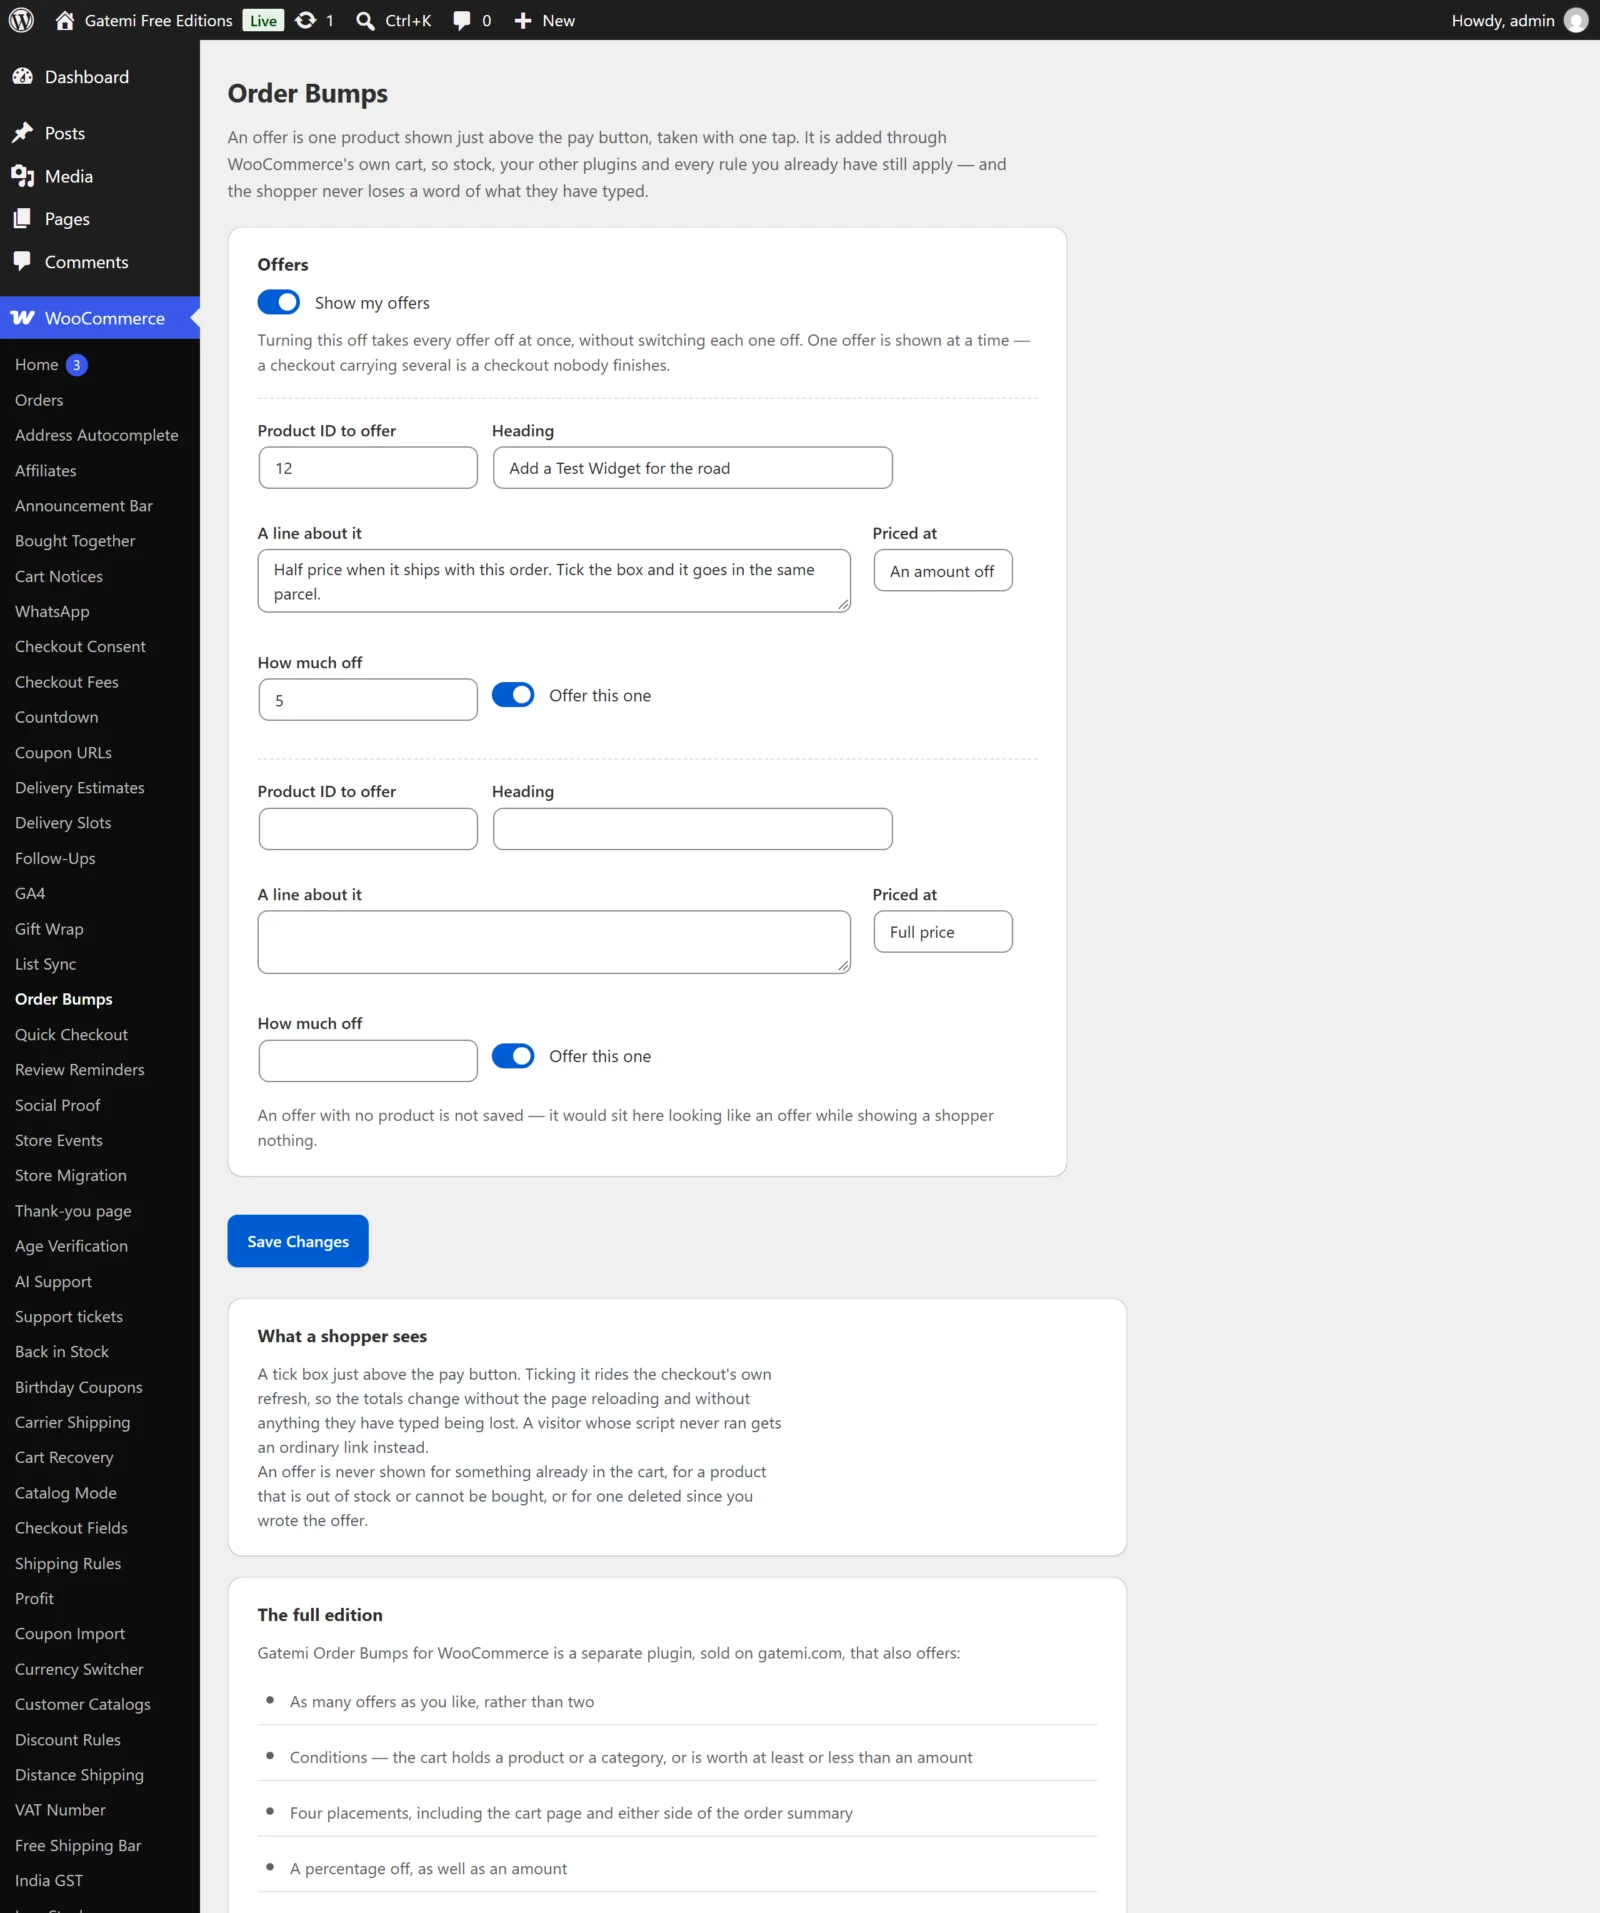
- Go to WooCommerce → Order Bumps.
- Leave Show my offers (full edition: Offer my bumps) ticked.
- In the first offer:
- Product ID to offer: the id, for example
318. - Heading: what the tick box says, for example "Add a matching case". Empty uses the product's name.
- A line about it: one sentence of reason, for example "Fits every model, and saves you a second delivery."
- Priced at: Full price or An amount off, and How much off, for example
5. - Tick Offer this one.
- Product ID to offer: the id, for example
- Full edition: choose where it is Shown and add any Only when conditions.
- Click Save changes.
Check it works
- In a private window, add any product other than the offered one to the cart, and go to the checkout.
- Just above the Place order button you see the offer: a tick box with the heading, your line, and both prices — the normal price struck through and the offer price beside it.
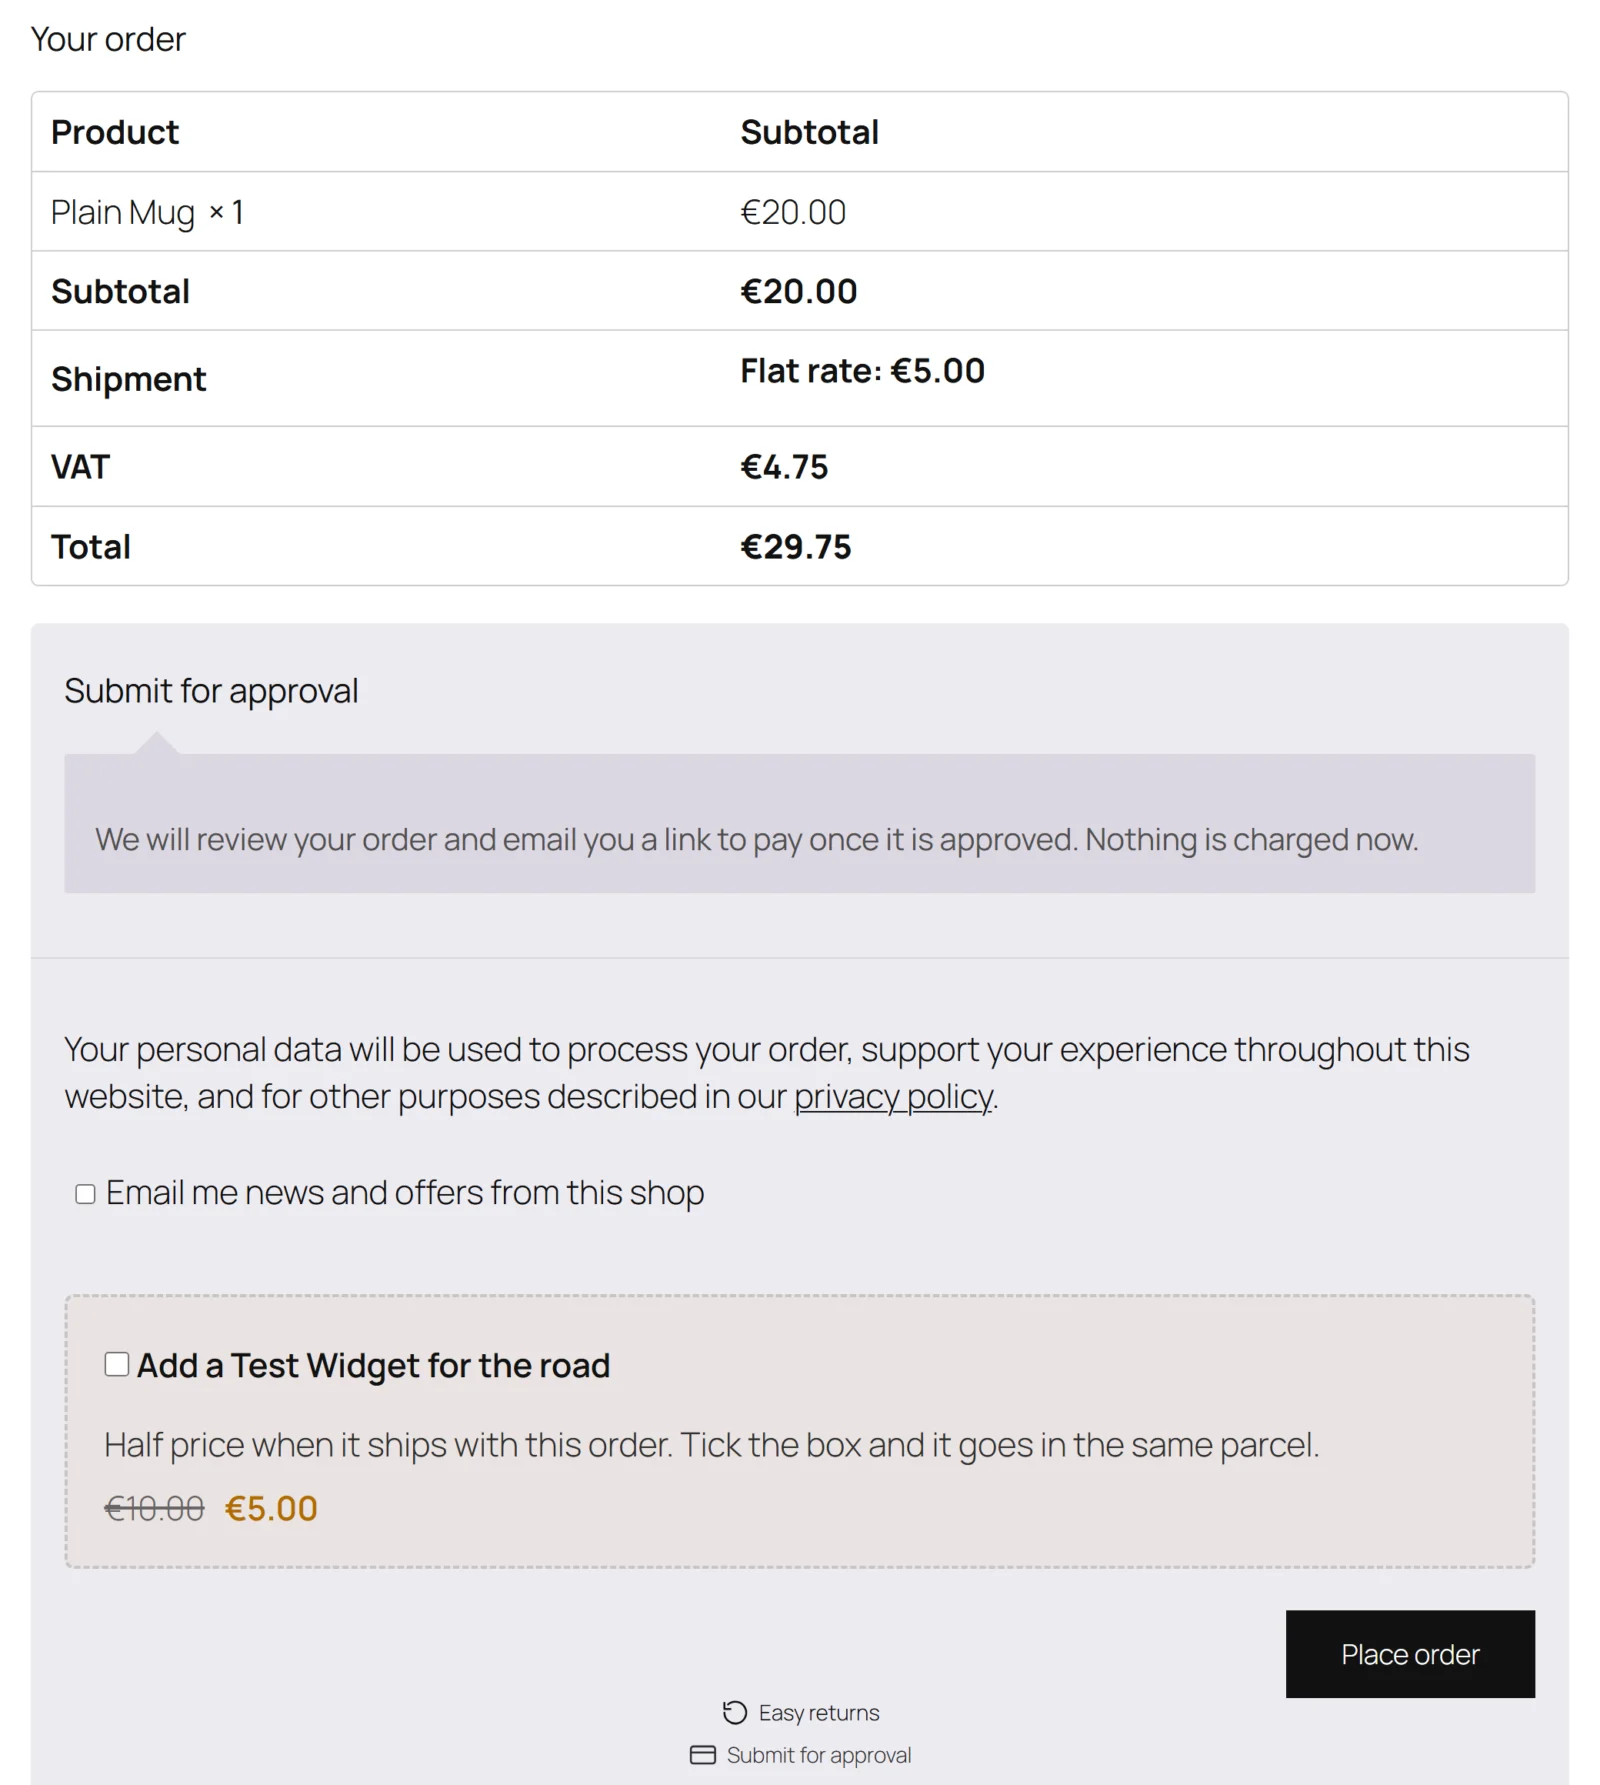
- Tick the box. The checkout refreshes and the order summary now includes the product at the offer price, with "Added as: Add a matching case" under it. The box stays, ticked.
- Place the order. The order line carries the same note, so you can see in the order why that line is there.
Not seeing the offer? See FAQ and troubleshooting.