
These docs cover both editions:
- Gatemi Countdown — the free edition, coming to wordpress.org. One store-wide countdown to a date and time you set, on product pages and, if you want, shop listings.
- Gatemi Countdown for WooCommerce — the full edition, sold on gatemi.com. As many countdowns as you like, each a campaign: a fixed end time, the product's own sale end date, or an evergreen timer per visitor; aimed at all products, chosen categories or chosen products; on the product page, shop listings and the cart.
Anything marked Full edition is only in the paid plugin.
Requirements
| Free edition | Full edition | |
|---|---|---|
| WordPress | 6.4 or later | 6.4 or later |
| PHP | 7.4 or later | 7.4 or later |
| WooCommerce | 8.0 or later (tested up to 10.9) | 8.0 or later (tested up to 10.9) |
Both editions declare HPOS and Cart & Checkout blocks compatibility. Neither adds a database table.
Install
Free edition: coming to wordpress.org. Once it is listed, go to Plugins → Add New, search for "Gatemi Countdown", install and activate.
Full edition: download the zip from your gatemi.com account, upload it at Plugins → Add New → Upload Plugin and activate. On WooCommerce → Countdown settings, paste your licence key into License & updates and press Activate.
Both editions store a countdown as a gmcd_campaign post with the same meta keys, and their settings in gmcd_settings, so the countdown you set in the free edition is there when you upgrade. While the full edition is active the free edition stands down.
First setup — free edition
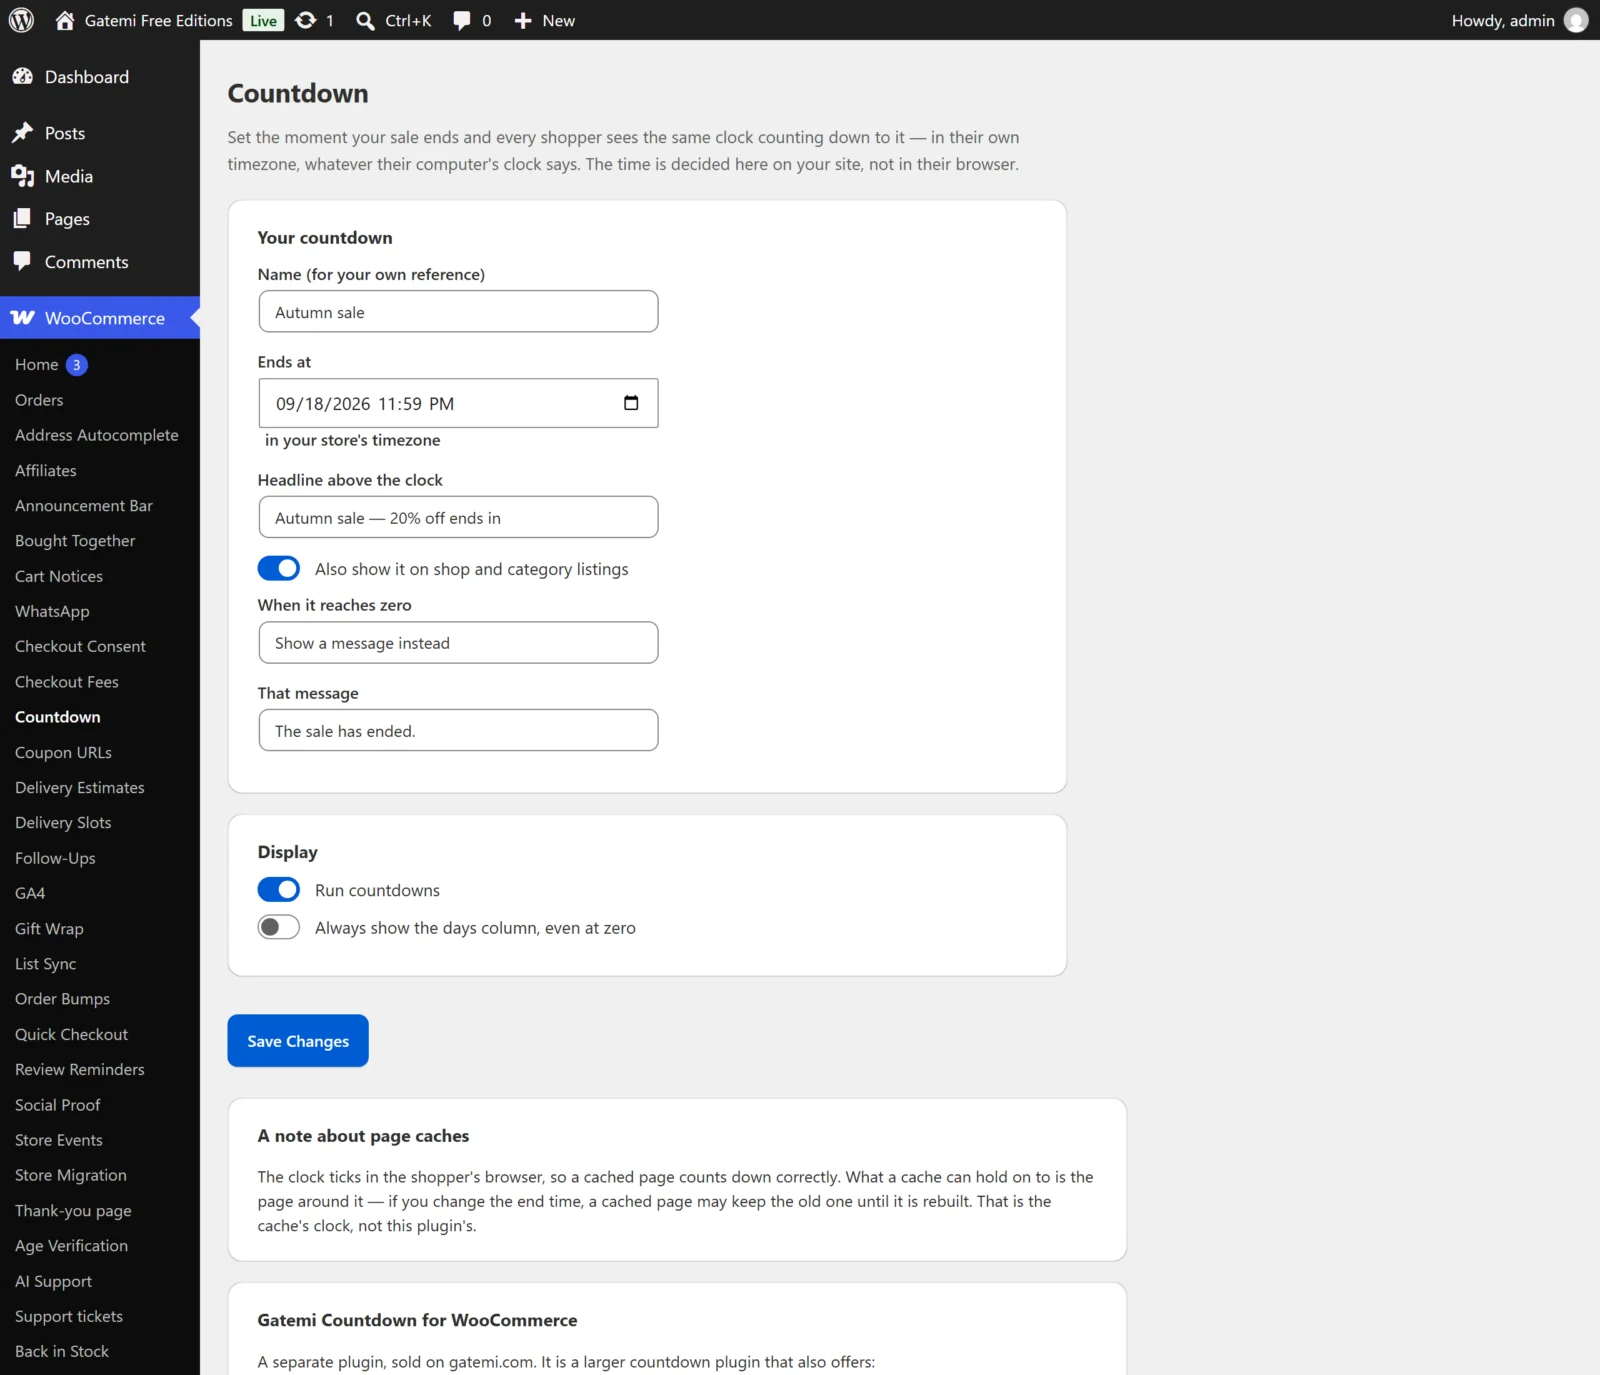
- Go to WooCommerce → Countdown.
- Under Your countdown:
- Name (for your own reference) — "Autumn sale".
- Ends at — the date and time the sale ends, in your store's timezone (Settings → General → Timezone).
- Headline above the clock — "Sale ends in".
- Tick Also show it on shop and category listings if you want it under every product in the shop too.
- When it reaches zero — Take it off the page, or Show a message instead with That message: "This offer has ended."
- Under Display, leave Run countdowns ticked.
- Press Save Changes.
First setup — Full edition
- Go to WooCommerce → Countdowns and press Add countdown.
- Give it a title, then in the Countdown box choose What ends it:
- Ends at a fixed date and time and fill in Ends at; or
- Ends when the product's own sale ends — no date to type; or
- Starts when each visitor first sees it and fill in Runs for (minutes).
- Choose Covers (every product, category ids or product ids), where it is Shown, a Headline, and what happens At zero.
- Press Publish.
Check it works
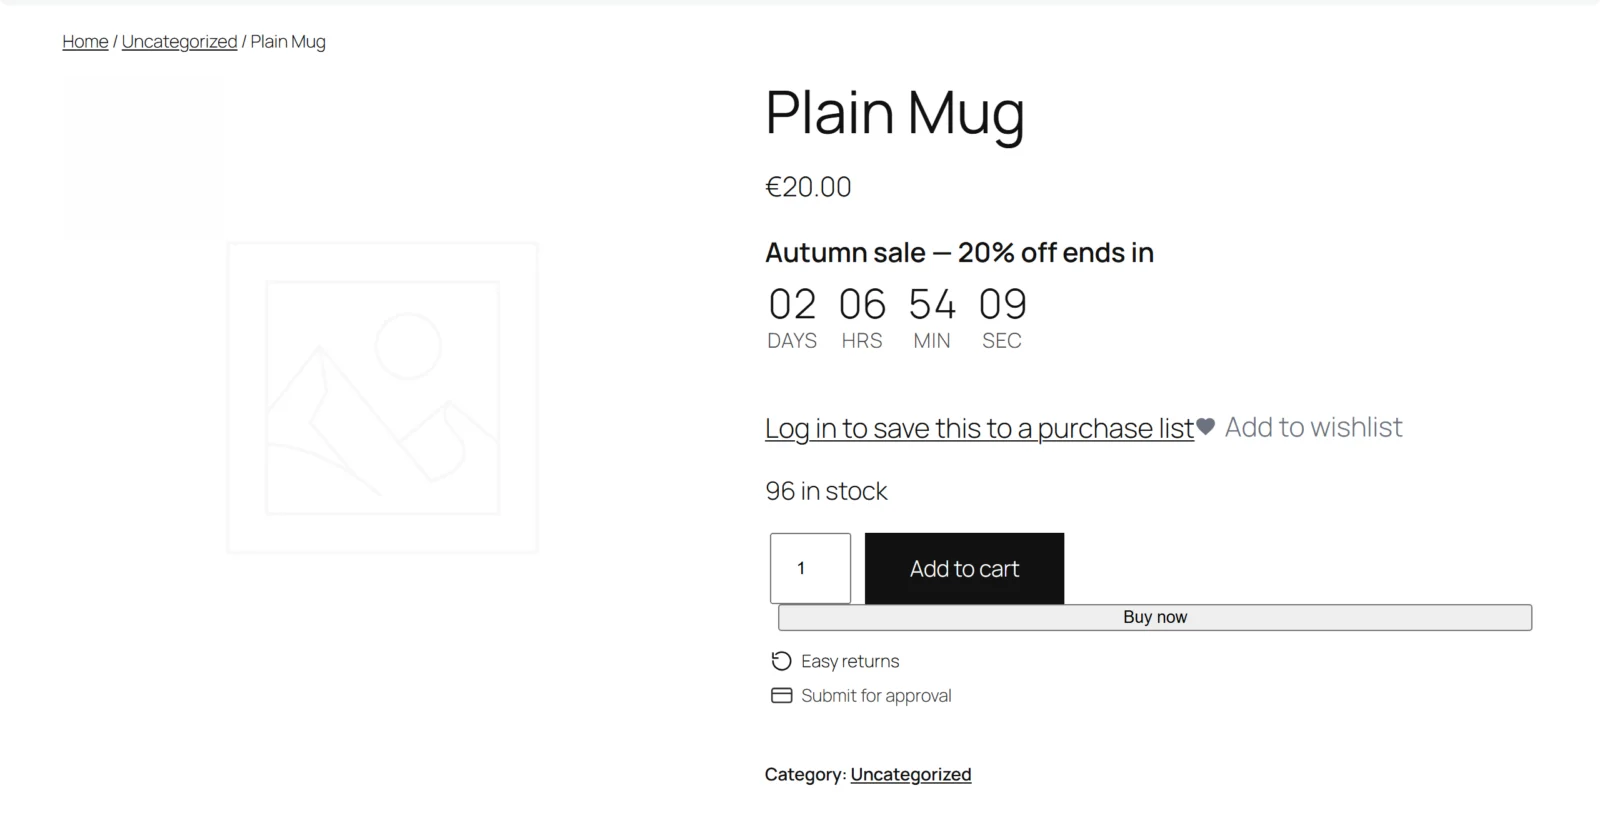
- Open a product page in a private window. Under the price you see the headline and a clock — days (when there are any), hours, minutes and seconds — ticking down.
- The digits are already in the page before any script runs, so the clock is right even with JavaScript off; the script only keeps it ticking.
- Set Ends at a minute ahead, wait, and reload: with Take it off the page the countdown is gone; with a message, the message shows.
If nothing shows, see FAQ and troubleshooting.
Next
- Settings — every field and its stored key.
- How it works — server-decided deadlines, sale-linked and evergreen campaigns, caching.
- Developer reference — filters, meta keys, the shortcode and CSS.