
Gatemi Announcement Bar puts a line across the top of your shop — a sale, a shipping deadline, a delivery promise — shown between the dates you choose and gone when they pass. A visitor can close it, and a closed bar stays closed: it does not flash up and disappear on every page, even when your pages come from a cache.
These docs cover both editions:
- Gatemi Announcement Bar — the free edition, coming to wordpress.org. One bar at the top of the page, scheduled between two dates.
- Gatemi Announcement Bar for WooCommerce — the full edition, sold on gatemi.com. As many bars as you like, shown only where they belong (pages, cart value, cart categories, role, before a cutoff time), at the top or the foot of the page, and optionally sticky. Marked Full edition.
Requirements
| Free edition | Full edition | |
|---|---|---|
| WordPress | 6.4 or later | 6.4 or later |
| PHP | 7.4 or later | 7.4 or later |
| WooCommerce | 8.0 or later | 8.0 or later |
The top bar is printed on WordPress's wp_body_open hook. Block themes and current classic themes fire it; a theme that does not will not show a top bar.
1. Install
Free edition: coming to wordpress.org. Until it is listed, upload the zip under Plugins → Add New → Upload Plugin and activate.
Full edition: download the zip from your gatemi.com account, upload and activate it, then open WooCommerce → Announcement Bar and enter your licence key in License & updates for updates and support.
If both are active, the free edition stands down and says so under its row on the Plugins screen. Both store bars in the same option, so nothing is lost.
2. Write the bar
- Go to WooCommerce → Announcement Bar.
- Leave Show the announcement bar ticked.
- Under The bar, type the Message, for example
Free UK delivery on orders over £40 this week. A link is allowed; a script is not. - Optionally add a Button label and where it Goes to, for example
Shop the saleandhttps://example.com/sale/. The button only appears when both are filled in. - Set Background and Text colours as hex values (defaults
#1e1e1eand#ffffff). - Set Starts and Ends, or leave them empty to show it from now on. Both dates count: a bar that ends on the 31st still shows on the 31st.
- Press Save changes.
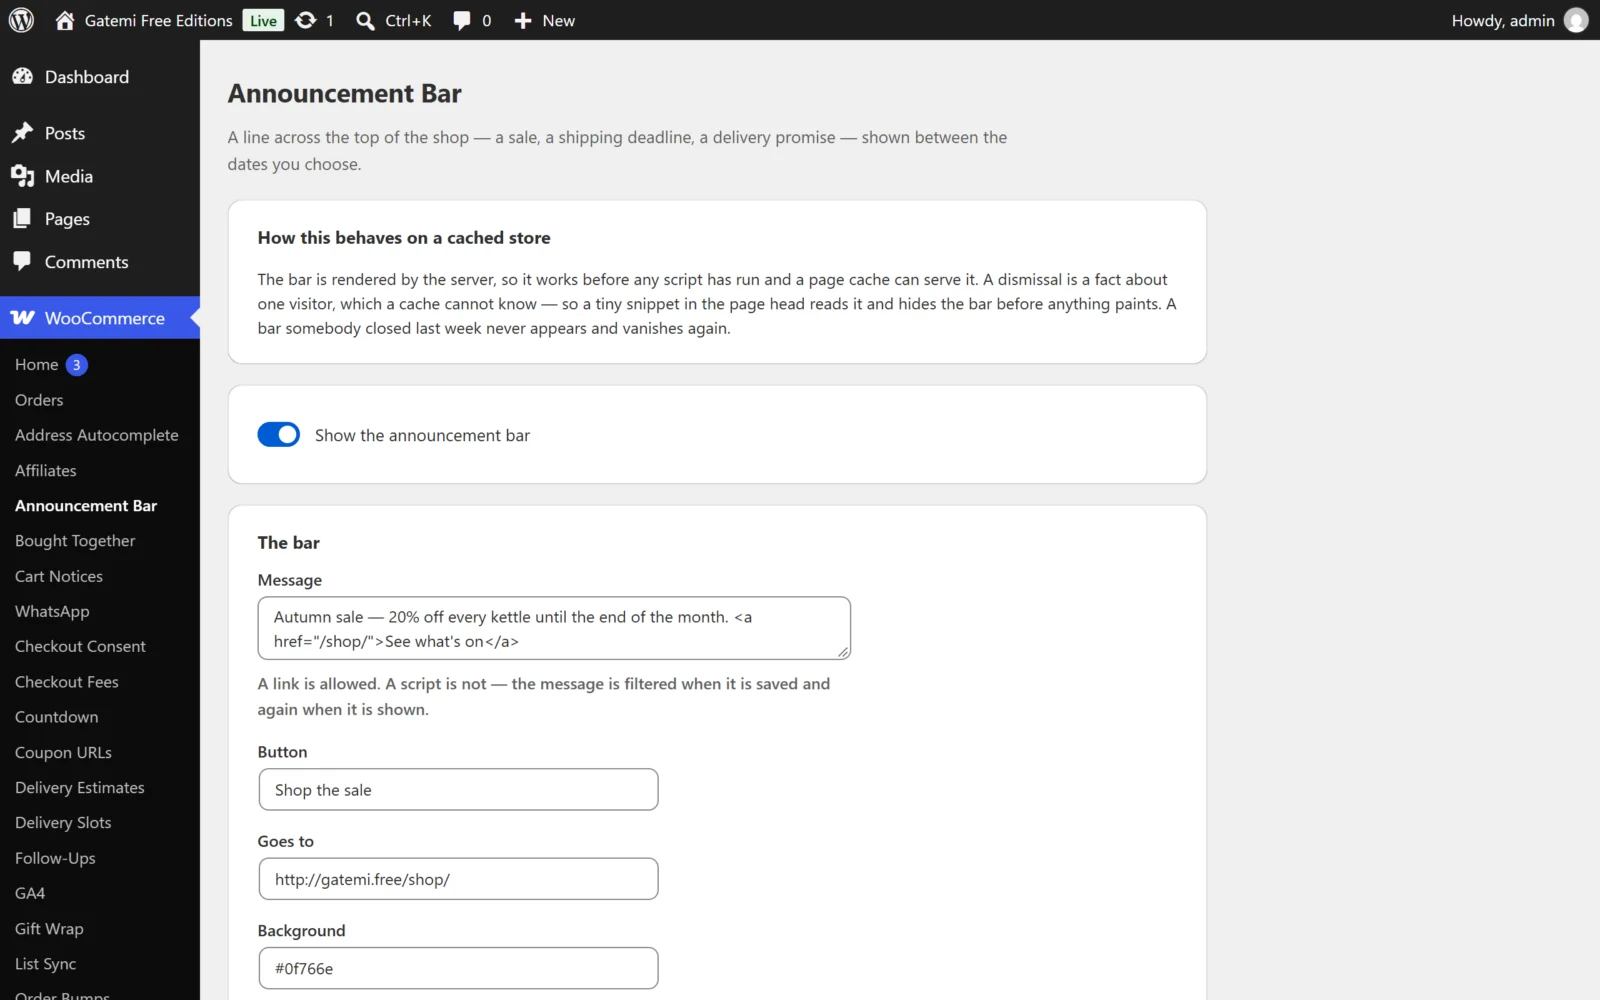
Full edition: press Add another bar for each extra bar, and use each bar's Position, Stays put as they scroll and conditions. See Settings.
3. Check it works
- Open your shop in a private window. The bar runs across the top of the page, with your message, the button and a × close control.
- Press ×. The bar disappears.
- Load another page. The bar does not come back — not even for a moment.
- Open a new private window: the bar is there again for that new visitor.
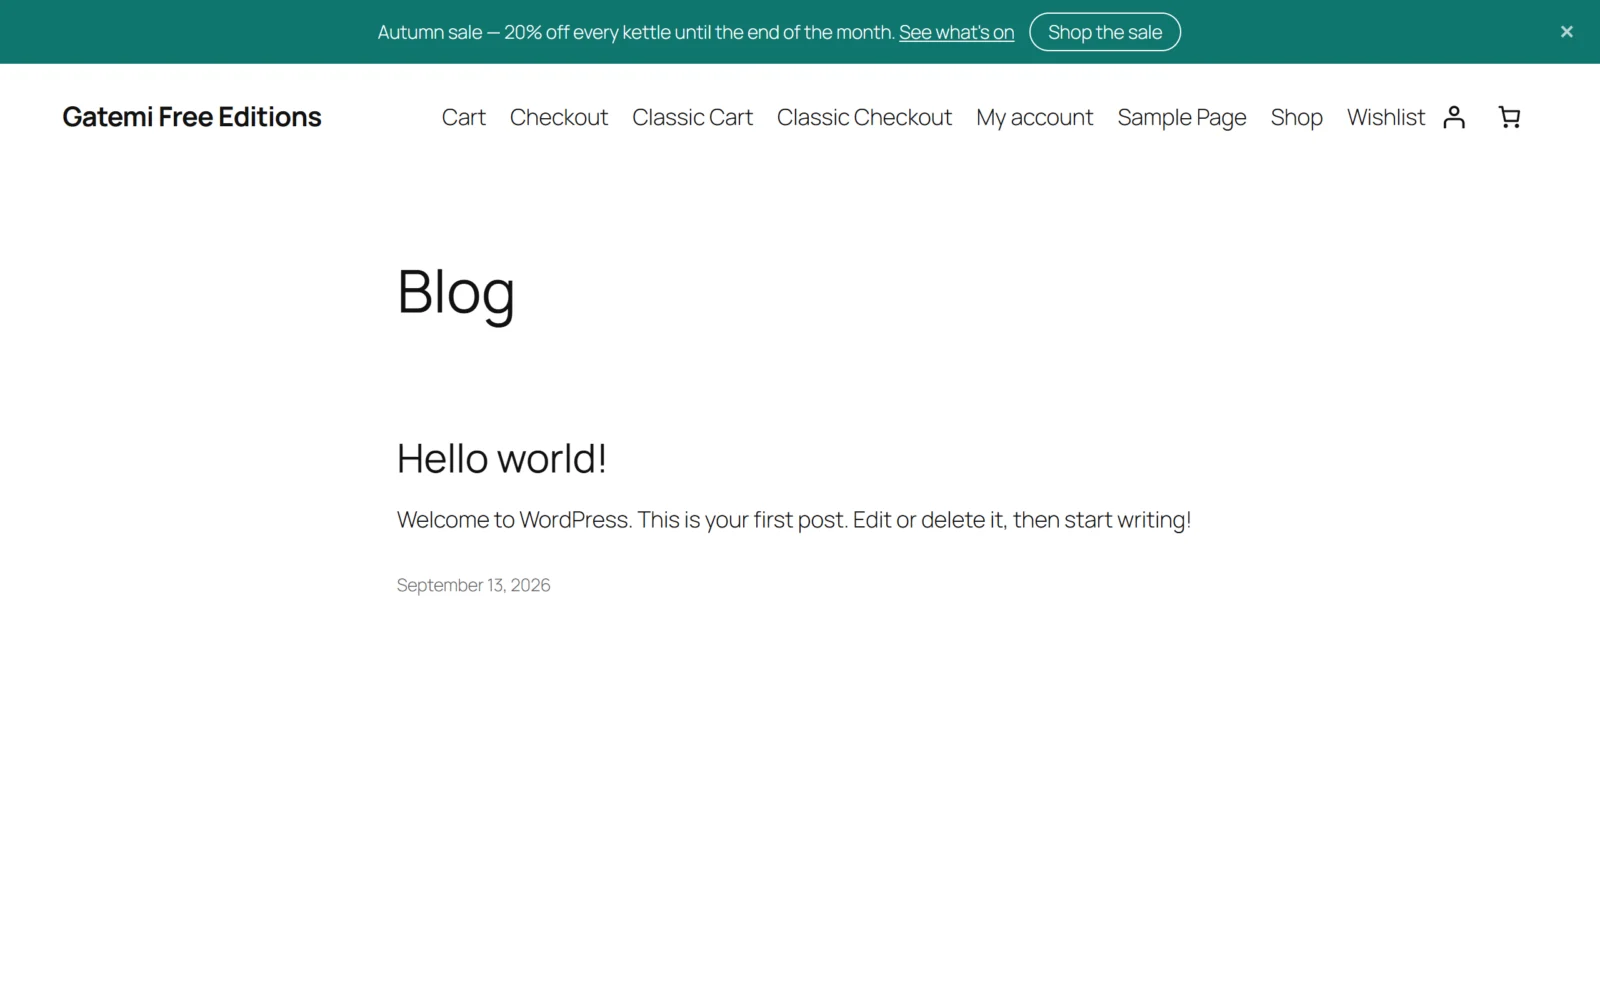
A closed bar stays closed for the number of days in Stays closed for (days) (default 7).
Next steps
- Settings
- How it works — the no-flash dismissal and the filter rule
- FAQ and troubleshooting