
Both editions have one screen: WooCommerce → Shipment Tracking (capability manage_woocommerce). Tracking numbers themselves are entered on each order, in the Shipment tracking box.
Free edition: no settings
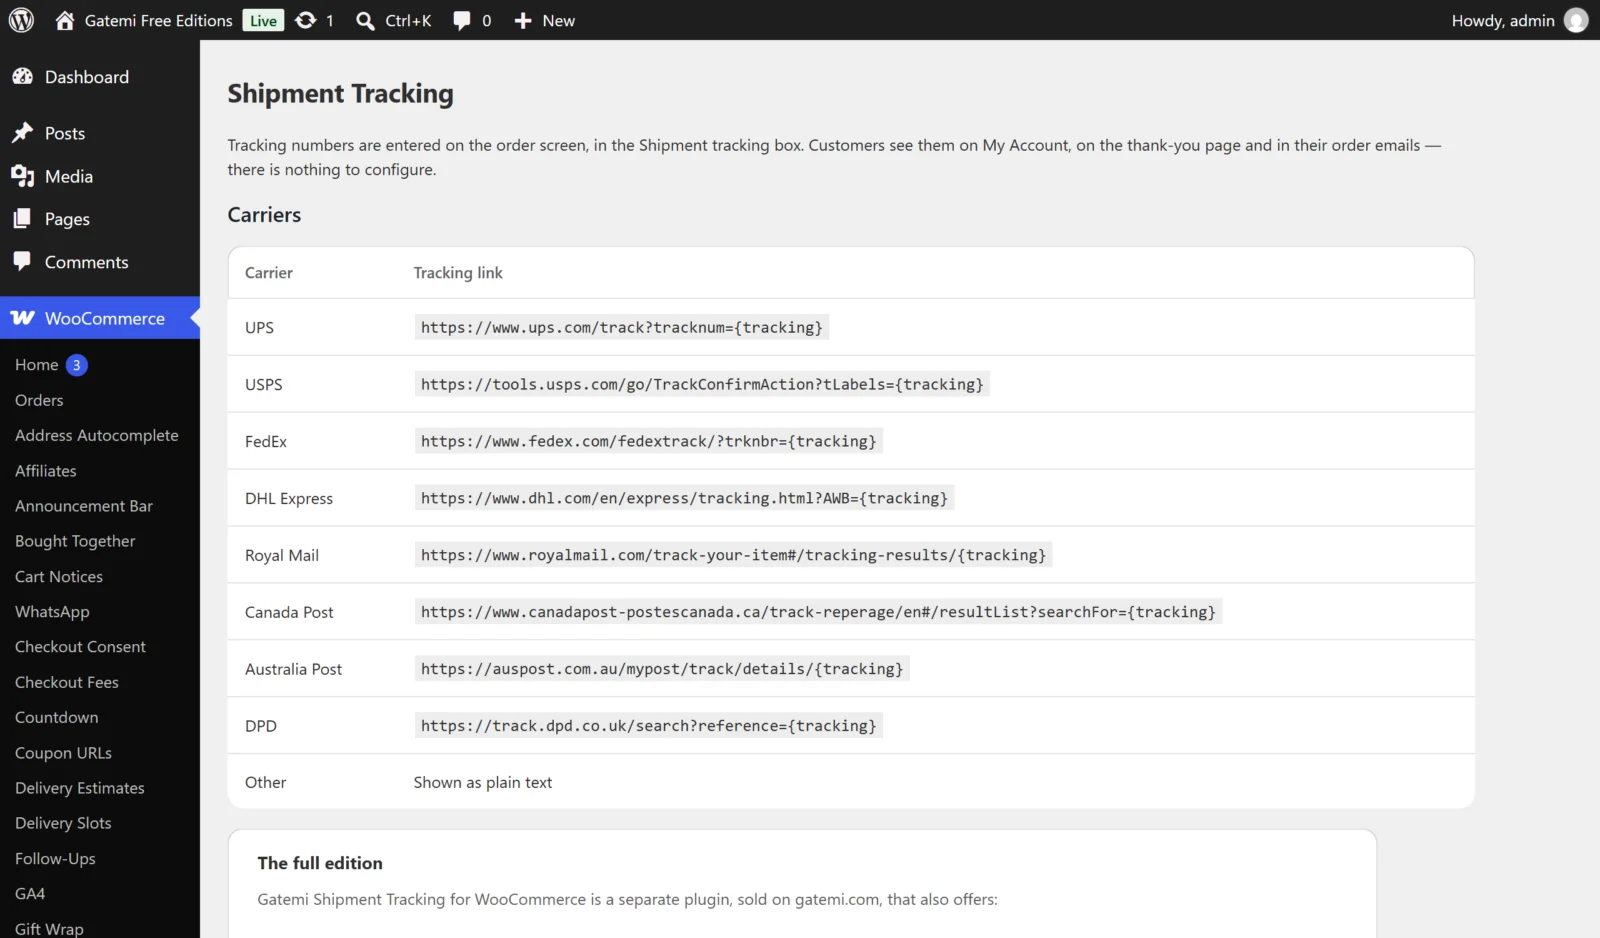
The free edition has nothing to configure. Its screen explains where numbers are entered and lists the carriers it can link to:
| Carrier | Slug | Link |
|---|---|---|
| UPS | ups |
https://www.ups.com/track?tracknum={tracking} |
| USPS | usps |
https://tools.usps.com/go/TrackConfirmAction?tLabels={tracking} |
| FedEx | fedex |
https://www.fedex.com/fedextrack/?trknbr={tracking} |
| DHL Express | dhl_express |
https://www.dhl.com/en/express/tracking.html?AWB={tracking} |
| Royal Mail | royal_mail |
https://www.royalmail.com/track-your-item#/tracking-results/{tracking} |
| Canada Post | canada_post |
https://www.canadapost-postescanada.ca/track-reperage/en#/resultList?searchFor={tracking} |
| Australia Post | australia_post |
https://auspost.com.au/mypost/track/details/{tracking} |
| DPD | dpd |
https://track.dpd.co.uk/search?reference={tracking} |
| Other | other |
Shown as plain text |
It always shows tracking on My Account, the thank-you page and every customer email, under the heading "Track your shipment".
Full edition settings
The full edition stores its settings in one option, gmst_settings, and its own carriers in gmst_carriers.
Where customers see tracking — Full edition
In their order emails
- Key:
in_emails· Default: on (yes) - Adds tracking to every customer email about the order, HTML and plain text. Admin emails never carry it.
On My Account and the thank-you page
- Key:
in_account· Default: on (yes) - Adds tracking below the order details on the customer's order in My Account and on the order-received page. The
[gatemi_tracking]shortcode works whatever this says.
Heading
- Key:
heading· Default: empty, shown as "Track your shipment"
When tracking is added — Full edition
Move the order on to another status
- Key:
advance_status· Default: off (no)
Move it to
- Key:
shipped_status· Default:completed - A drop-down of your order statuses.
The status changes only when the first shipment is added to an order — from the order screen or by import — with an order note ("Tracking added." or "Tracking imported."). Adding a second shipment never moves the order again. Moving an order to Completed sends WooCommerce's own Completed email, which then carries the tracking.
Your own carriers — Full edition
Add a regional carrier the built-in list does not cover: a slug (lower case, used to identify it), a Carrier name, and a URL with {tracking} where the number belongs, for example https://example.com/track?n={tracking}. Leave the URL empty to show the number as plain text. A carrier with the slug of a built-in one replaces it. Only http and https addresses are kept.
The {tracking} placeholder is kept when the screen saves, so the number goes into the link. A carrier can also be added in code with the gmst_carriers filter — see the developer reference.
Press Save changes to store the settings.
Import tracking in bulk — Full edition
Paste one shipment per line into the box and press Import:
1234,1Z999AA10123456784,ups,2026-08-15
1235,9400111899223197428490,usps,2026-08-15
The columns are the order, the tracking number, the carrier slug and the date shipped (YYYY-MM-DD, optional). A first line that does not start with a number is treated as a header and skipped. The result reads "Imported N shipments, skipped N.", with a line-numbered reason for each skip ("Line 3: no tracking number.", "Line 7: no order 9999.").
The first column is matched against the order's ID — the number in the order's address in wp-admin. If you use a plugin that changes order numbers (such as Gatemi Sequential Order Numbers), use the order ID, not the number the customer sees.
Running the same lines twice changes nothing: a number an order already carries is updated in place, never added again. See How it works.
License & updates — Full edition
Enter your GM-XXXXX-… key and press Activate. The card shows the status, the renewal date and how many sites use the key; an expired licence keeps working and only stops updates. Deactivate on this site frees the key. A failed connection never changes your licence state.
For developers — Full edition
The screen ends with For developers, a table of every filter. See the developer reference.