
All the settings are on one screen: WooCommerce → Checkout Consent. It needs the manage_woocommerce capability.
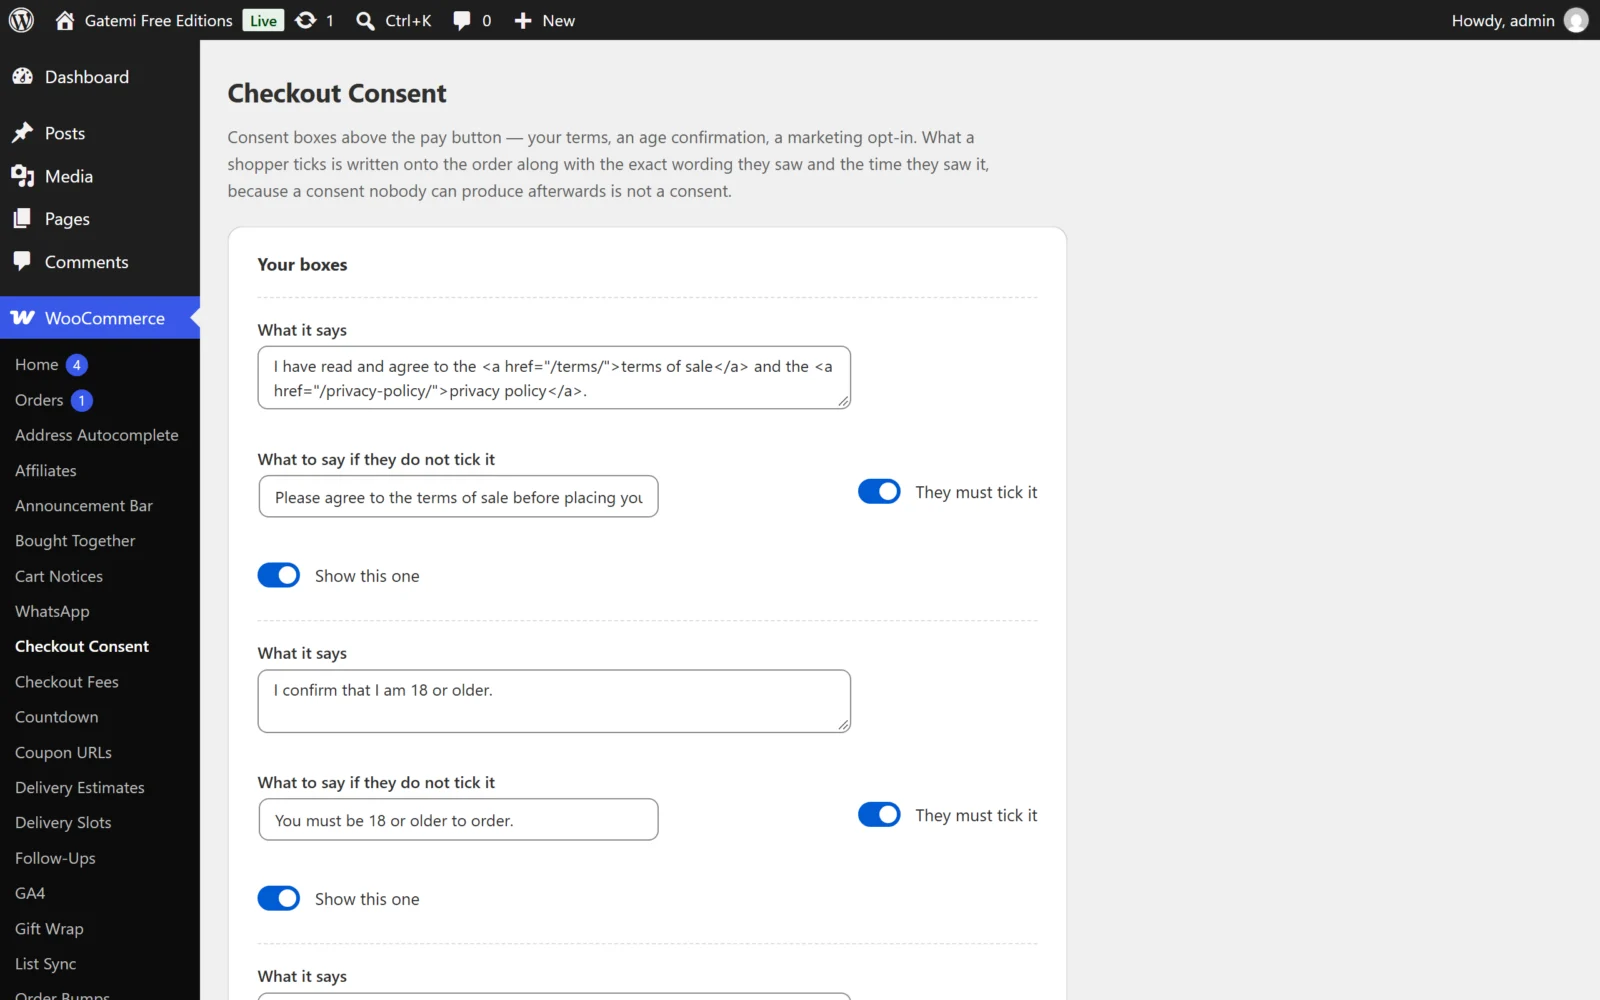
Your boxes
The screen always shows five rows. Five is the most this plugin stores (GMCC_Consents::MAX_BOXES). The rows are fixed rather than a list you add to, which is why the screen needs no JavaScript.
Every row is one box, and the boxes appear at the checkout in the same order as the rows. Each row has four fields.
What it says
| Stored as | label |
| Default | empty |
The wording printed beside the tick box. It may contain the markup WordPress allows in a post (wp_kses_post()), so a link works:
I agree to the <a href="/terms/">terms and conditions</a>.
Anything that could run — a script, an event attribute — is removed when you save, and the wording is filtered again every time it is printed.
A row with no wording is not saved. Clear the wording to delete a box.
On the Checkout block the wording is shown as plain text, so the link is shown as its words. See How it works.
What to say if they do not tick it
| Stored as | error |
| Default | empty |
The message a customer sees when they press Place order without ticking a required box. Plain text.
If you leave it empty, the plugin uses Please agree to: followed by the box's wording with any link markup removed. Writing your own is better on a checkout with more than one box, because it tells the customer exactly which one they missed.
The message is only used for a required box. An optional box is never refused, so it never needs one.
They must tick it
| Stored as | required (yes / no) |
| Default for a new row | ticked (yes) |
When ticked, the order is refused unless the box is ticked. The refusal happens on the server, when WooCommerce is about to create the order — not only in the browser. See How it works.
When unticked, the box is optional: a customer may place the order either way, and the order records the consent only if they ticked it. Use this for a marketing opt-in.
Show this one
| Stored as | enabled (yes / no) |
| Default for a new row | ticked (yes) |
Untick it to take a box off the checkout without losing its wording. The box stays in the settings and can be switched back on.
Orders that already recorded this box keep their record either way.
How the boxes are stored
All five rows are saved together in one option, gmcc_boxes, as a list. Each box looks like this:
array(
	'id'       => 'consent-1a2b3c4d',
	'label'    => 'I agree to the <a href="/terms/">terms</a>.',
	'required' => 'yes',
	'error'    => 'Please accept the terms to place your order.',
	'enabled'  => 'yes',
)
The id is made once, the first time you save a row, and kept in a hidden field from then on. It is what names the box at the checkout (gmcc_{id} on the classic checkout, gatemi-checkout-consent/{id} on the Checkout block) and what an order's record refers to. Editing the wording does not change it.
Any value other than yes for They must tick it or Show this one is read as no. A box nobody said was required must not start blocking orders.
The notes on the screen
Below the form are two cards with no settings in them:
- What gets recorded — a summary of the order record. See How it works.
- Need more than tick boxes? — a pointer to Gatemi Checkout Fields for WooCommerce, a separate plugin that edits the checkout's own fields. The two run alongside each other; this plugin works the same with or without it.
What is not a setting
- Where the boxes appear. Always just above the pay button, on both checkouts. There is no option to move them earlier, because agreeing to terms three screens before paying is not agreeing to anything a shopper remembers reading.
- Which boxes show on which cart. There is no condition on the screen. A developer can decide per checkout with the
gmcc_boxesfilter — see the Developer reference. - The look. The plugin's stylesheet is deliberately small — spacing and a larger tap target — so the boxes read as part of your checkout rather than an advert.