
Gatemi Checkout Consent adds up to five tick boxes just above the Place order button: your terms, an age confirmation, a marketing opt-in. When a customer ticks one, the order records three things: that they ticked it, the exact wording they were shown, and the time.
It is a free plugin with no paid edition. Everything described in these docs is in the plugin you install from wordpress.org.
Requirements
- WordPress 6.4 or later
- PHP 7.4 or later
- WooCommerce 8.0 or later (tested up to 10.9)
- Compatible with High-Performance Order Storage (HPOS) and with the Cart and Checkout blocks — both are declared to WooCommerce, so activating it on a new shop raises no compatibility warning.
The plugin header carries Requires Plugins: woocommerce, so WordPress 6.5 and later will not activate it without WooCommerce. If WooCommerce is deactivated later, the plugin does nothing and says why in a row under its own entry on the Plugins screen.
It loads no JavaScript, calls no external service and sends nothing anywhere.
1. Install
- In WordPress go to Plugins → Add New Plugin.
- Search for Gatemi Checkout Consent.
- Press Install Now, then Activate.
Or download it from wordpress.org/plugins/gatemi-checkout-consent and upload the zip through Plugins → Add New Plugin → Upload Plugin.
Nothing appears on the checkout until you write a box. Activating creates no tables.
2. Write your first box
-
Go to WooCommerce → Checkout Consent. You need the
manage_woocommercecapability (shop managers and administrators have it). -
In the first row, under What it says, write the wording, for example:
I have read and agree to the <a href="/terms/">terms and conditions</a>. -
Under What to say if they do not tick it, write the sentence a customer sees when they try to pay without ticking, for example Please accept the terms and conditions to place your order.
-
Leave They must tick it and Show this one ticked.
-
Press Save Changes. The screen answers Saved.
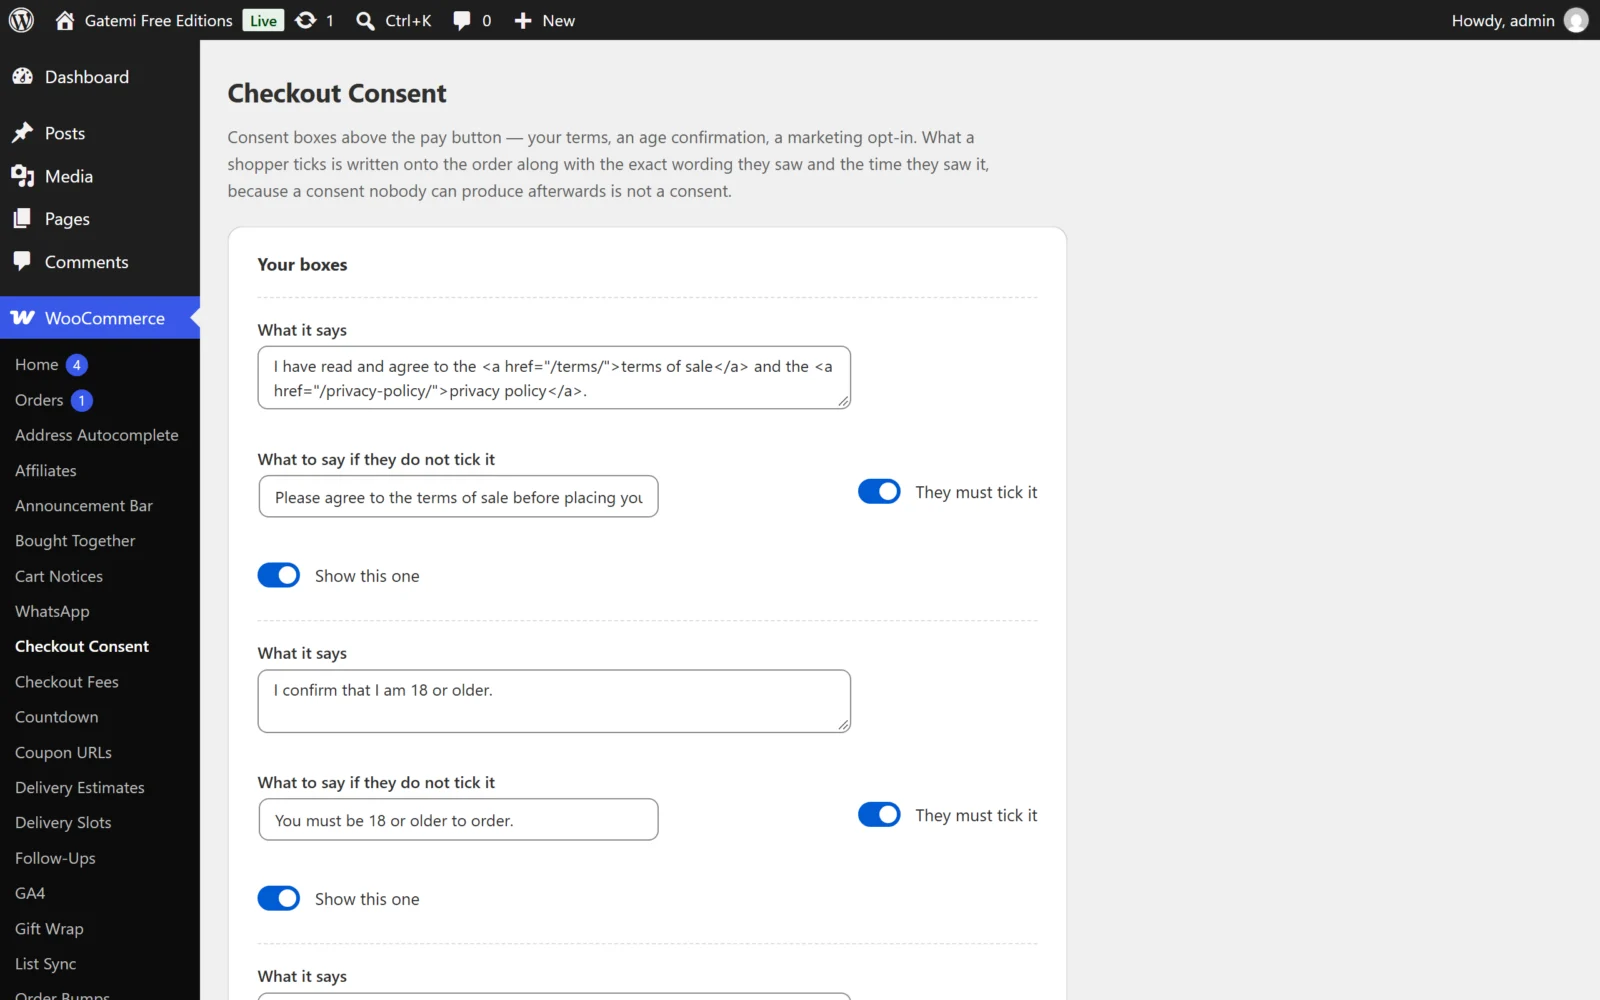
A row with no wording is not saved at all — it would be a tick box beside nothing. See Settings for every field.
3. Check it works
- Add any product to the cart in a private browser window and go to the checkout.
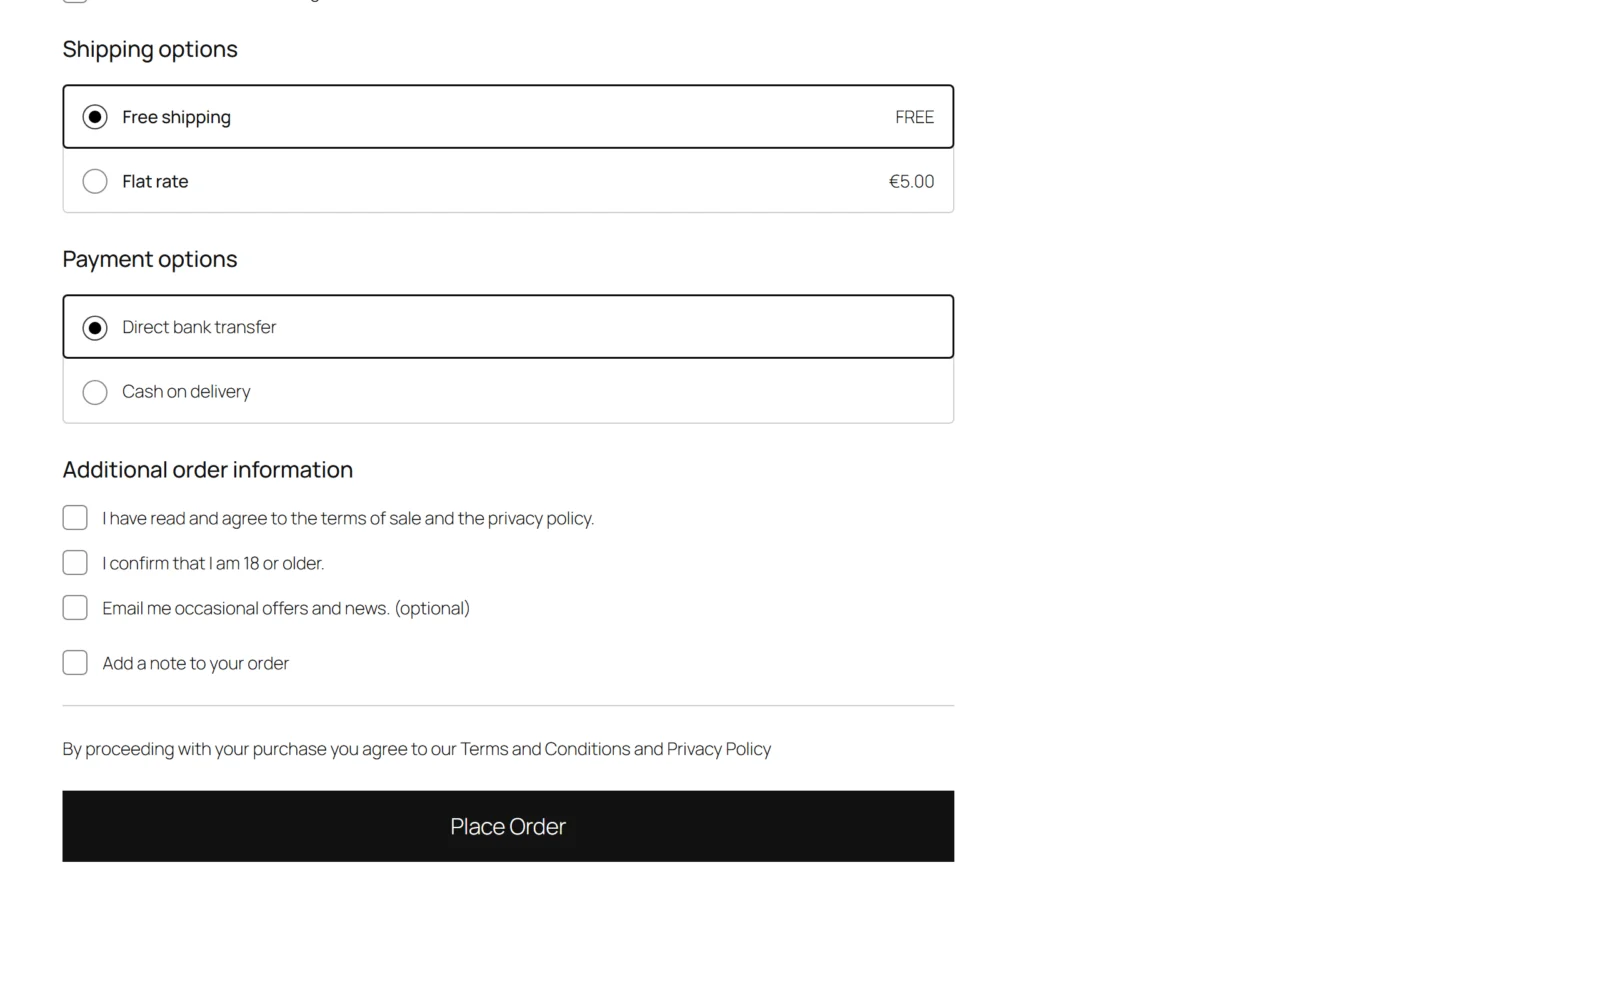
- Find the box. On the classic (shortcode) checkout it is just above Place order. On the Checkout block it is in the Order information step, also above the pay button.
- Fill in the address and press Place order without ticking the box. The order is refused with your message. Your other choices are kept, and on the classic checkout any box you did tick stays ticked.
- Tick the box and place the order.
- In the admin, open the order (WooCommerce → Orders). In the right-hand column there is a Consent panel showing the wording and agreed YYYY-MM-DD HH:MM:SS UTC.
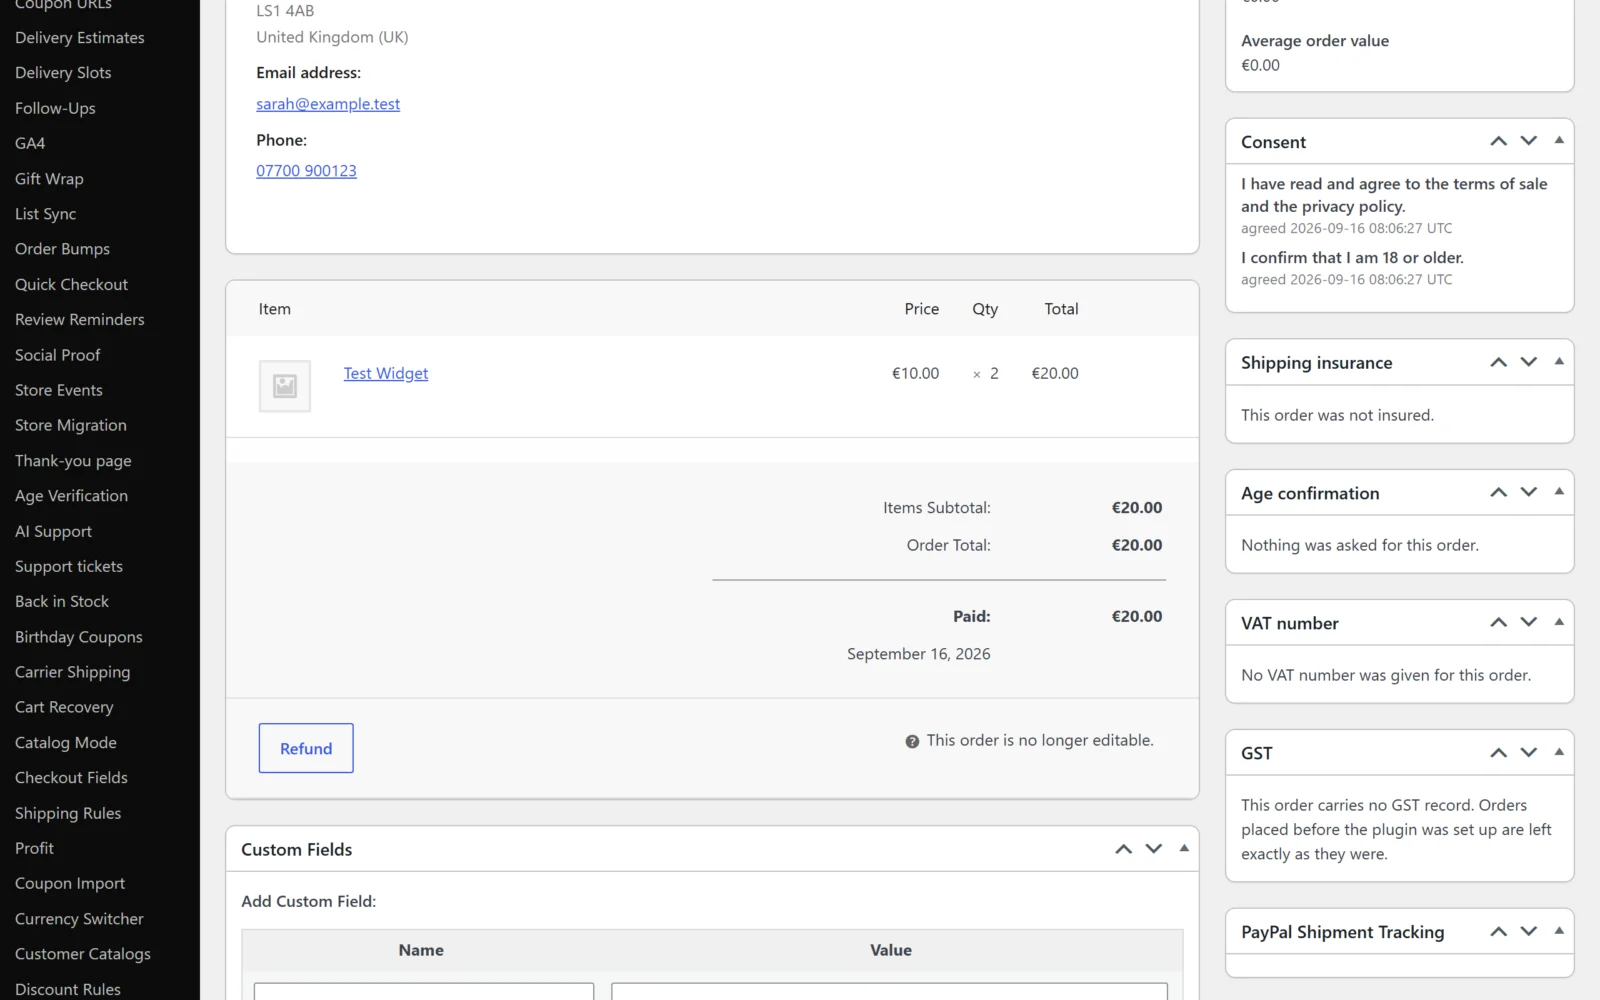
The panel only appears on orders where at least one box was ticked. An order with nothing agreed has no panel, rather than an empty one.
One thing to know about the Checkout block
WooCommerce draws the boxes on the Checkout block through its own checkout fields API, and that API shows a field's wording as plain text. So on the block, "I agree to the terms and conditions" appears without its link. Keep the link to your terms in the block's own terms text as well — most block-checkout shops already have one. On the classic checkout the link works.
Next steps
- Settings — the five rows field by field.
- How it works — where the boxes print, how a refusal is enforced, and what is recorded.
- FAQ and troubleshooting
- Developer reference