
Gatemi Product Bundles sells several products together as one purchase. The two editions do this in two different ways, and it helps to know which one you are reading about:
- Gatemi Product Bundles — the free edition, coming to wordpress.org. Any product can carry a contents list of up to five parts. It becomes a kit: it sells as one line at its own price, the product page lists what is in it, and it cannot be added to the cart when the parts are short.
- Gatemi Product Bundles for WooCommerce — the full edition, sold on gatemi.com. It adds a real product type, Product bundle, with per-item quantities, optional items, variable products, per-item pricing and discounts, and the bundled products added to the cart as real, stock-managed lines.
Anything marked Full edition is only in the paid plugin.
Requirements
| Free edition | Full edition | |
|---|---|---|
| WordPress | 6.4 or later | 6.4 or later |
| PHP | 7.4 or later | 7.4 or later |
| WooCommerce | 8.0 or later (tested to 10.9) | 8.0 or later (tested to 10.9) |
Both editions declare compatibility with High-Performance Order Storage (HPOS) and the Cart and Checkout blocks.
1. Install
Free edition: coming to wordpress.org. Until it is listed, install the zip through Plugins → Add New → Upload Plugin and activate it.
Full edition: download the zip from your gatemi.com account, upload it through Plugins → Add New → Upload Plugin and activate it. Then open WooCommerce → Bundles license and enter your licence key. The plugin works without a key; the key switches on one-click updates and support.
Use one edition at a time. If the full edition is active, the free edition stands down and says so in a row under its entry on the Plugins screen.
The two editions store their contents differently (the free edition's contents list is the _gmpbf_items meta, the full edition's bundles are the _gmpb_bundled_items meta on a different product type). A kit made in the free edition keeps selling as a kit after you upgrade, and is turned into a bundle only when you ask for it on WooCommerce → Bundles license — see FAQ.
2. Build a kit (free edition)
- Go to Products → Add New (or edit an existing product) and give it a name and a regular price. This price is what the kit sells for.
- Keep the product type on Simple product and, on the General tab of the Product data box, find Kit contents (it is shown only for simple products).
- In Part 1, type the product ID of a published simple product and its quantity (1–99). The product ID is shown when you hover a product in Products → All Products.
- Fill as many of the five parts as you need and click Update.
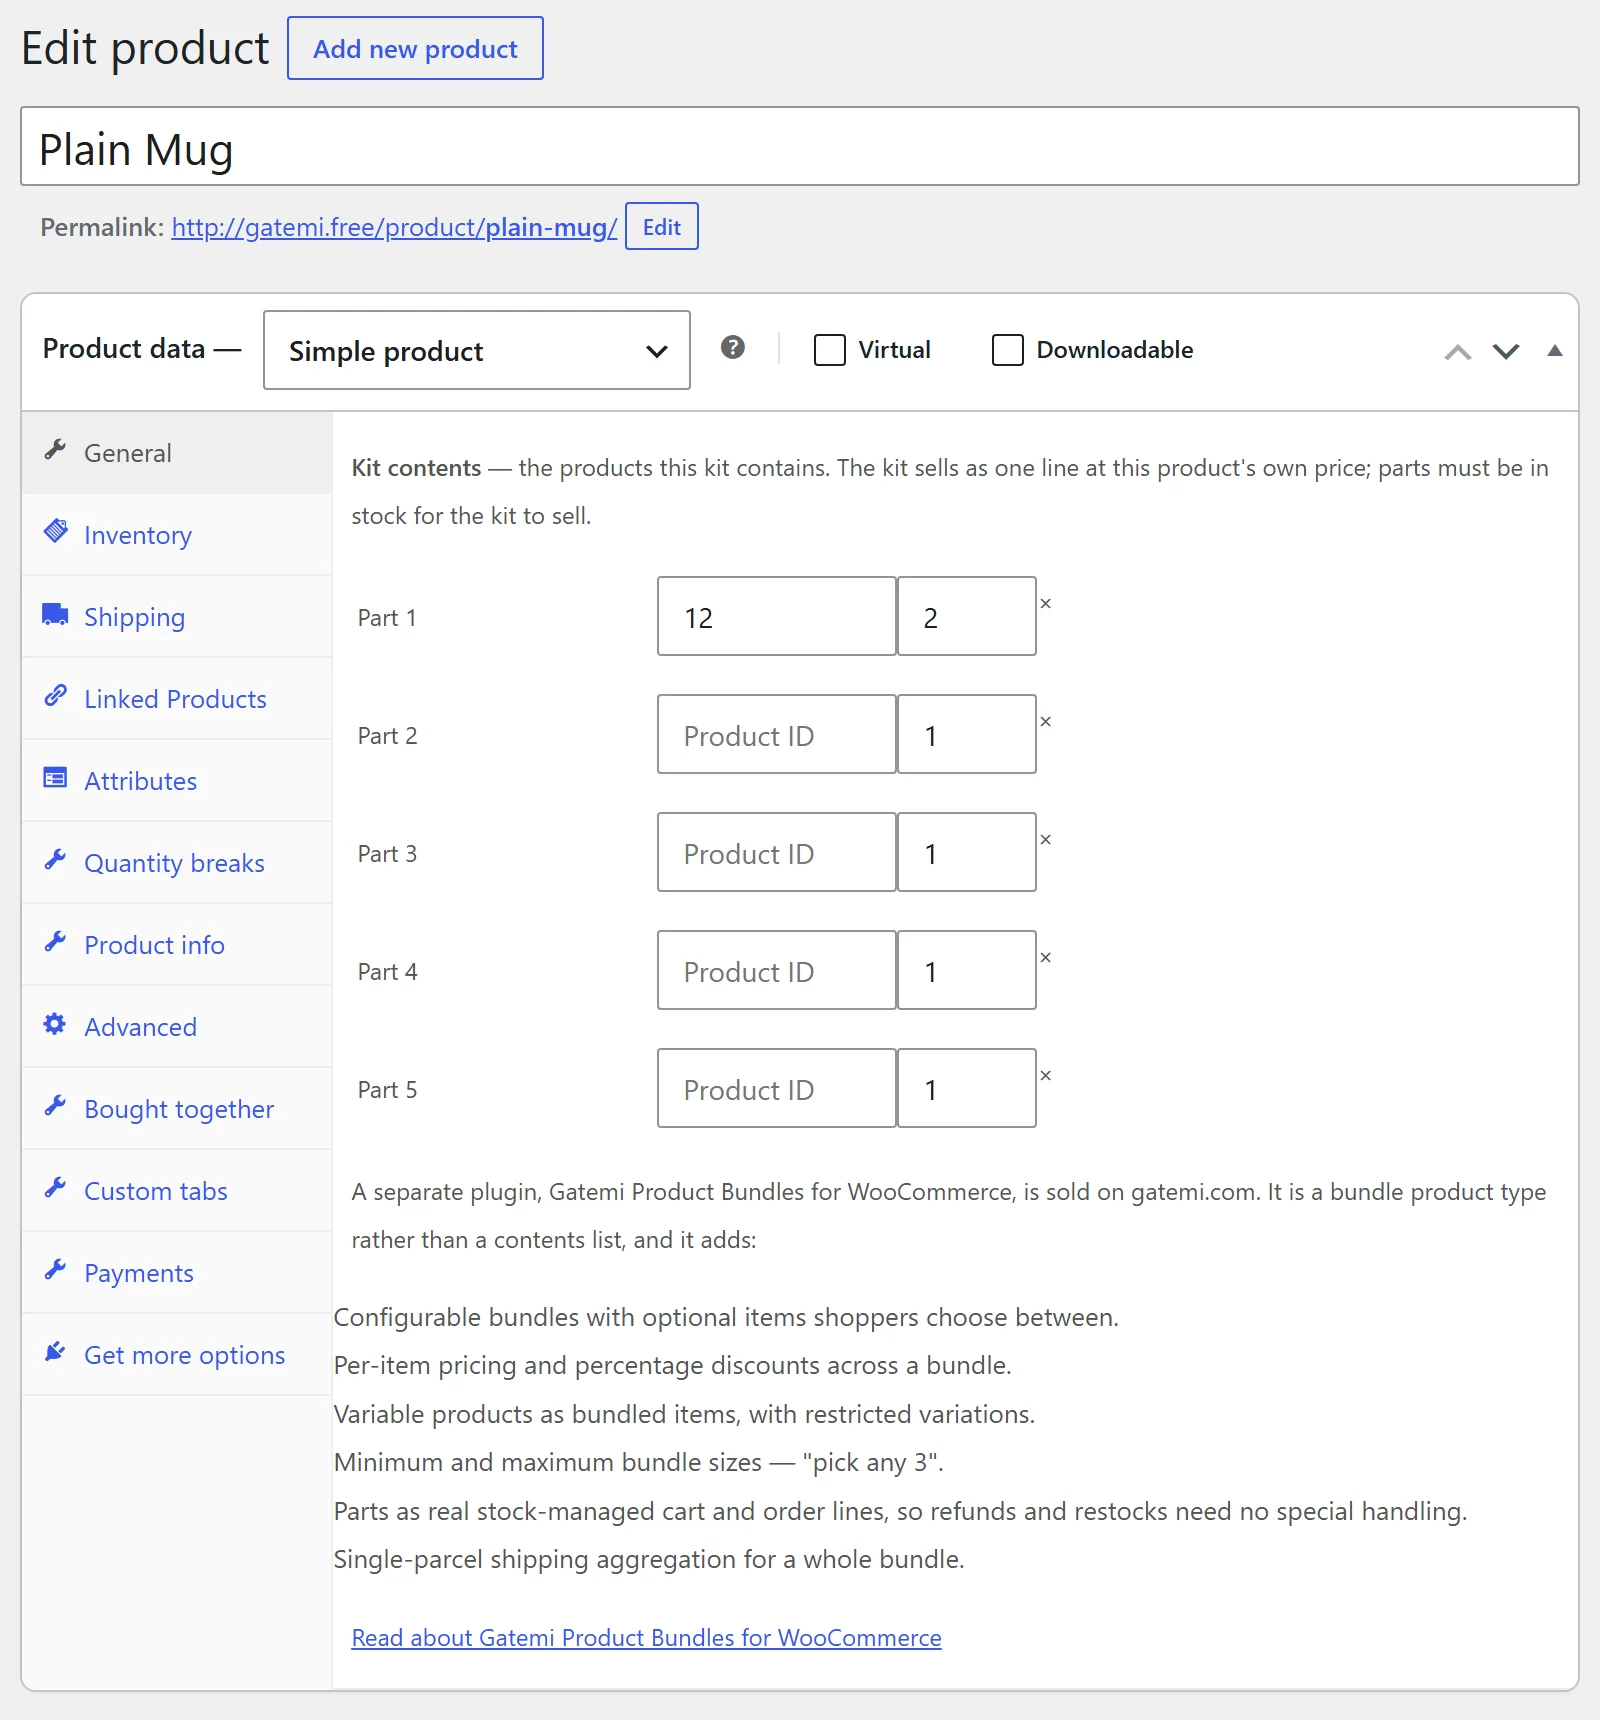
An empty part, a quantity of 0 and the kit's own ID are ignored when you save. If you leave every part empty, the contents list is removed and the product is an ordinary product again.
2. Build a bundle (Full edition)
- Go to Products → Add New and pick Product bundle from the product type dropdown.
- Open the Bundled products tab.
- Set the Base regular price — the price of the bundle itself, before any individually priced contents. It can be 0 if every item is priced individually.
- In Add bundled product, search for a product and pick it. A row appears for it.
- Set the row's Min quantity, Max quantity and Default quantity, and tick Optional or Priced individually as needed.
- Add the other products the same way and click Publish.
Each setting is explained in Settings.
3. Check it works
Free edition:
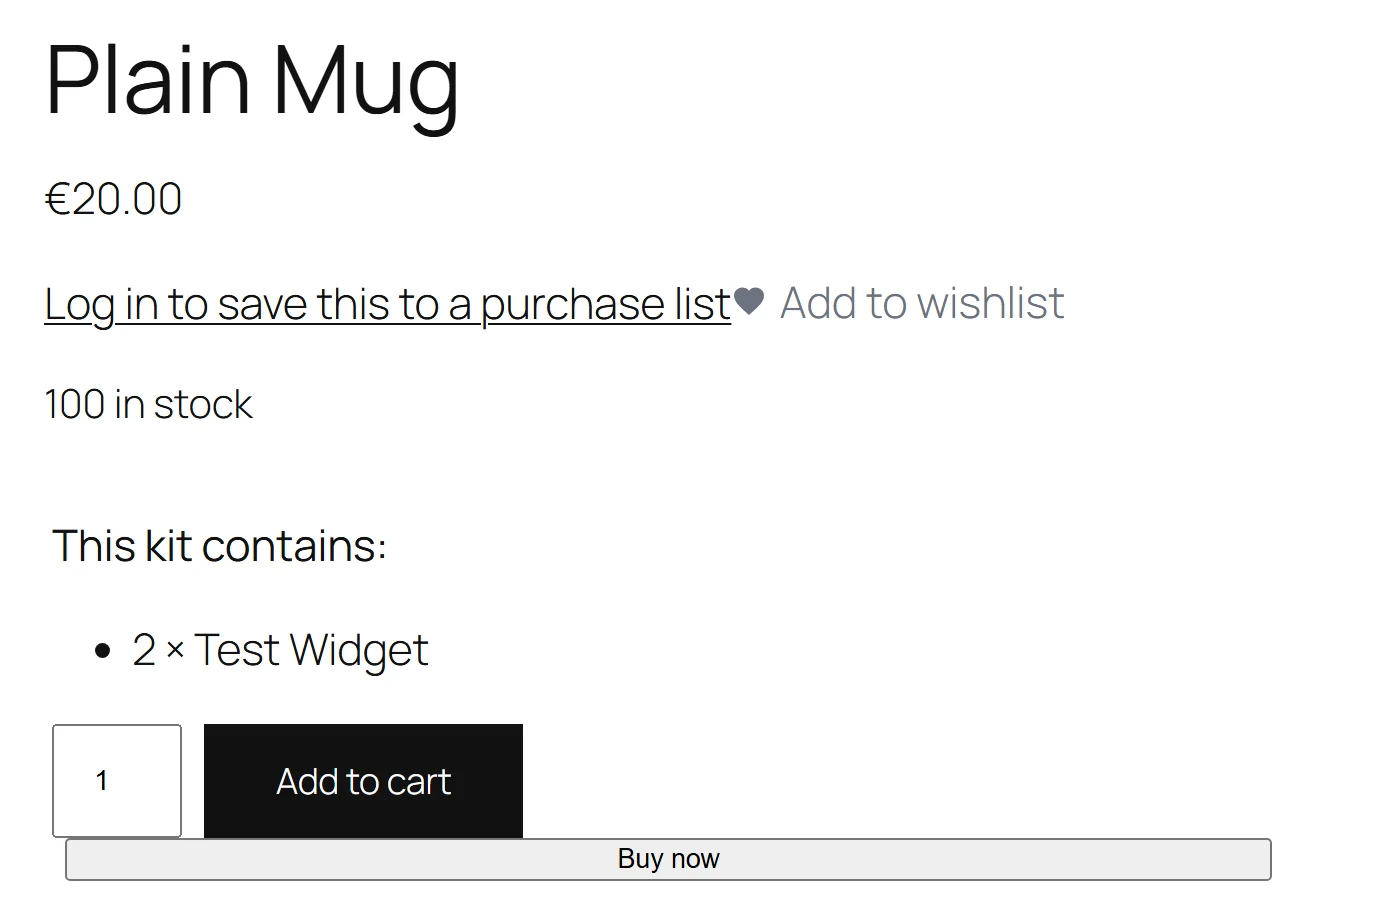
- Open the kit's product page. Above the add-to-cart button you should see This kit contains: followed by each part as "2 × Part name". A part that is out of stock is marked (out of stock).
- Set one part's stock quantity (with stock management on) below what one kit needs, and try to add the kit. You are refused with a message naming the part, how many are in stock and how many the kit needs.
- Restore the stock, add the kit and place a test order. The order line carries a Contains row listing the parts, so the packing slip and the emails say what goes in the box.
Full edition:
- Open the bundle's product page. The bundled items are listed with their quantity fields, a Total that updates as quantities change, and the add-to-cart button.
- Add it to the cart. The cart shows the bundle with its items grouped under it (with the default Item grouping).
- Try removing a mandatory item on its own — the cart refuses. Remove the bundle — its items go with it.
Next steps
- Settings — the kit slots and every bundle option.
- How it works — the stock check, pricing and the cart.
- FAQ and troubleshooting
- Developer reference