
Gatemi Product Add-Ons puts extra options on a product page: an engraving text, a gift-wrap checkbox, a rush-order surcharge. What the shopper picks is priced into the cart line, shown on the cart and recorded on the order.
These docs cover two plugins:
- Gatemi Product Addons — the free edition, coming to wordpress.org. Up to three text or checkbox options per product, each with an optional fee.
- Gatemi Product Add-Ons for WooCommerce — the full edition, sold on gatemi.com. A separate options engine: dropdowns, radio buttons, image swatches, long text, quantities, customer-named prices, dates, file uploads and headings; flat, per-unit and percentage prices; global groups applied to many products; a running total; and an importer from WooCommerce Product Add-Ons.
Anything marked Full edition is only in the paid plugin.
The two editions store their options differently (see FAQ). Choose one per shop rather than planning to move options from one to the other.
Requirements
| Free edition | Full edition | |
|---|---|---|
| WordPress | 6.4 or later | 6.4 or later |
| PHP | 7.4 or later | 7.4 or later |
| WooCommerce | 8.0 or later | 8.0 or later |
The full edition declares compatibility with High-Performance Order Storage (HPOS) and the Cart and Checkout blocks. The free edition writes to orders only through WooCommerce's own line-item meta.
1. Install
Free edition: coming to wordpress.org. Until it is listed, install the zip through Plugins → Add New → Upload Plugin and activate it.
Full edition: download the zip from your gatemi.com account, go to Plugins → Add New → Upload Plugin, upload and activate. Then open WooCommerce → Product Add-Ons and enter your licence key in the License & updates card. The key switches on one-click updates; the plugin works without one.
If both are active, the free edition stands down and says so in a row under its entry on the Plugins screen.
2a. Add options — free edition
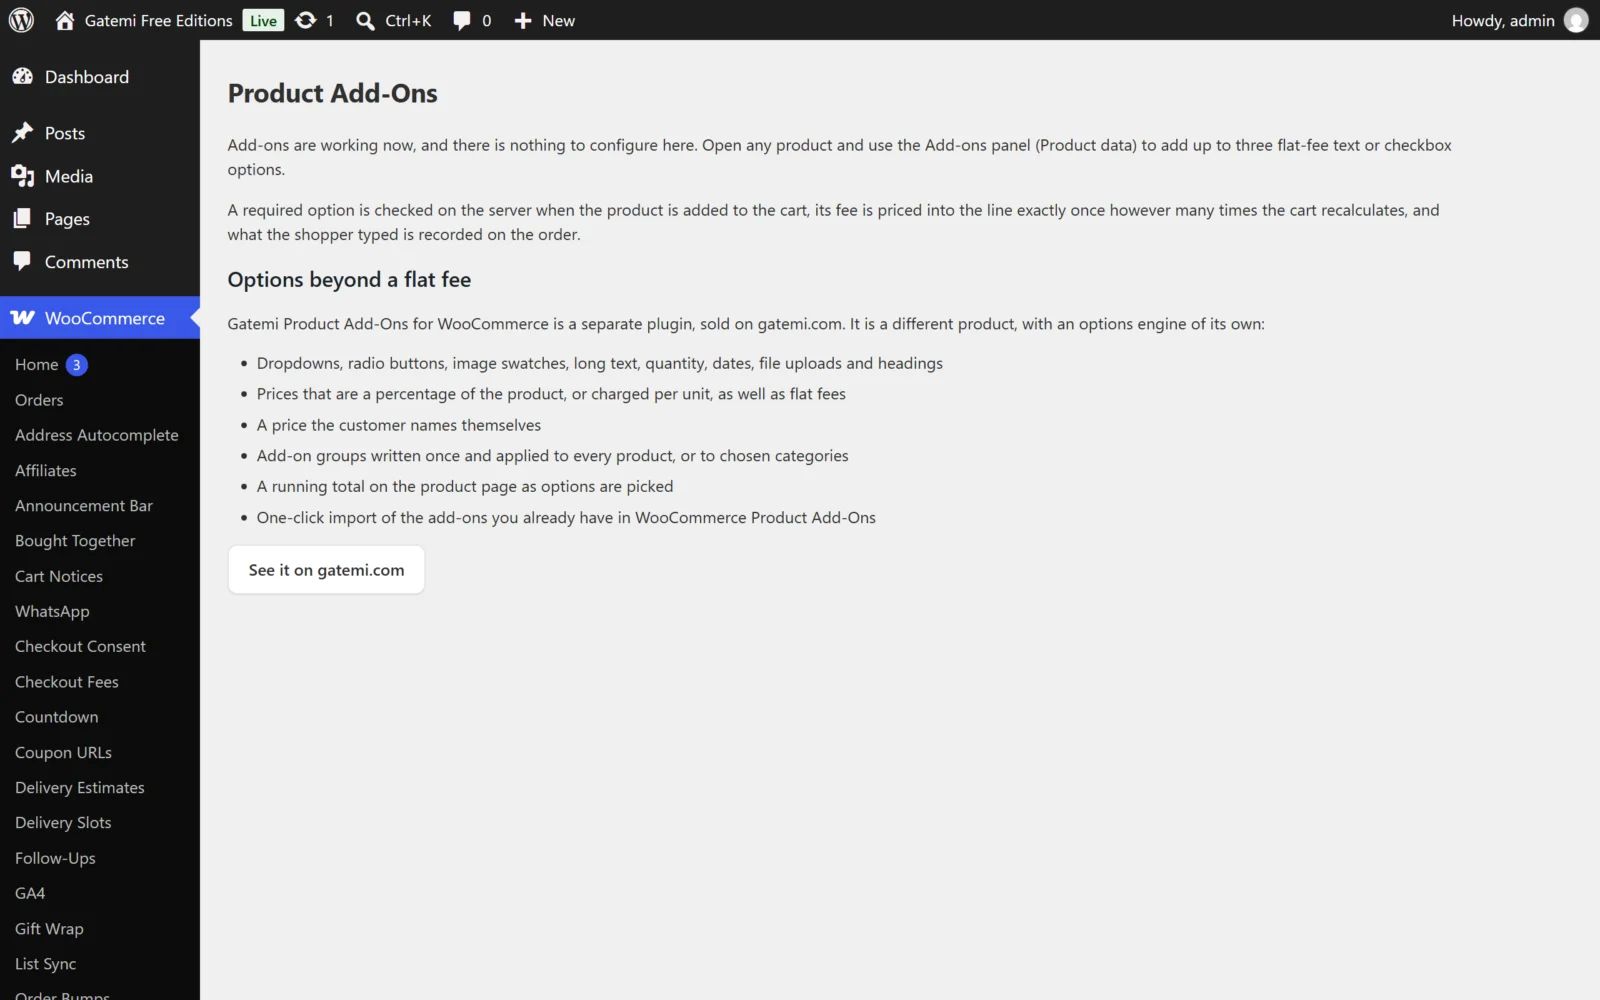
- Open WooCommerce → Product Add-Ons. The screen confirms there is nothing to configure there.
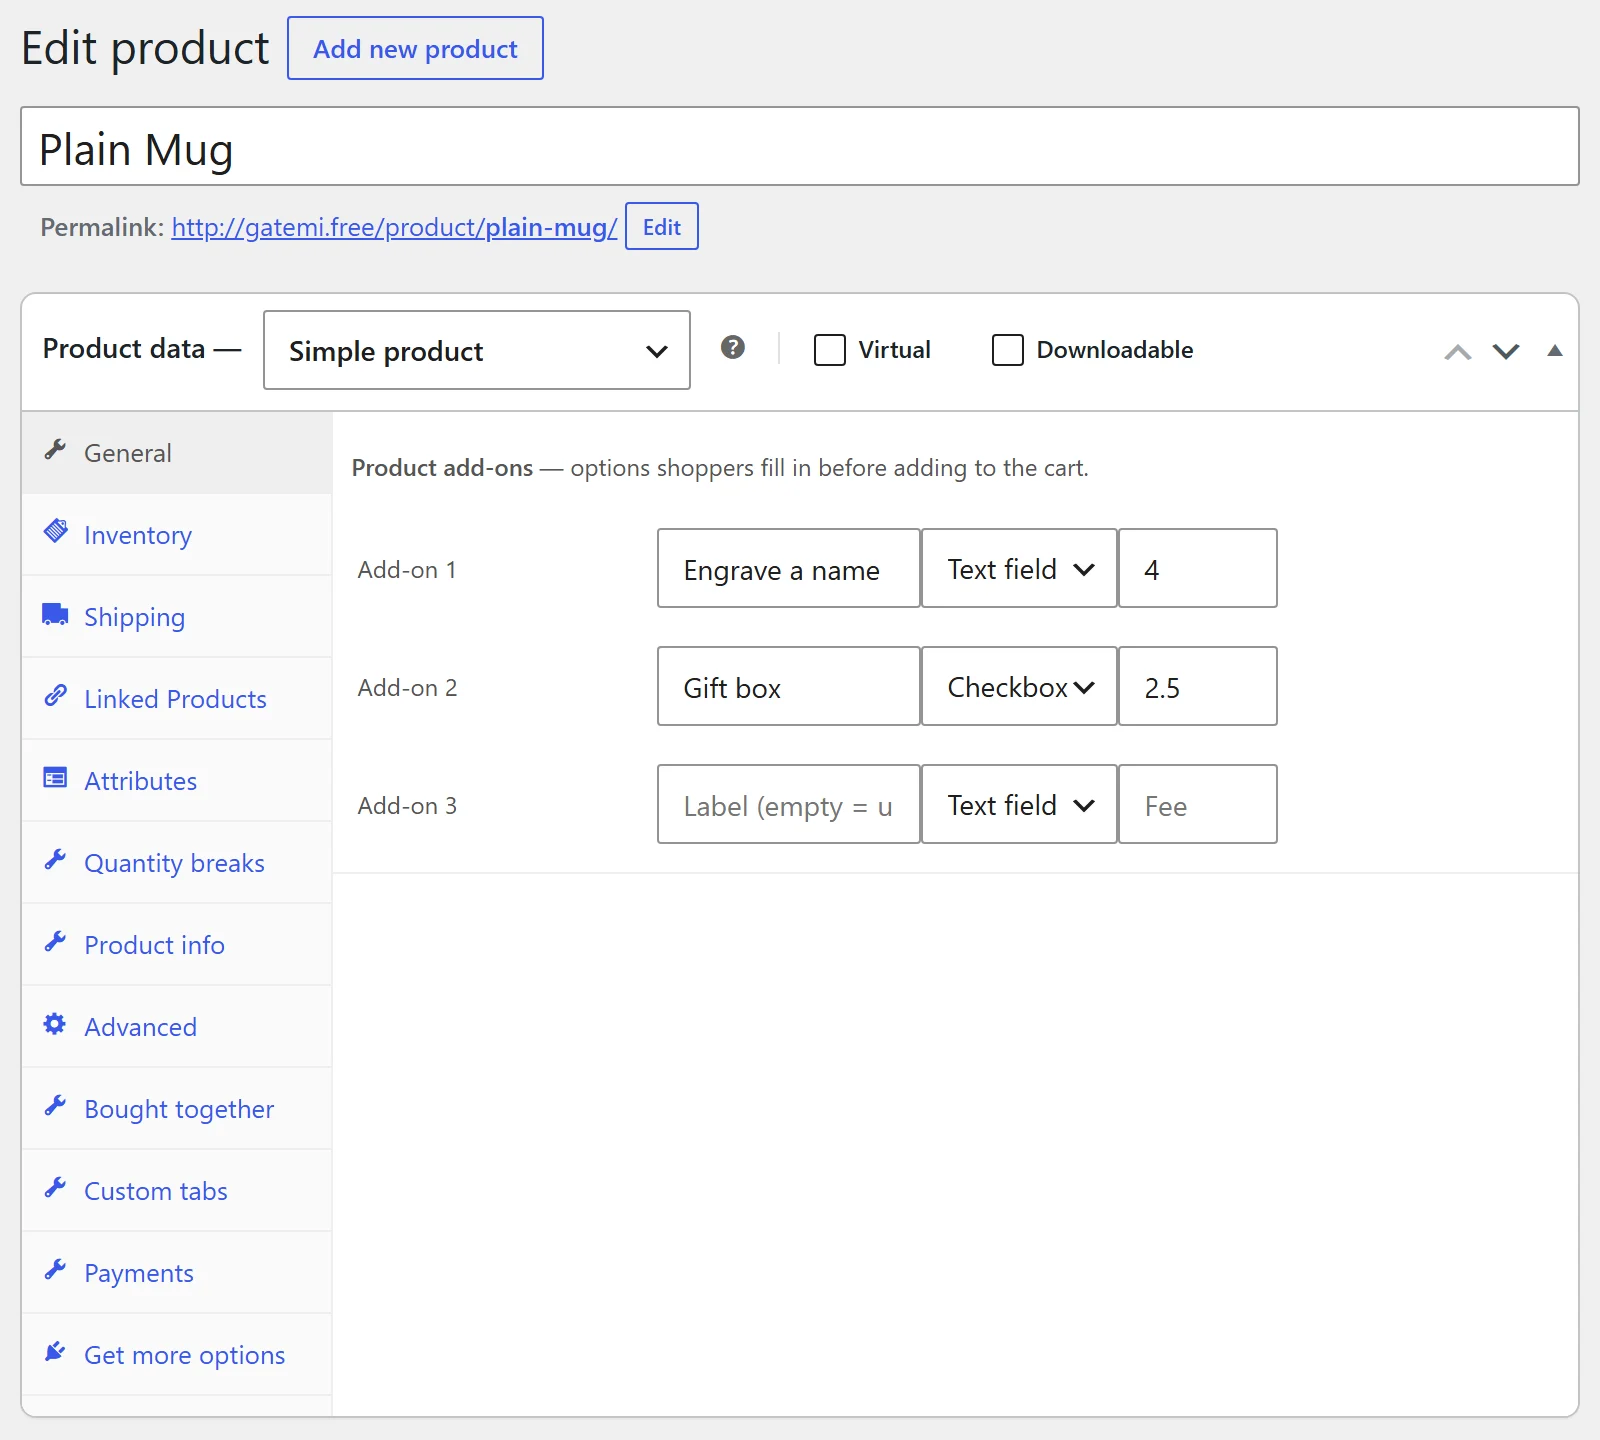
- Edit a product and open Product data → General.
- Scroll to Product add-ons. There are three slots, Add-on 1 to Add-on 3. For each one you want:
- type a Label (an empty label leaves the slot unused);
- choose Text field or Checkbox;
- optionally type a Fee.
- Update the product.
2b. Add options — full edition
- Edit a product and open Product data → Add-ons.
- Choose a field type in Add a field…: Multiple choice, Checkboxes, Short text, Long text, Customer-defined price, Quantity, File upload, Date picker or Heading.
- Fill in the Title and, for multiple choice and checkboxes, the options with their prices.
- Update the product.
To put the same fields on many products, create a global group under WooCommerce → Product Add-Ons → Add group. See Settings.
3. Check it works
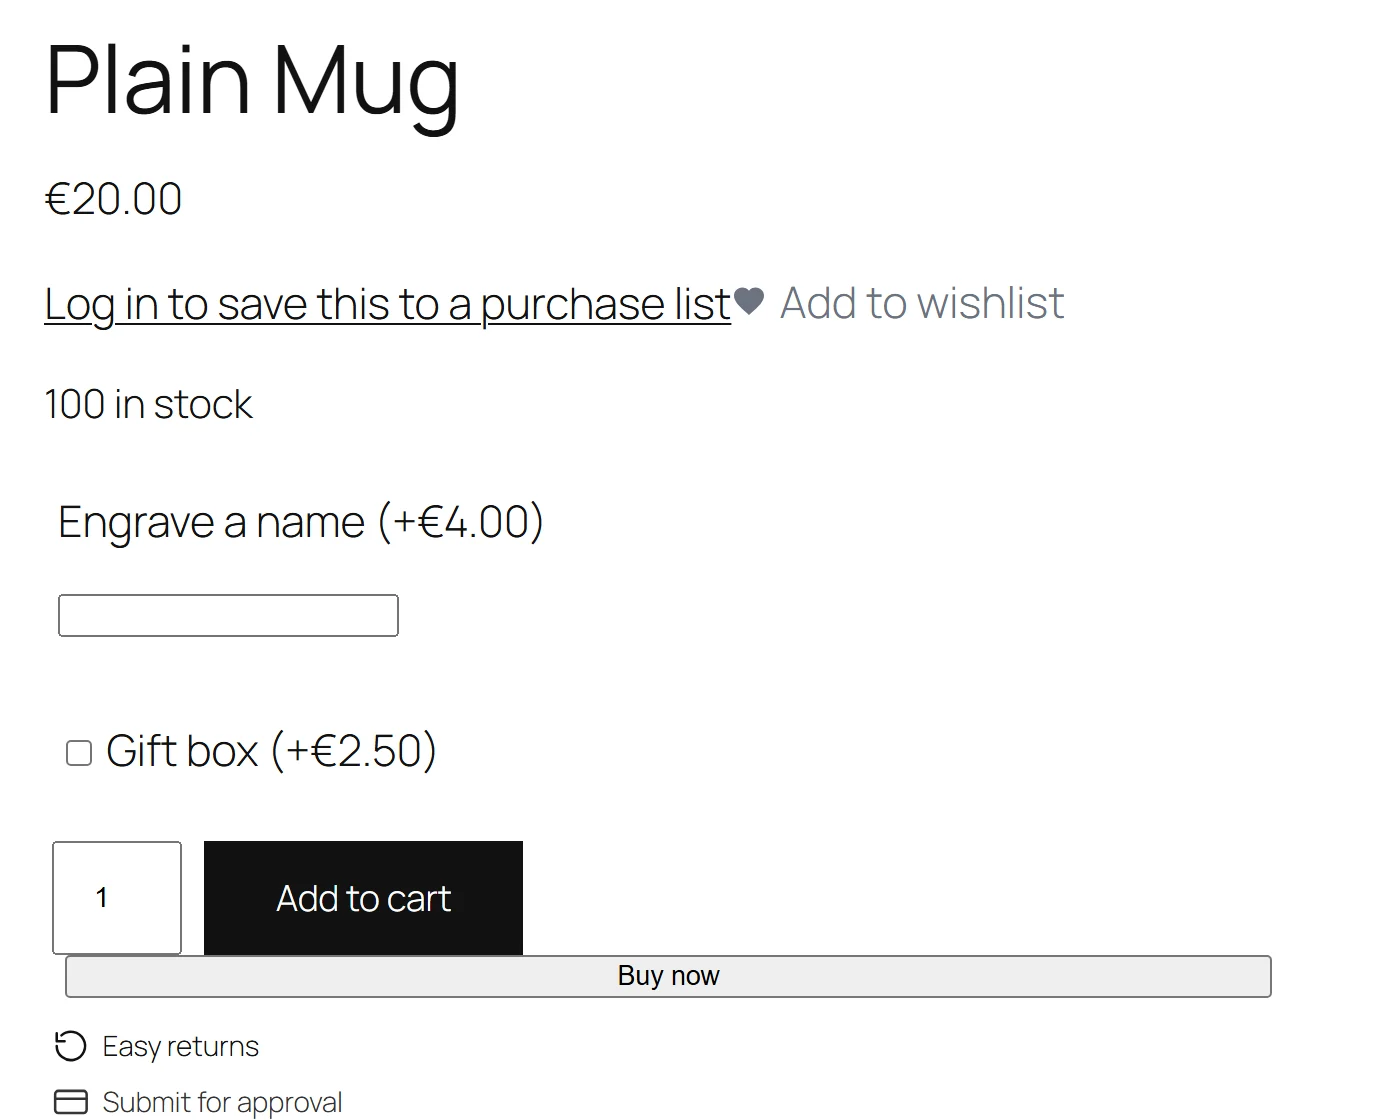
- Open the product page in a private window. The options appear just above the Add to cart button, a fee shown beside its label, for example "Gift wrap (+$5.00)".
- Tick or fill in an option and add the product to the cart.
- The cart line shows the choice ("Gift wrap: Yes (+$5.00)") and the price includes the fee.
- Place a test order. The choice is on the order line in the admin, in the emails and in the customer's account.
Next steps
- Settings — every field and option.
- How it works — how prices are worked out.
- FAQ and troubleshooting
- Developer reference