
Gatemi's India GST plugins make a WooCommerce store's orders GST-ready. They do not change what a customer is charged — WooCommerce's own tax settings do that. They decide which head the tax WooCommerce charged sits under — CGST and SGST for a sale inside your state, IGST for a sale to another state — write that split onto the order when it is placed, and print a GST tax invoice from it with a consecutive invoice number.
There are two editions:
- Gatemi GST Invoice — the free edition. The customer's GSTIN at the checkout (checked by its own check digit), HSN and SAC codes on products, the CGST/SGST/IGST split frozen onto each order, and printable tax invoices with a consecutive series per financial year, up to 20 at a time.
- Gatemi India GST for WooCommerce — the full edition, sold on gatemi.com. It adds a GSTR-1 CSV export, HSN codes on product categories, the place of supply taken from the billing address for shops selling services, your own wording for the checkout field and a note at the foot of every invoice, and printing up to 100 invoices at a time. See the product page.
Both editions share the settings, every order record, the HSN codes and the invoice series counters. Upgrading never renumbers an invoice.
Requirements
- WordPress 6.4 or later
- PHP 7.4 or later
- WooCommerce 8.0 or later (tested up to 10.9)
- WooCommerce taxes set up for India (WooCommerce → Settings → Tax), with your GST rates. The plugin splits the tax WooCommerce charges; it never calculates or adds tax itself.
- MySQL or MariaDB. The invoice series is drawn with a MySQL statement; on SQLite-based installs (such as WordPress Playground) invoice numbers are not drawn from the series.
- Both editions declare compatibility with HPOS and the Cart & Checkout blocks.
Install
Free edition. Gatemi GST Invoice is coming to wordpress.org. Until then, install it from its zip:
- Go to Plugins → Add New Plugin → Upload Plugin.
- Choose
gatemi-gst-invoice.zip, click Install Now, then Activate.
Full edition.
- Download the zip from your gatemi.com account and upload it the same way.
- Go to WooCommerce → India GST, find License & updates, paste your licence key and click Activate.
If both editions are active, the free edition stands down and the full edition does everything.
First setup
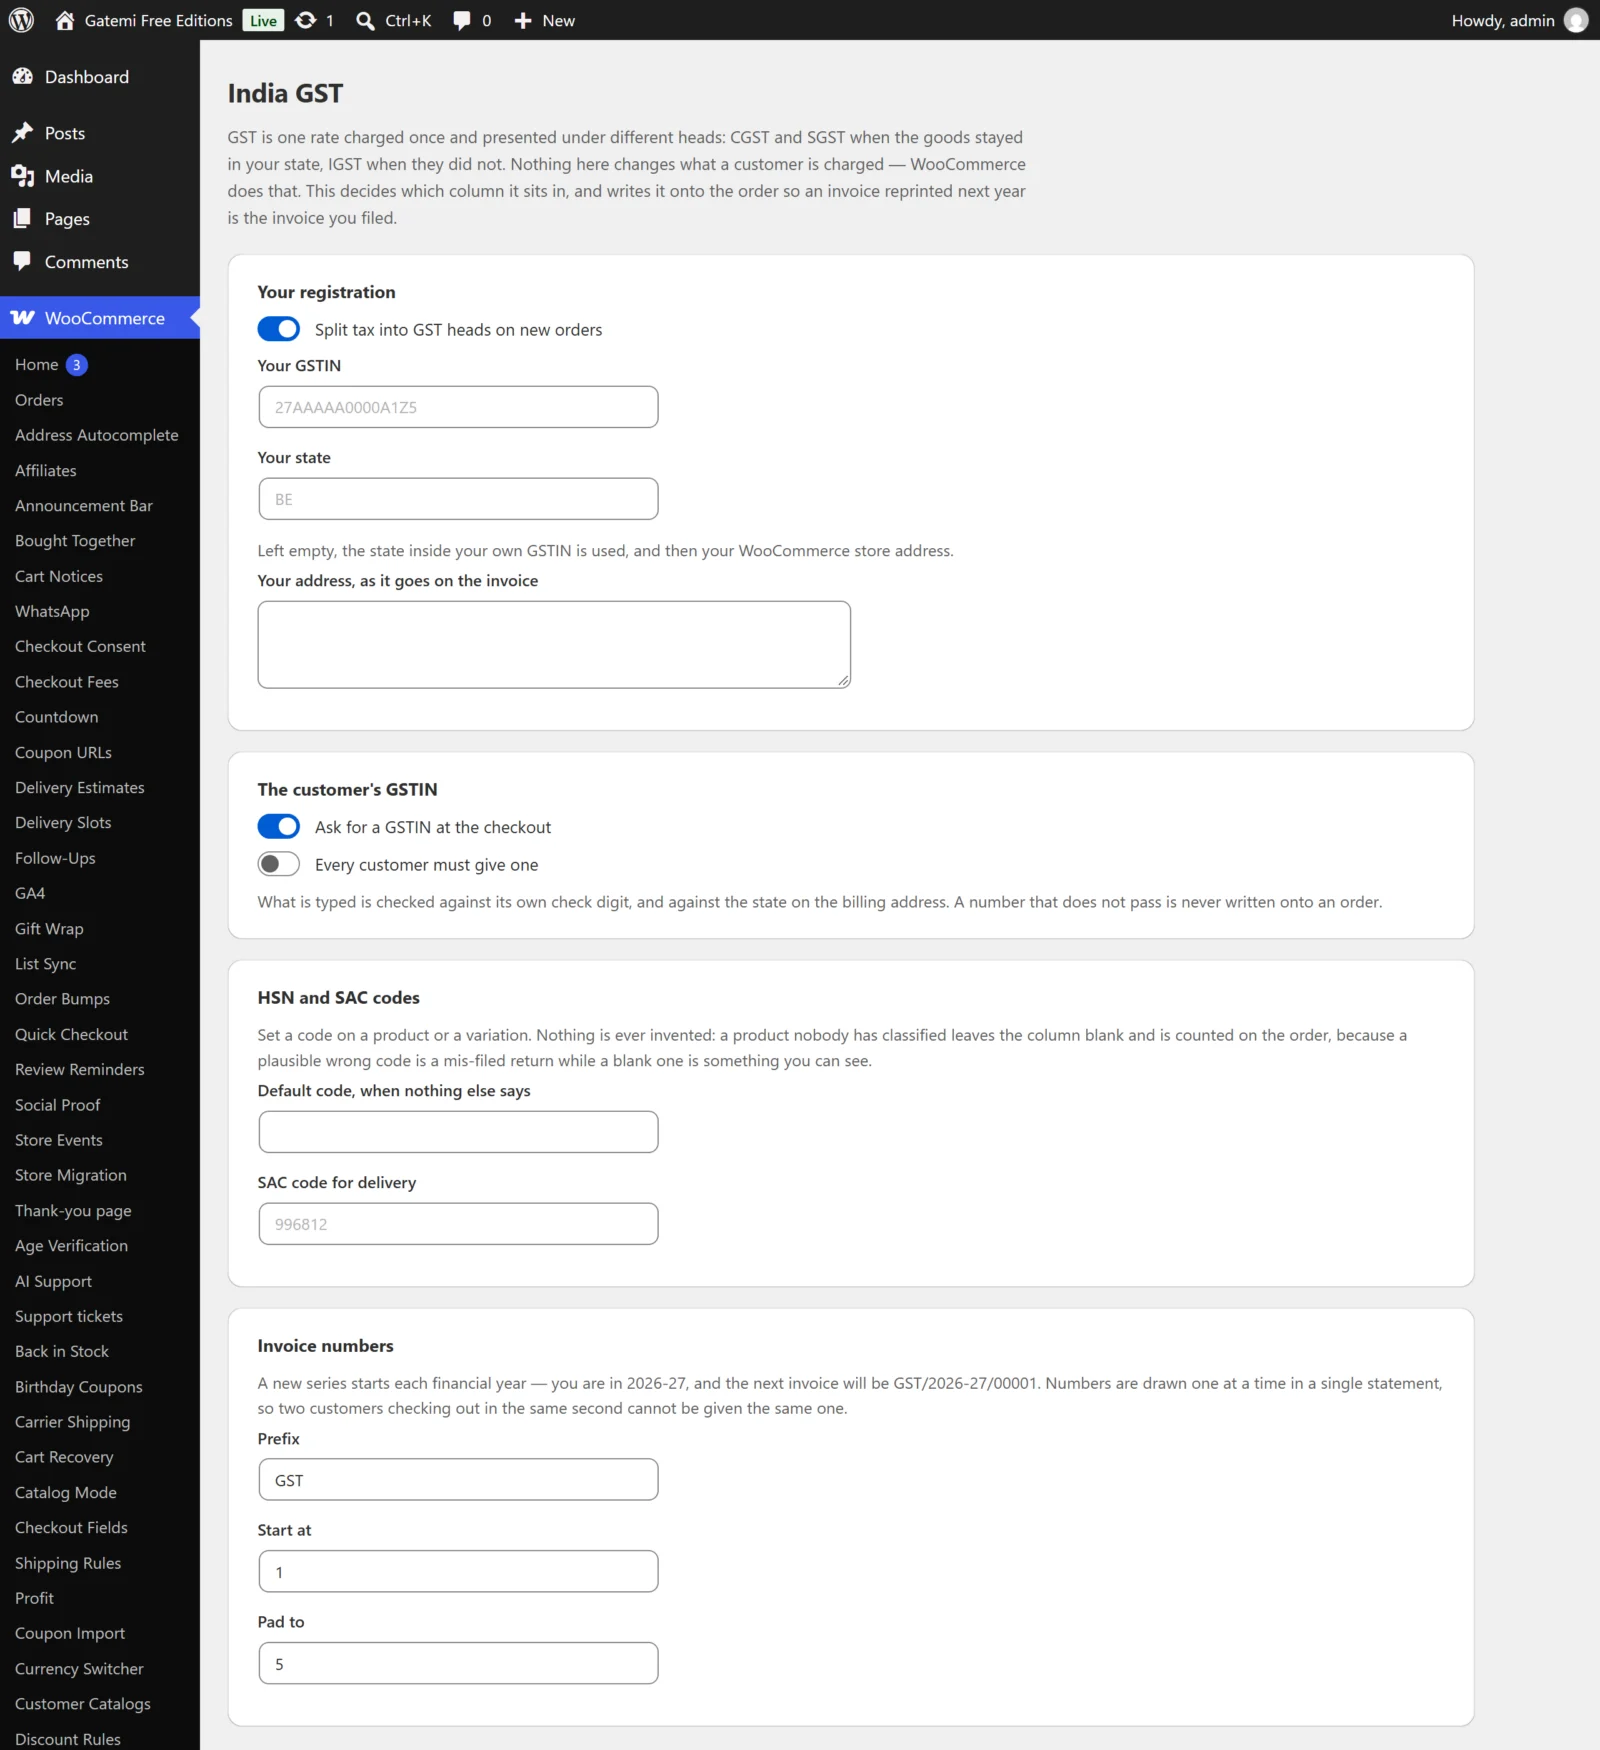
- Go to WooCommerce → India GST (the menu has the same name in both editions).
- Under Your registration, leave Split tax into GST heads on new orders ticked and type Your GSTIN. If it fails its check digit, the screen says so — fix it before taking orders, because every invoice will carry it.
- Leave Your state empty: the state inside your GSTIN is used (for example
27…is Maharashtra). Type it only to override, as WooCommerce's two-letter code (MH,KA,DL). - Type Your address, as it goes on the invoice.
- Under The customer's GSTIN, leave Ask for a GSTIN at the checkout ticked. Tick Every customer must give one only if you sell to businesses alone.
- Under HSN and SAC codes, set a Default code if most of your products share one, and the SAC code for delivery (for example
996812). - Under Invoice numbers, set a Prefix (default
GST), Start at and Pad to. The screen shows what the next invoice number will be. - Click Save changes.
Then give products their codes: open a product, go to Product data → Inventory, and fill HSN / SAC code (a variation has its own box in its panel under Variations). Full edition: you can also set a code on a product category (Products → Categories → edit), which every product in it and its sub-categories uses unless it has its own.
Check it works
- Place a test order with an Indian billing address in your state and a valid GSTIN in the GSTIN (for input credit) field.
- Open the order in WooCommerce → Orders. The GST box shows the place of supply, "Intra-state — CGST and SGST", the two heads with their amounts and the customer's GSTIN.
- The order totals — on the order screen, the customer's emails and My Account — show CGST and SGST rows.
- Set the order to Processing (or Completed) if it is not already — the invoice number is drawn when the order is paid. Click Print tax invoice in the GST box. A printable tax invoice opens in a new tab, with its invoice number. Use your browser's print (or Save as PDF).
- Place another order to a different state: the box says "Inter-state — IGST" and shows one IGST row.
Next: Settings · How it works · FAQ and troubleshooting