
These docs cover both editions:
- Gatemi Checkout Fees — the free edition, coming to wordpress.org.
- Gatemi Checkout Fees for WooCommerce — the full edition, sold on gatemi.com.
Anything marked Full edition is only in the paid plugin. Everything else is in both.
The plugin adds charges to the cart total that are not products: a handling charge on small orders, a fee on deliveries abroad, a cash-on-delivery charge, and an optional shipping-insurance box the shopper can tick. Every charge is a real WooCommerce fee — it shows as its own line in the cart, the checkout, the order and every email, and it lands on the order as a fee line where an accountant expects it.
Requirements
| Free edition | Full edition | |
|---|---|---|
| WordPress | 6.4 or later | 6.4 or later |
| PHP | 7.4 or later | 7.4 or later |
| WooCommerce | 8.0 or later (tested up to 10.9) | 8.0 or later (tested up to 10.9) |
Both editions declare compatibility with WooCommerce's High-Performance Order Storage (HPOS) and with the Cart and Checkout blocks. Neither adds a database table or a stylesheet on a shopper's page, and the only script either loads there is the small insurance box on the Cart and Checkout blocks.
1. Install
Free edition: coming to wordpress.org. Once it is listed, go to Plugins → Add New, search for "Gatemi Checkout Fees", install and activate.
Full edition: download the zip from your gatemi.com account, then go to Plugins → Add New → Upload Plugin, upload it and activate. Open WooCommerce → Checkout Fees, find the License & updates card, paste your licence key (it looks like GM-XXXXX-XXXXX-XXXXX-XXXXX-XXXXX) and press Activate. The plugin works without a key; the key switches on one-click updates and support.
You only need one edition. If both are active, the free edition stands down and says so in a row under its entry on the Plugins screen — otherwise every fee would be charged twice. Deactivate the free one: the full edition reads the same rules and settings.
2. Open the screen
Go to WooCommerce → Checkout Fees. You need the manage_woocommerce capability, which shop managers and administrators have.
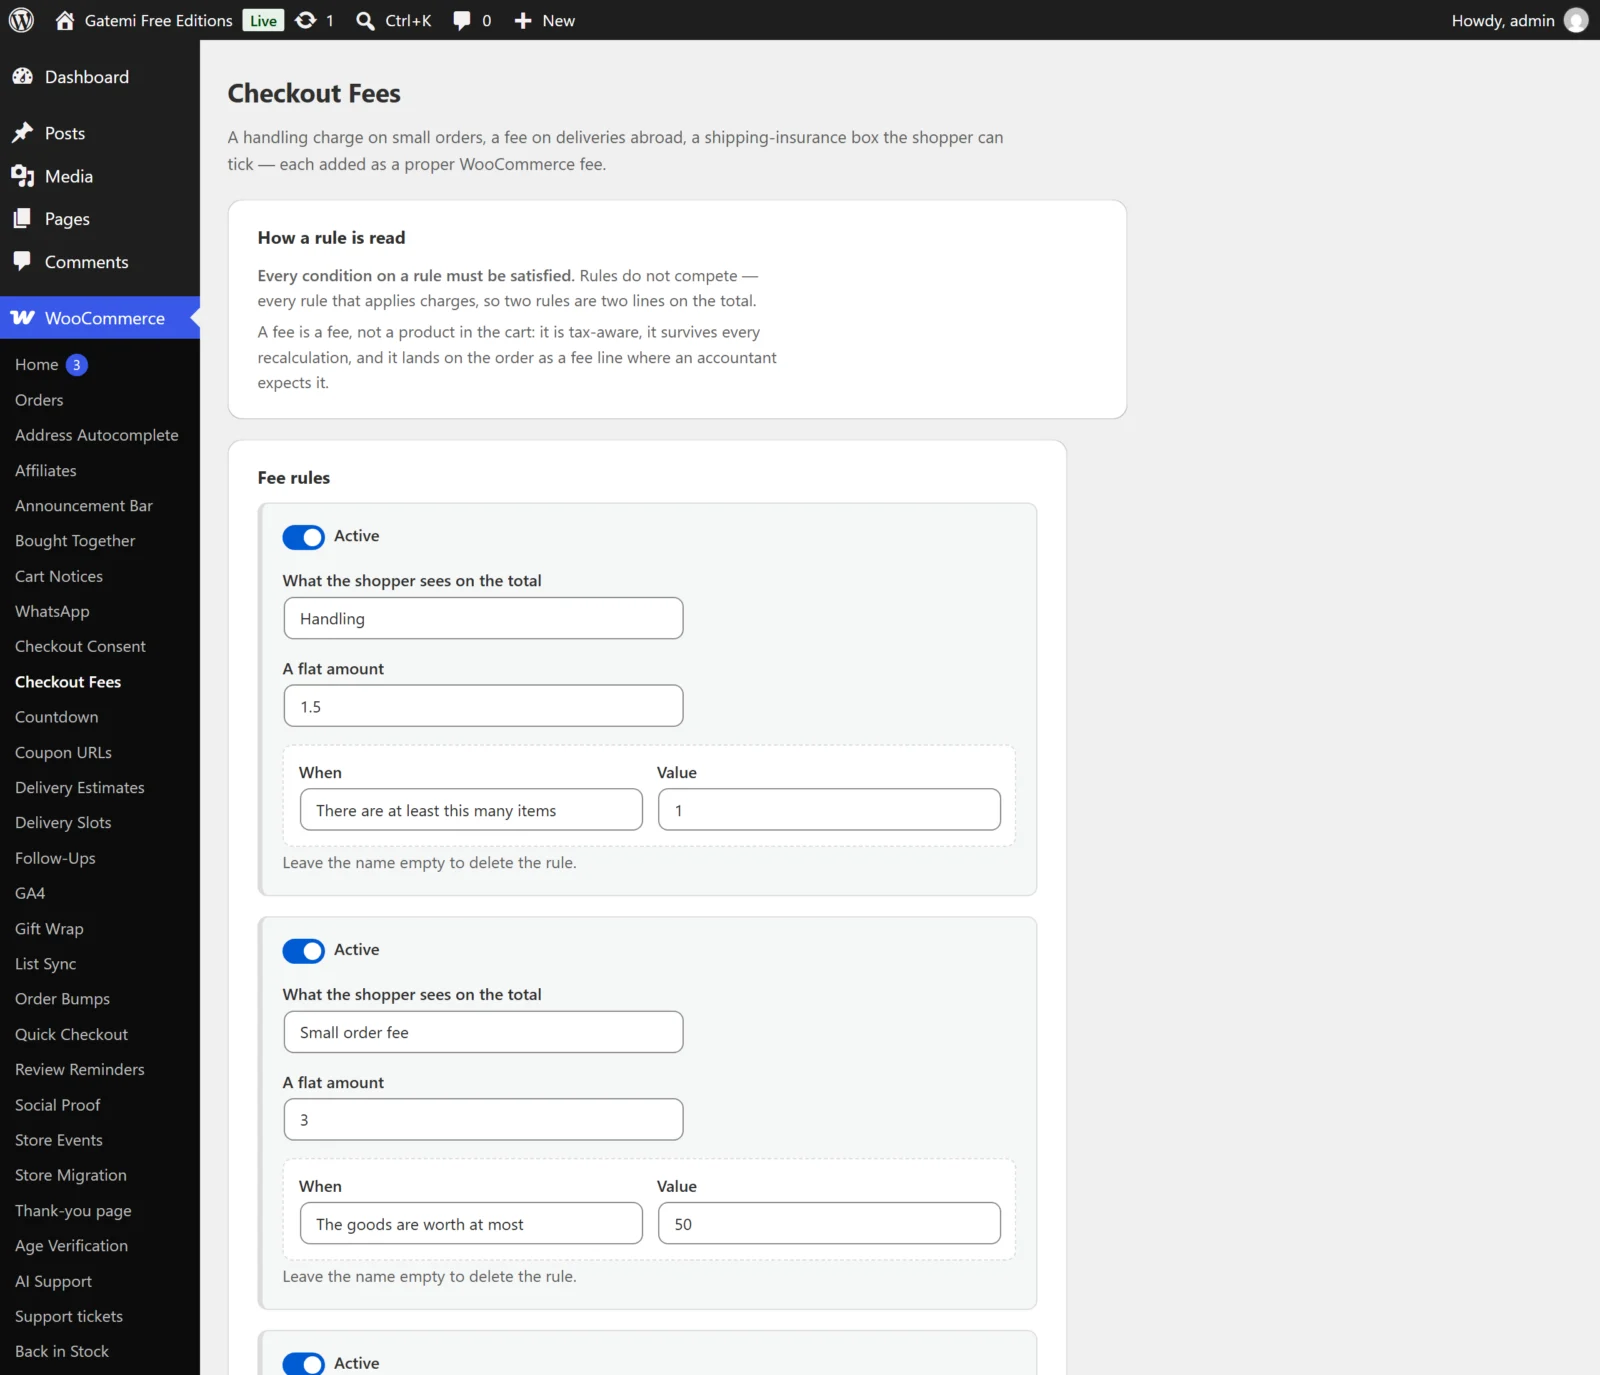
The free edition shows three rule rows. The full edition shows every saved rule plus an empty row, and an Add another rule button.
3. Write your first rule
A common first rule is a handling charge on small orders.
- In the first row, tick Active.
- In What the shopper sees on the total, type
Small order handling. - In A flat amount, type
2.50. - Under When, choose The goods are worth at most and type
20in Value. - Press Save changes.
Every cart whose goods are worth 20 or less now carries a "Small order handling" line of 2.50.
Full edition: the row also has Charge (a flat amount or a percentage), Measured against (the base of a percentage), Taxable, and as many conditions as you want. A new condition box appears each time you save one. See Settings.
4. Offer shipping insurance (optional)
- In the Shipping insurance card, tick Offer shipping insurance.
- Type a price in A flat amount, for example
3.95. - Optionally change What the box says and add A note under the box such as "Covers loss in transit."
- Press Save changes.
The box is never ticked for the shopper — there is deliberately no setting for that, because a charge nobody asked for is a chargeback. It does not appear at all while its price is nothing.
Full edition: the price can be a flat amount plus a percentage of the goods with a minimum, the charge can be taxable, and you choose whether the box shows on the cart, the checkout or both.
5. Check it works
- Open your shop in a private window and add a product worth less than 20.
- Go to the cart. You should see the fee as its own line above the total, and, if you switched insurance on, a Shipping insurance row with a tick box and its price.
- Tick the insurance box and press Update cart. The insurance line is added to the total.
- Add more products until the goods are worth more than 20 and update the cart. The handling line disappears — rules are worked out again on every recalculation.
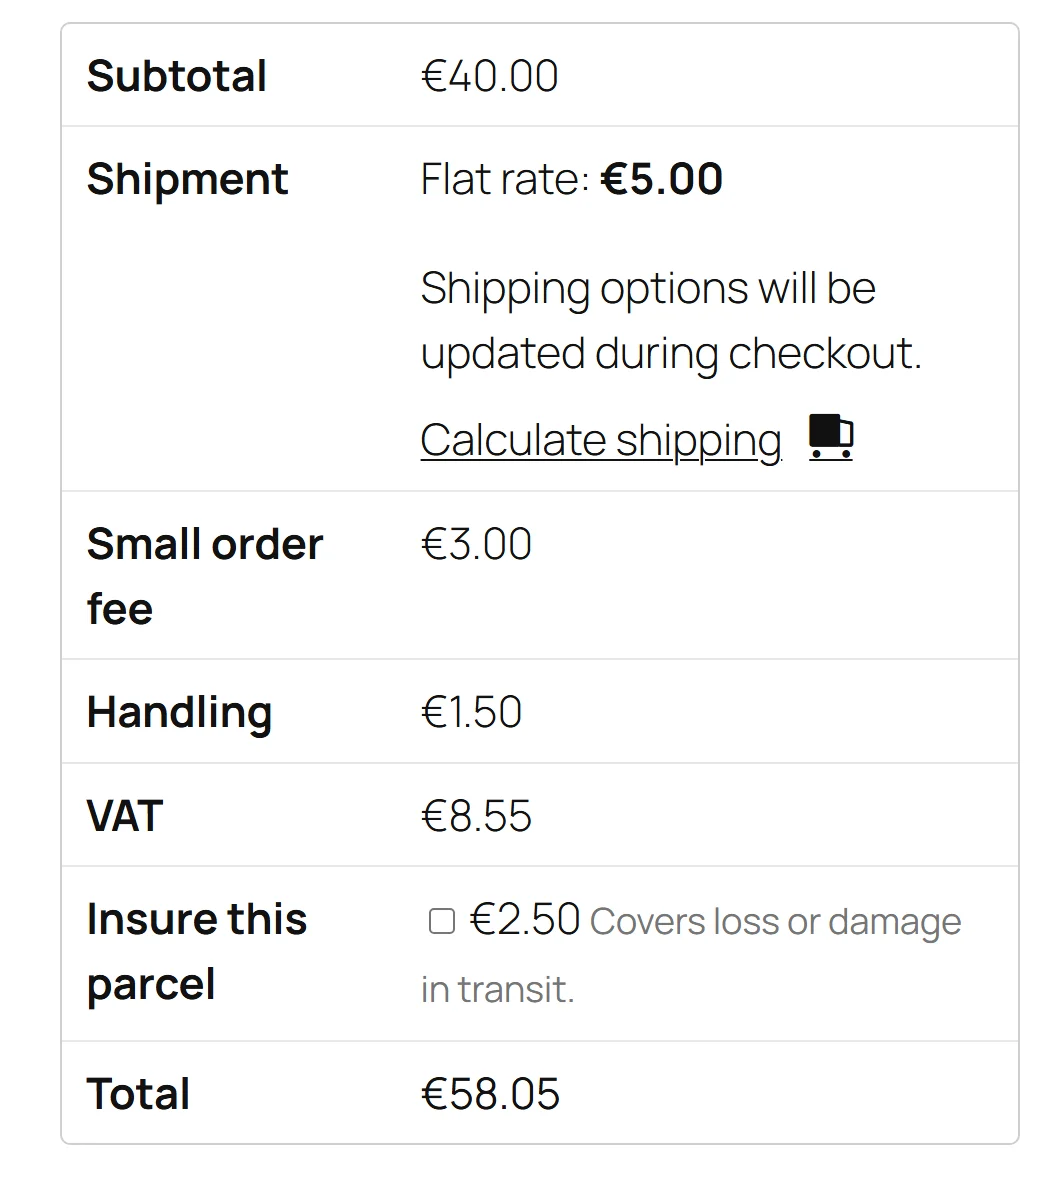
- Place a test order with insurance ticked. Open the order in WooCommerce → Orders: the fees are fee lines on the order, and a Shipping insurance box on the right says what the goods were insured for and what the cover cost.
The fees and the insurance tick box both work on the classic cart and checkout and on the Cart and Checkout blocks; see FAQ & troubleshooting for how the box appears on a block-based store.
Next
- Settings — every field on the screen.
- How it works — the rules the plugin follows, and a worked card-surcharge example.
- Developer reference — filters, options and order meta.