
Gatemi Variation Swatches shows a variable product's options as swatches — a coloured chip, a small image or a labelled button — instead of a dropdown. You choose a swatch type for each product attribute, and set each option's colour or image once, on the attribute's own terms.
These docs cover both editions:
- Gatemi Variation Swatches — the free edition, coming to wordpress.org.
- Gatemi Variation Swatches for WooCommerce — the full edition, sold on gatemi.com.
Anything marked Full edition is only in the paid plugin. Everything else is in both.
Requirements
| Free edition | Full edition | |
|---|---|---|
| WordPress | 6.4 or later | 6.4 or later |
| PHP | 7.4 or later | 7.4 or later |
| WooCommerce | 8.0 or later | 8.0 or later |
Both editions declare compatibility with High-Performance Order Storage (HPOS) and with the Cart and Checkout blocks.
Swatches work on global product attributes — the ones under Products → Attributes. An attribute typed straight into a single product ("custom product attribute") has no terms to carry a colour or an image, so it keeps WooCommerce's dropdown.
1. Install
Free edition: coming to wordpress.org. Until it is listed, install the zip through Plugins → Add New → Upload Plugin and activate it.
Full edition: download the zip from your gatemi.com account, go to Plugins → Add New → Upload Plugin, upload and activate. Then open WooCommerce → Variation Swatches and enter your licence key in the License & updates card. The plugin works without a key; the key switches on one-click updates and support.
You only need one edition. If both are active, the free edition stands down and says so in a row under its entry on the Plugins screen.
2. Choose a swatch type for an attribute
- Make sure you have a global attribute with terms — for example Products → Attributes, attribute Colour with terms Red, Blue and Green, used for the variations of a variable product.
- Go to WooCommerce → Variation Swatches. You need the
manage_woocommercecapability. - Next to Colour (
pa_colour), choose Color swatches. - Leave Show swatches on product pages ticked and press Save changes.
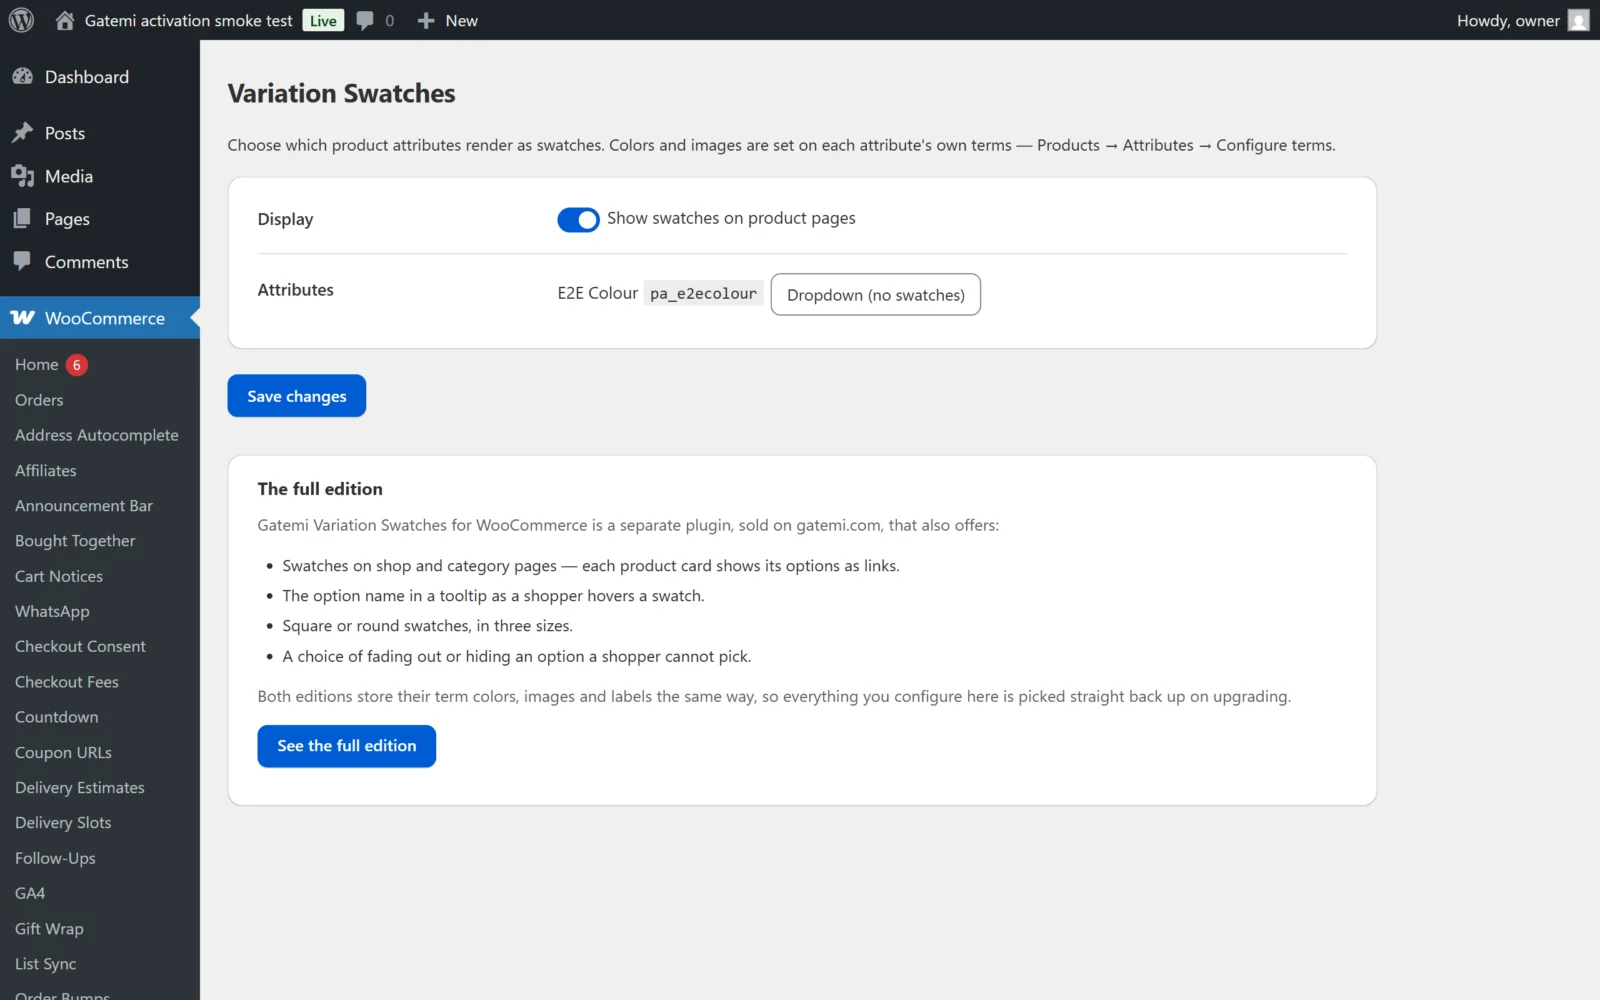
Every attribute starts as Dropdown (no swatches), so nothing changes on your storefront until you choose a type.
3. Give each option its colour
- Go to Products → Attributes, and click Configure terms next to Colour.
- Edit Red. Below the usual fields you now see Swatch color, and Swatch label (optional — stands in for the term name).
- Pick the colour and press Update. Repeat for Blue and Green.
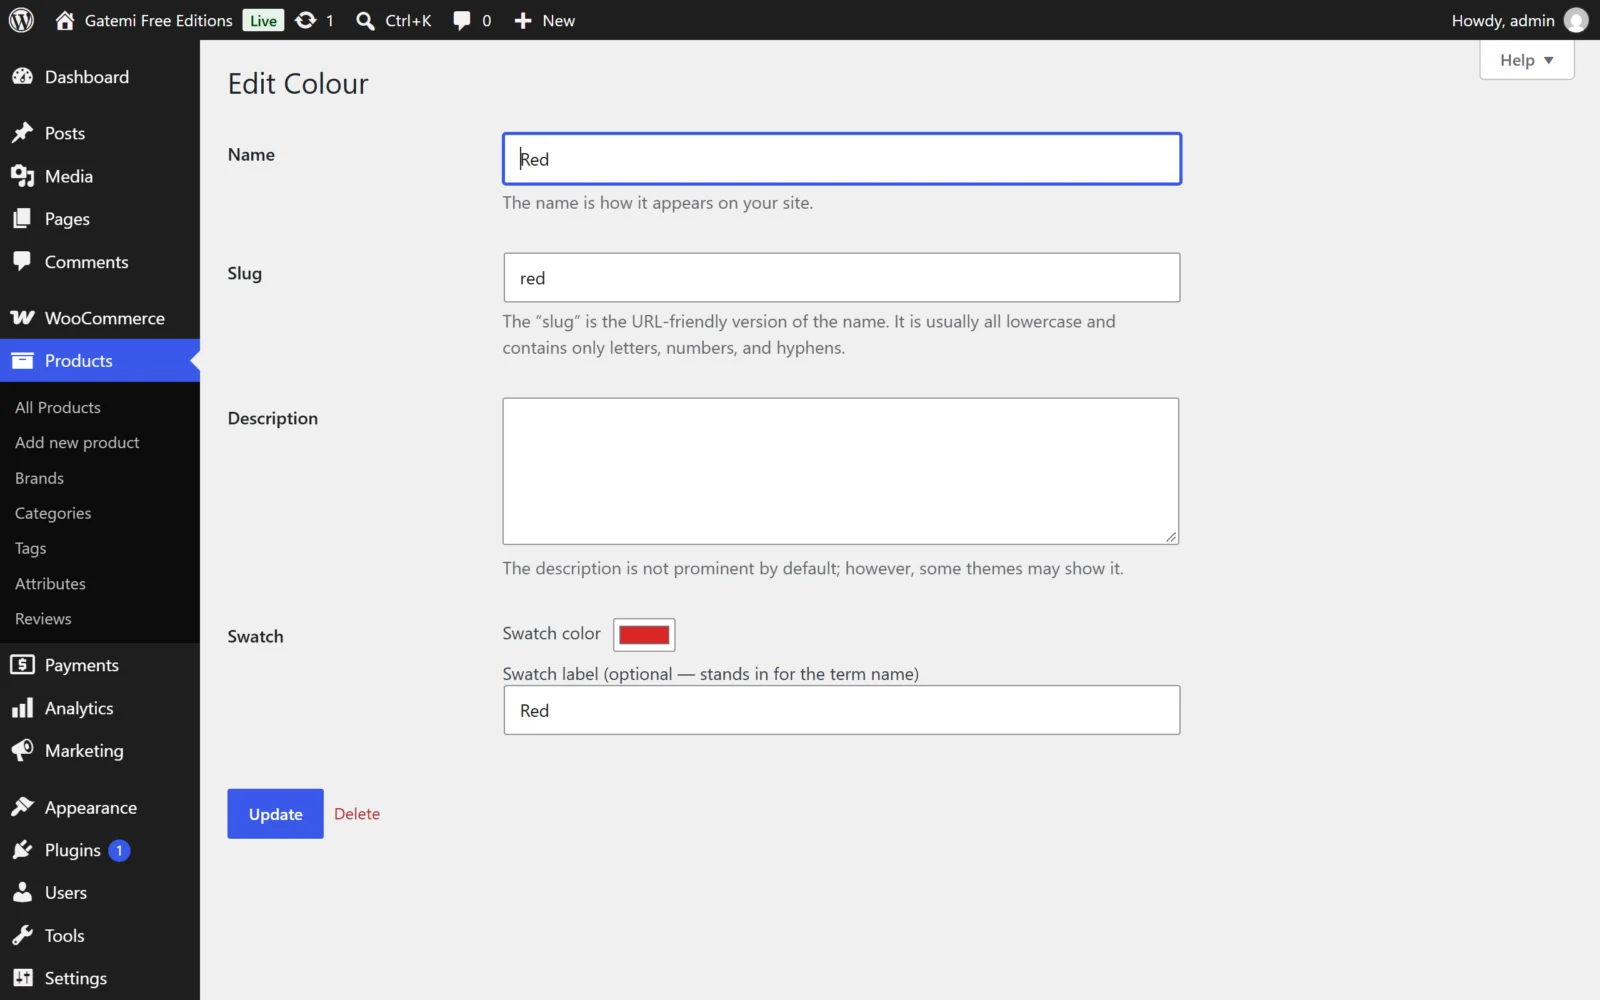
For an attribute set to Image swatches, the term shows Choose swatch image (the media library opens) and Remove image instead. For Label swatches, only the label field appears.
The swatch fields appear only on the terms of attributes set to a swatch type. Set the type first, then edit the terms.
4. Check it on a product
- Open a variable product that uses Colour in a private window.
- Where the Colour dropdown was, you see three coloured swatches.
- Click one. It is marked as selected, the price and stock update, and Add to cart becomes available exactly as if you had picked from the dropdown — because, underneath, you did.
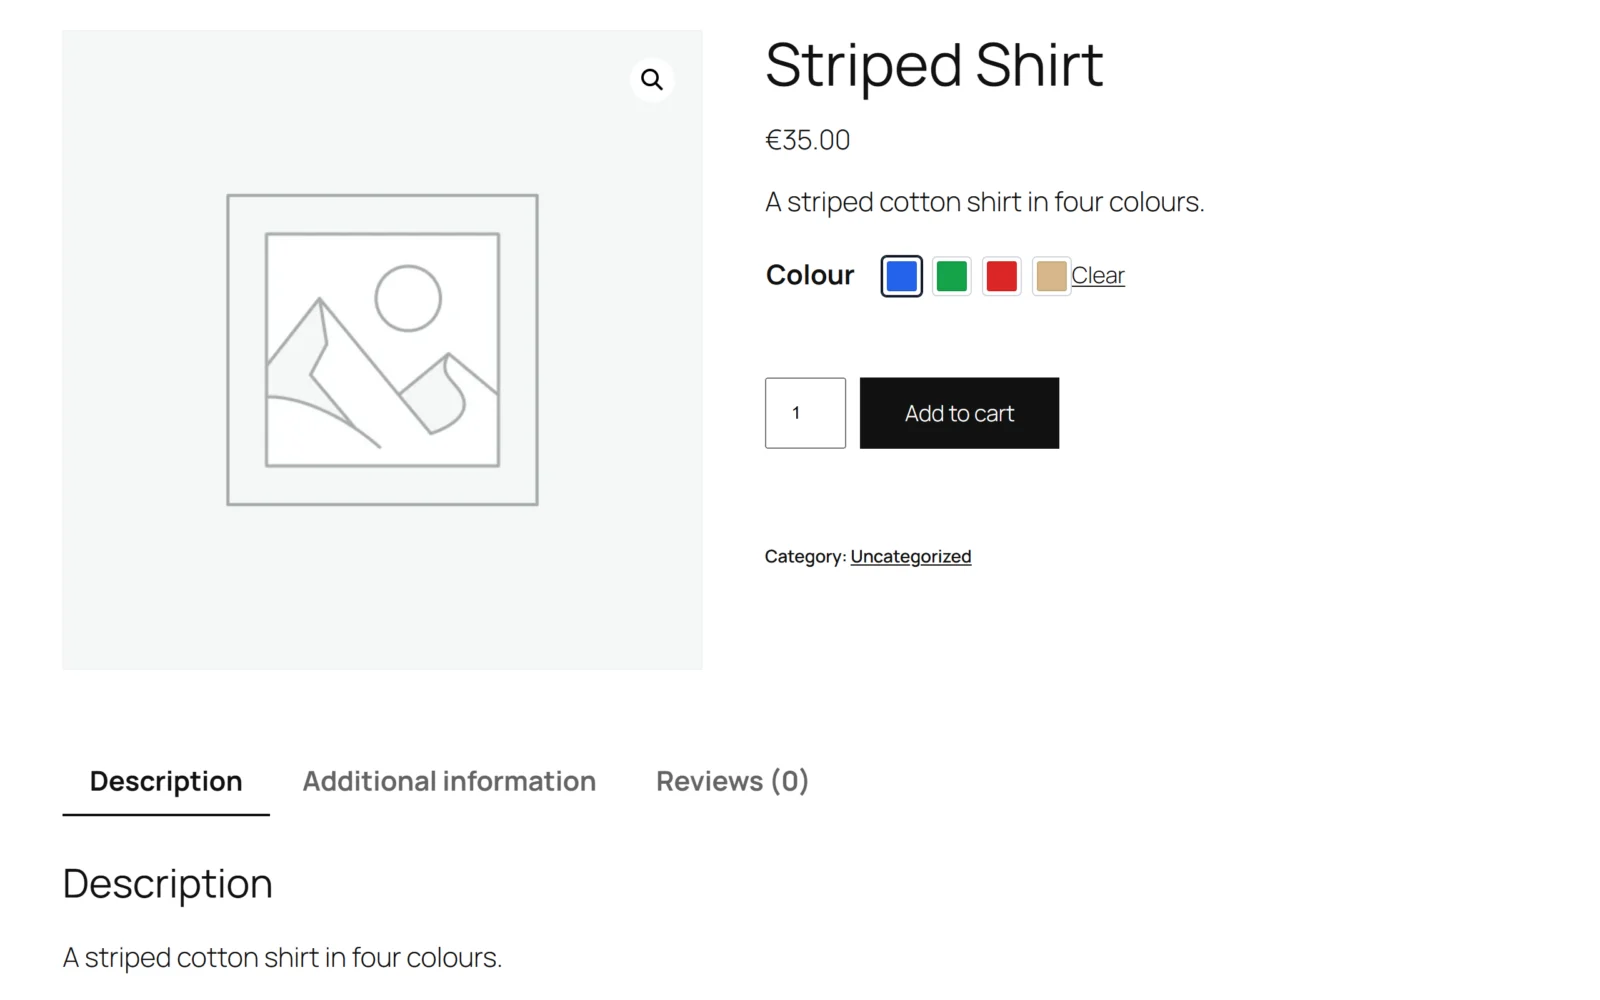
An option no variation can provide with the choices already made is faded out and cannot be clicked.
How it fits WooCommerce
The plugin does not replace the variation form. WooCommerce still renders its <select>; the swatches are added beside it, and clicking a swatch sets that select and fires its change event. WooCommerce's own variation logic — availability, prices, images, "Clear" — does the rest. A visitor whose JavaScript has not run gets the working dropdown.
Full edition: the same swatches can also appear on shop and category pages, under each variable product — see Settings.
Next steps
- Settings — every setting and the term fields.
- How it works — decorate, never replace.
- FAQ and troubleshooting
- Developer reference