
Gatemi Stripe for WooCommerce takes payments through your own Stripe account: cards with 3-D Secure, Apple Pay and Google Pay, Link, bank debits (SEPA, ACH, BECS) and over twenty local payment methods — 37 methods in all. Your API keys are entered once, on one screen, and used by every method you switch on.
It is a free plugin with no paid edition. There is no Gatemi account or middleman: the plugin talks to Stripe with your keys, and no payment data is sent to Gatemi.
Requirements
- WordPress 6.4 or later
- PHP 7.4 or later
- WooCommerce 8.0 or later (tested up to 10.9)
- Compatible with High-Performance Order Storage and the Cart and Checkout blocks
- A Stripe account
- HTTPS on the live site. Stripe will not show Apple Pay or Google Pay on an insecure page, and card details cannot be collected safely; the settings screen warns you if live mode is on without HTTPS.
The header carries Requires Plugins: woocommerce.
1. Install
Gatemi Stripe is coming to wordpress.org. Until it is listed:
- Download the plugin zip.
- Go to Plugins → Add New Plugin → Upload Plugin, choose the zip and press Install Now.
- Press Activate.
Until keys are saved, WooCommerce's own screens, the Plugins screen and the dashboard show one notice: Gatemi Stripe is active but has no API keys yet, so it cannot take payments.
Already using another Stripe plugin? Read Moving from another Stripe plugin before you deactivate it.
2. Get your API keys from Stripe
Stripe keeps test mode and live mode completely separate, each with its own keys, its own customers and its own webhooks.
- Sign in to the Stripe Dashboard.
- Switch on Test mode (the toggle in the Dashboard).
- Go to Developers → API keys. Copy the Publishable key (
pk_test_…) and the Secret key (sk_test_…). A restricted key (rk_test_…) can be used as the secret key if you give it the permissions the plugin needs. - Later, when you are ready to take real money, switch test mode off and copy the live keys (
pk_live_…,sk_live_…) the same way.
3. Enter them in WooCommerce
- Go to WooCommerce → Stripe (capability
manage_woocommerce). - Under Connection, leave Mode on Test.
- Paste the Test publishable key and Test secret key.
- Press Save changes. The status at the top reads Connected — Test mode.
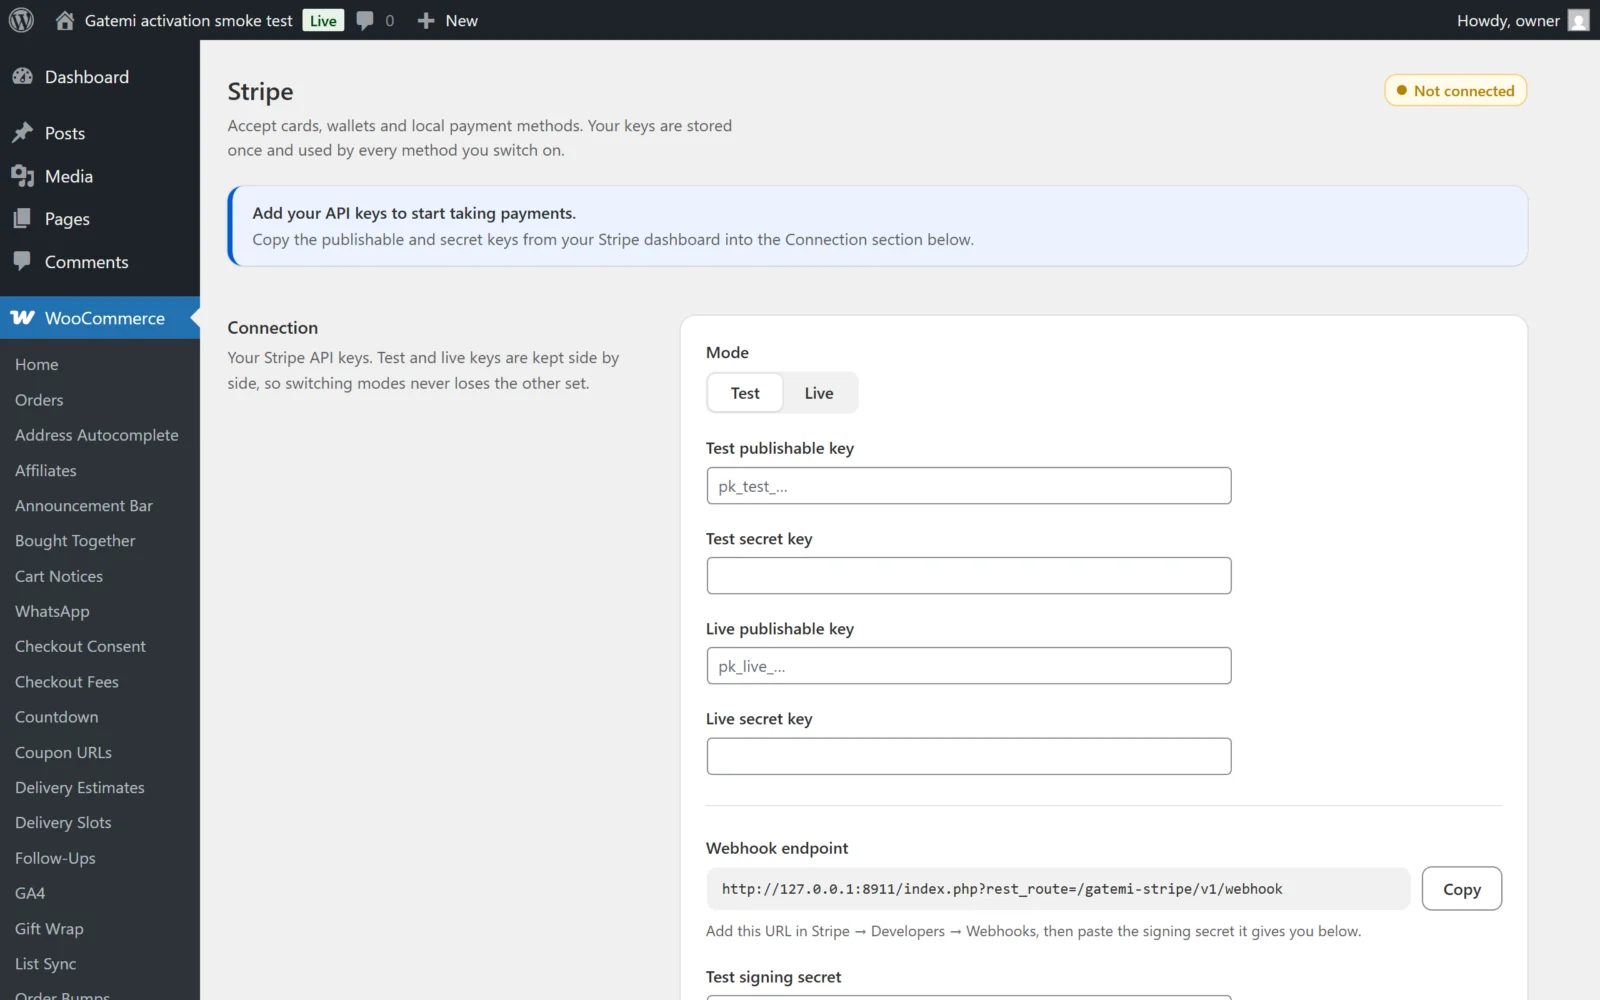
Test and live keys are stored side by side, so switching Mode never deletes the other set. If the keys you saved belong to the other mode — live keys in the test boxes, the commonest setup mistake — a banner says These keys are for the other Stripe mode, because Stripe will reject every payment until they match.
Secret keys are never shown again after saving; the field shows a mask, and leaving the mask as it is keeps the stored key.
4. Set up the webhook
For cards the payment is complete before the shopper leaves the page, so orders are right without webhooks. For anything that settles later — bank debits, vouchers, redirect methods whose shopper never comes back, refunds made in Stripe, disputes, Radar reviews — the webhook is how the order finds out. Set it up.
- On WooCommerce → Stripe, under Connection, copy the Webhook endpoint. It is your site's
/wp-json/gatemi-stripe/v1/webhook. - In the Stripe Dashboard (still in test mode) go to Developers → Webhooks and add an endpoint with that URL.
- Select these events — the ones the plugin acts on:
payment_intent.succeededpayment_intent.payment_failedpayment_intent.canceledpayment_intent.requires_actioncharge.pendingcharge.refundedcharge.dispute.createdcharge.dispute.closedreview.openedreview.closed
- Save the endpoint, then reveal its Signing secret (
whsec_…). - Paste it into Test signing secret and save.
Do the same in live mode when you go live — a live-mode endpoint has its own signing secret, which goes into Live signing secret. Both modes can point at the same URL; an event for the mode you are not in is ignored.
Without a signing secret for the current mode, every webhook is refused — with no secret there is no way to tell Stripe apart from anyone else who found the URL.
5. Switch on payment methods
Under Payment methods, switch on what you want to offer. Credit / debit card is on by default. Each method shows the currencies and countries Stripe accepts it in; a method outside those limits is not shown at checkout.
Most methods other than cards must also be turned on in your Stripe account (Stripe Dashboard → Settings → Payment methods), and some need Stripe to approve your business first. A method switched on here but not in Stripe will be refused by Stripe.
See Settings for the whole list.
6. Apple Pay and Google Pay (optional)
Switch on Apple Pay and/or Google Pay. Their buttons appear on product pages, the cart and the top of checkout (see Express checkout).
Apple also needs your domain verified, and fails silently without it — no button and no error:
- In the Stripe Dashboard go to Settings → Payment method domains and download the Apple Pay domain association file.
- Paste its contents into Association file contents under Apple Pay domain verification. The plugin serves it at
/.well-known/apple-developer-merchantid-domain-association. - Press Register this domain with Stripe. The plugin saves first, then asks Stripe to fetch and check the file.
Do this for each domain shoppers use, and in live mode.
7. Take a test payment
- Add a product to the cart and go to the checkout.
- Choose Credit / debit card and use Stripe's test card
4242 4242 4242 4242, any future expiry date and any CVC. - Place the order. It should become Processing (or Completed for virtual downloadable products).
- Open the order in WooCommerce → Orders. The Stripe payment panel shows the payment intent, Test mode, whether the funds are captured, Stripe's fee and the net amount.
- Try a 3-D Secure test card from Stripe's testing documentation: the challenge opens in the page.
- Refund the order from WooCommerce's Refund button and check that the refund appears in the Stripe Dashboard.
8. Go live
- Create a live webhook endpoint and paste its signing secret (step 4).
- Paste the live publishable and secret keys.
- Switch Mode to Live and save. The screen confirms Stripe is now in Live mode.
- Repeat Apple Pay domain registration in live mode if you use it.
- Make a small real purchase and refund it.
Orders keep the mode they were paid in: refunding or capturing a test-mode order after going live still talks to your test account. See How it works.