
Gatemi Product Feed writes your catalog to a feed file in your own uploads folder. You give the file's address to Google Merchant Center (or Meta, or Microsoft), and the channel fetches it from your site. The plugin sends nothing anywhere itself.
These docs cover both editions:
- Gatemi Product Feed — the free edition, coming to wordpress.org. One Google Shopping feed with the core fields.
- Gatemi Product Feed for WooCommerce — the full edition, sold on gatemi.com. As many feeds as you need for Google, Meta and Microsoft, category and stock filters per feed, hourly and twice-daily rebuilds, and GTIN, MPN and Google product category fields on products.
Anything marked Full edition is only in the paid plugin.
Requirements
| Free edition | Full edition | |
|---|---|---|
| WordPress | 6.4 or later | 6.4 or later |
| PHP | 7.4 or later | 7.4 or later |
| WooCommerce | 8.0 or later (tested to 10.9) | 8.0 or later (tested to 10.9) |
The uploads folder must be writable, and the feed file must be reachable from the internet so the channel can fetch it. Scheduled rebuilds use WordPress cron.
1. Install
Free edition: coming to wordpress.org. Until it is listed, install the zip through Plugins → Add New → Upload Plugin and activate it.
Full edition: download the zip from your gatemi.com account, upload it through Plugins → Add New → Upload Plugin and activate it. Then open WooCommerce → Product Feeds and enter your licence key in the License & updates card. The plugin works without a key; the key switches on one-click updates and support.
Use one edition at a time. If the full edition is active, the free edition stands down and says so in a row under its entry on the Plugins screen. The full edition picks up the free edition's feed and keeps its address — see FAQ.
2. Build the feed (free edition)
- Go to WooCommerce → Product Feed.
- Press Rebuild now. The first build writes the file; until then the screen says "This feed has not been built yet."
- When it finishes, the screen shows the feed's address and three numbers: products in the feed, left out and last built (UTC).
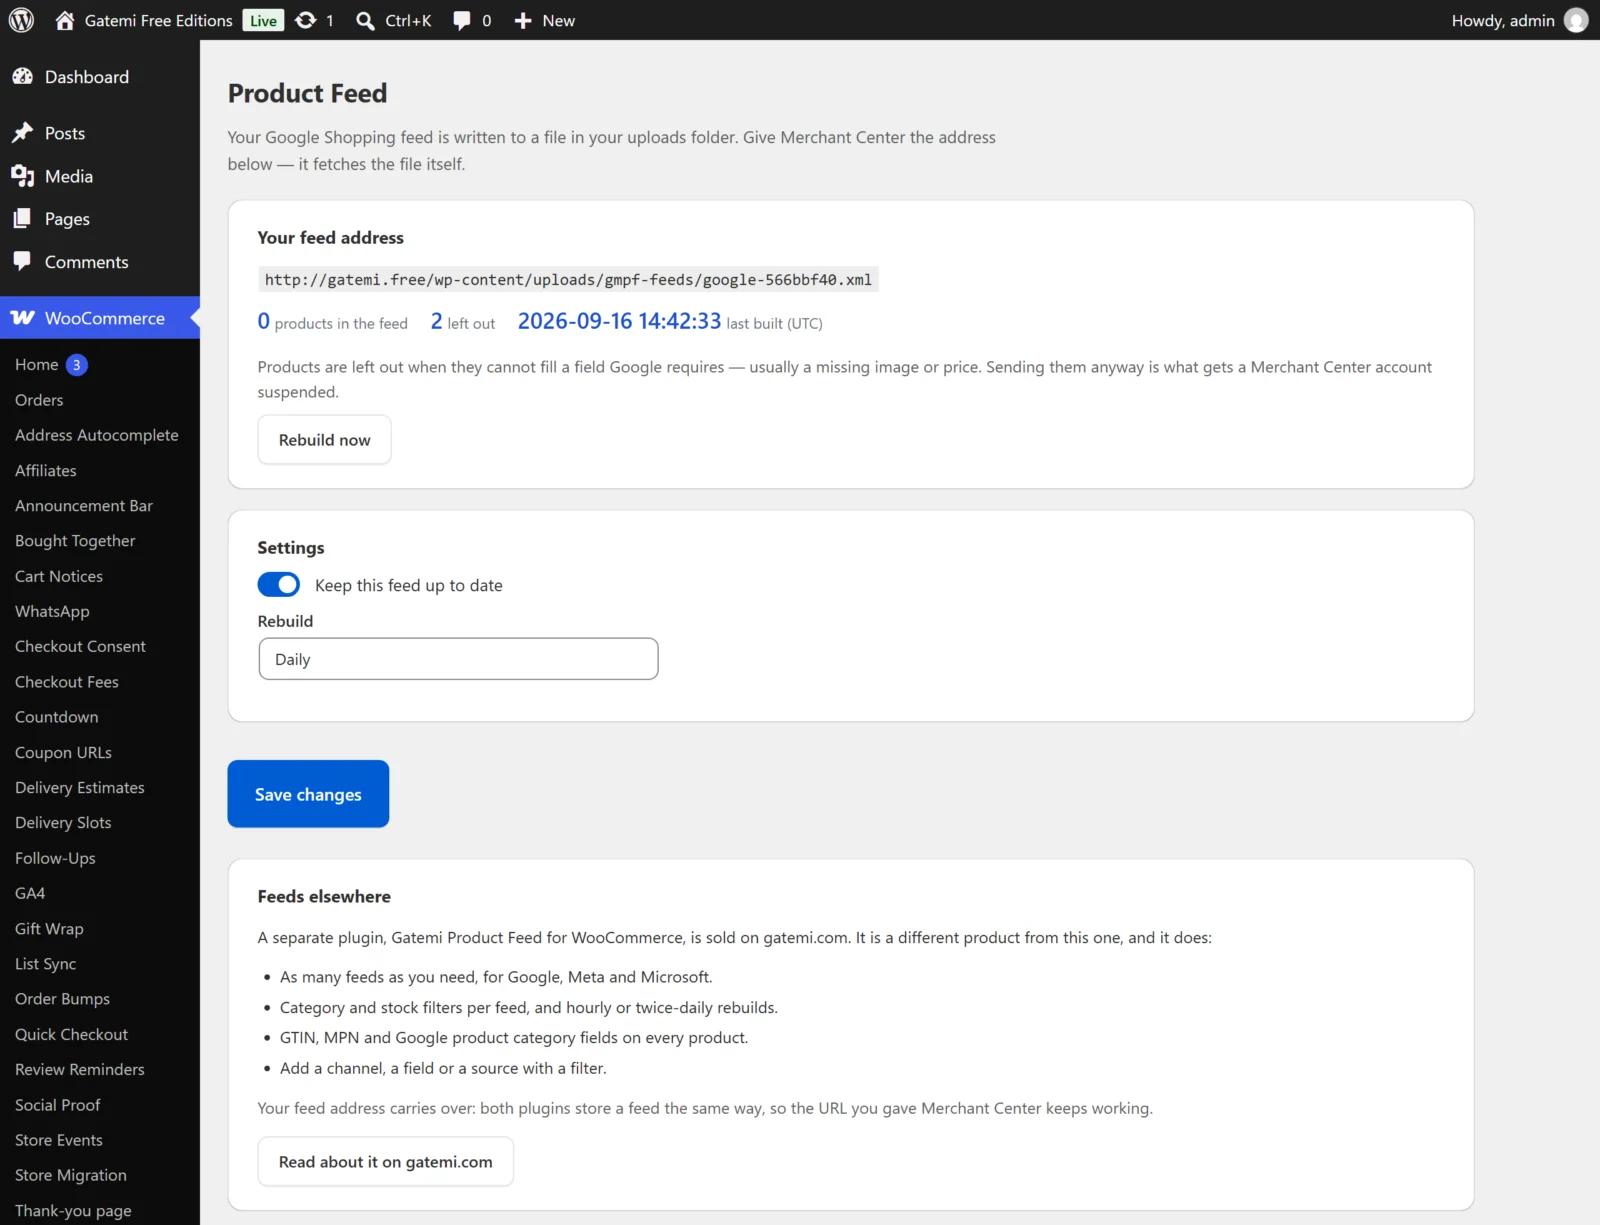
The feed is rebuilt daily from then on (the Rebuild setting).
2. Set up a feed (Full edition)
- Go to WooCommerce → Product Feeds.
- Fill in the empty feed card: Name this feed, the Channel (Google Shopping, Meta (Facebook & Instagram) or Microsoft (Bing) Shopping), how often to Rebuild, and tick Active.
- Add filters if you need them: Only products in stock, Only these category ids, and Send each variation as its own row.
- Press Save changes, then Rebuild now beside the feed.
3. Give the address to Merchant Center
- Copy the feed address from the screen. It looks like
https://example.com/wp-content/uploads/gmpf-feeds/google-1a2b3c4d.xml. The random part is deliberate: the file is public, and a guessable name would hand your catalog to anyone who tried. - In Google Merchant Center, add a product data source that fetches a file from a URL ("scheduled fetch"), and paste the address.
- Set Merchant Center's fetch to run after the plugin's rebuild.
For Meta, use a scheduled data feed in Commerce Manager with the .csv address. For Microsoft Merchant Center, use the Microsoft feed's .xml address.
4. Check it works
- Open the feed address in your browser. You should see an XML (or, for Meta, CSV) file with one
<item>(or row) per product. - Look at left out. If it is above 0, some products could not fill a field the channel requires. The usual cause is a product without an image or a price. The screen gives the count, not the product names — see FAQ for how to find them.
- After Merchant Center's first fetch, check its diagnostics for warnings about optional fields such as brand or GTIN.
Next steps
- Settings
- How it works — the fields, the left-out rule and the atomic rebuild.
- FAQ and troubleshooting
- Developer reference