
Gatemi PayPal for WooCommerce takes payments through PayPal Complete Payments (PPCP), on PayPal's current REST API (Orders v2, Payments v2, Vault v3) and JavaScript SDK (Web SDK v6). One plugin offers PayPal, Pay Later, Venmo, credit and debit cards with 3-D Secure, Apple Pay, Google Pay and Fastlane.
It is a free plugin with no paid edition. Money moves between the shopper, PayPal and your PayPal account; Gatemi never holds it.
Requirements
- WordPress 6.0 or later
- PHP 7.4 or later
- WooCommerce 8.0 or later (tested up to 10.7)
- Compatible with High-Performance Order Storage and the Cart and Checkout blocks
- A PayPal business account
- HTTPS for Apple Pay and Google Pay, and for automatic webhook updates — PayPal can only send events to a public HTTPS address
The header carries Requires Plugins: woocommerce.
1. Install
Gatemi PayPal is coming to wordpress.org. Until it is listed:
- Download the plugin zip.
- Go to Plugins → Add New Plugin → Upload Plugin, choose the zip and press Install Now.
- Press Activate.
- Go to WooCommerce → PayPal Payments (capability
manage_woocommerce).
Moving from another PayPal plugin? Read Moving from another PayPal plugin first.
2. Sandbox or live
PayPal keeps two separate worlds:
- Sandbox — pretend money, test buyer and seller accounts, created at
developer.paypal.com. - Live — your real business account.
The plugin stores a separate connection for each, and separate payment-method switches for each. Switching Environment saves immediately and the store starts using the other connection at once. Start in Sandbox.
3. Connect your PayPal account
The first screen is Connect your PayPal account.
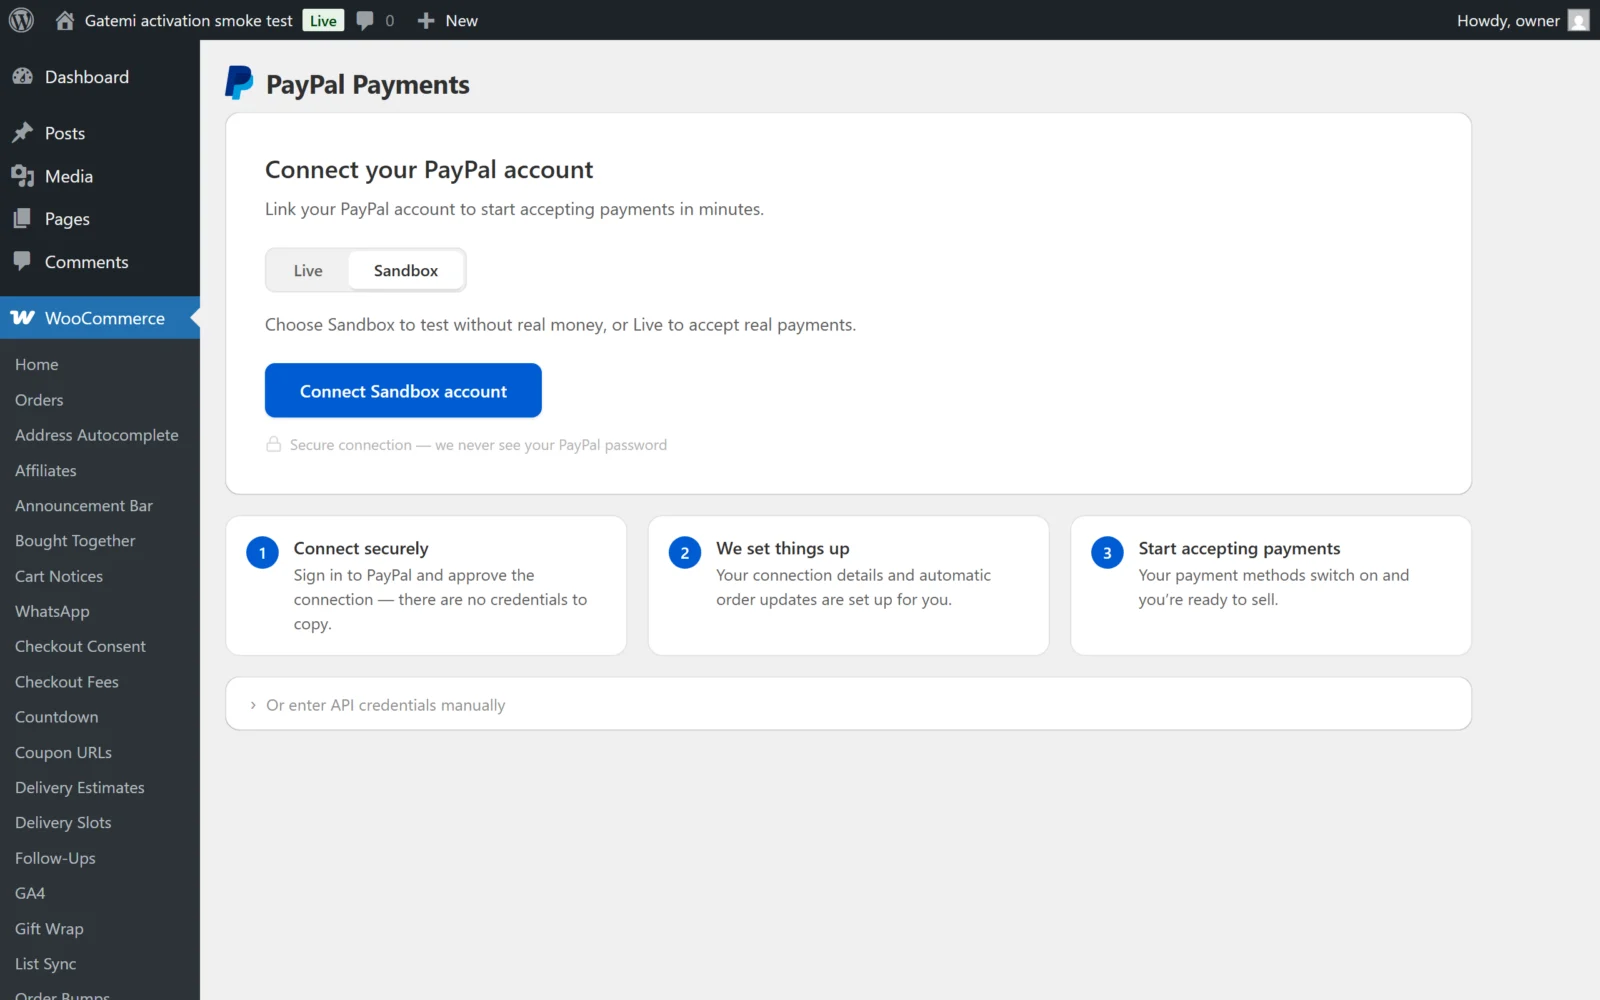
Option A: Connect with PayPal (recommended)
- Choose Sandbox.
- Press Connect Sandbox account.
- PayPal's sign-up window opens. Sign in with your sandbox business account and approve the connection. Your password is entered at PayPal; the plugin never sees it.
- You return to the settings screen. The plugin has stored the account's client ID, secret and merchant ID, and registers the webhook on the next admin page load.
To generate the PayPal sign-up link, the Connect button first calls a partner onboarding service run by the plugin's author. It sends the email address of the administrator pressing the button, your store's return URL and the PayPal products being enabled. This happens only when you connect, never during checkout.
Option B: Enter API credentials manually
- At
developer.paypal.com, sign in and open Apps & Credentials. Choose the Sandbox tab (or Live later) and create a REST app, or open the default one. - Copy the Client ID and the Secret key.
- On the connect screen, open Or enter API credentials manually, paste both into the fields for the environment you chose, and press Save credentials.
The plugin checks the pair straight away by asking PayPal for an access token, and refuses the save if PayPal rejects it. It then looks up the account's merchant ID itself. The secret is stored encrypted and shown as a mask afterwards.
4. Check the account status
Once connected, the General tab shows Account status:
- Payments — Enabled or Not ready
- Account email — Confirmed or Unconfirmed
- PayPal Payments — Approved or Pending review
- Automatic updates — Active, Not active or Local site
Card processing, Apple Pay, Google Pay, Pay Later, vaulting and Fastlane each need PayPal to have enabled that capability on your account. The Payment methods list shows each one's status, with a setup link where PayPal has not enabled it yet. Press Refresh status after PayPal approves something.
5. Webhooks
You do not create the webhook yourself. After a connection the plugin registers one with PayPal for your site's /wp-json/gatemi-paypal/v1/webhook, subscribed to the capture, refund, reversal, void, dispute, order-approved and vault events it handles. It checks the subscription again once a day — from its own daily cron event, and when you open the settings screen, sharing one throttle — and re-creates it if it was deleted in PayPal.
The address is shown on the Advanced tab under Automatic updates (webhooks).
- On a local or private-network site, PayPal cannot reach you, so nothing is registered and the status reads Local site. Test payments still work.
- If it reads Not active on a public site, disconnect and reconnect the account.
Captures are confirmed in the same request as the payment, so webhooks are a reconciliation channel: refunds and disputes made in PayPal, pending captures that clear later, and shoppers who approved and then closed the tab.
6. Choose payment methods
Under Payment methods on the General tab, switch on what you want: PayPal, Credit / Debit Card, Pay Later and Venmo are on by default; Apple Pay, Google Pay and Save payment methods are off. Apple Pay and Google Pay also need HTTPS and must be turned on in your PayPal account. See Settings.
Under Payment processing, Payment action is Capture by default.
7. Take a test payment
- In a private window, add a product to the cart and go to the checkout.
- Choose PayPal, press the PayPal button and sign in with a sandbox personal (buyer) account from
developer.paypal.com. - Approve. You return and the order is placed — usually Processing.
- Open the order: the note reads PayPal payment captured via … with the capture id.
- Try Credit / Debit Card with a test card from PayPal's sandbox card generator.
- Refund the order with WooCommerce's Refund button and check the refund appears in your sandbox account.
Admin only mode on the Advanced tab shows the PayPal methods only to administrators and shop managers, so you can test on a live store without shoppers seeing them.
8. Go live
- Switch Environment to Live and connect your real business account (Option A or B with live credentials).
- Check Account status and switch on the payment methods for Live — they are separate from the sandbox ones.
- Make a small real purchase and refund it.
Each order remembers the environment it was paid in. Capturing, re-authorizing or voiding a sandbox order is skipped — with an order note saying so — while the plugin is switched to Live, and the other way round. Refunds are sent through whichever connection is active, so refund your sandbox test orders before you switch to Live.