
Gatemi Follow-Ups sends the message that should come after WooCommerce stops talking: a thank-you the day after the parcel goes out, a review request a fortnight later. A follow-up is queued when an order reaches the status you choose, and an hourly sweep sends it once it is due — after checking that it still makes sense to send.
There are two editions:
- Gatemi Follow-Ups — the free edition. One follow-up, sent a number of hours after an order reaches a status, with your own sender name and unsubscribe wording.
- Gatemi Follow-Ups for WooCommerce — the full edition, sold on gatemi.com. As many follow-ups as you like, a welcome on a customer's first order, a win-back when somebody has not ordered for a while, conditions (order value, products, categories, customer role, the order's current status), and a sending rate you set. See the product page.
Both editions share the outbox table, the follow-ups, the settings and the unsubscribe list, so upgrading keeps every queued and every sent message.
Requirements
- WordPress 6.4 or later
- PHP 7.4 or later
- WooCommerce 8.0 or later (tested up to 10.9)
- WP-Cron running (or a real cron calling
wp-cron.php), because sending happens in an hourly sweep. - A working outgoing mail setup — follow-ups are sent with
wp_mail().
Install
Free edition. Gatemi Follow-Ups is coming to wordpress.org. Until then, install it from its zip:
- Go to Plugins → Add New Plugin → Upload Plugin.
- Choose
gatemi-follow-ups.zip, click Install Now, then Activate.
Full edition.
- Download the zip from your gatemi.com account and upload it the same way.
- Go to WooCommerce → Follow-Ups, find License & updates, paste your licence key and click Activate.
If both editions are active, the free edition stands down and the full edition sends everything.
First setup: a thank-you the day after completion
- Go to WooCommerce → Follow-Ups.
- Leave Send follow-up emails ticked.
- Optionally fill in Sender name (full edition: Send them from) — for example your shop's name.
- Under The follow-up:
- Name:
Thank you(only you see it) - When an order reaches: Completed
- Wait this many hours:
24 - Subject:
Thank you, {first_name} - Message:
Thanks for order {order_number}. We hope you enjoy {products}. <a href="{shop_url}">Visit us again</a>.
- Name:
- Leave This follow-up is switched on ticked and click Save changes.
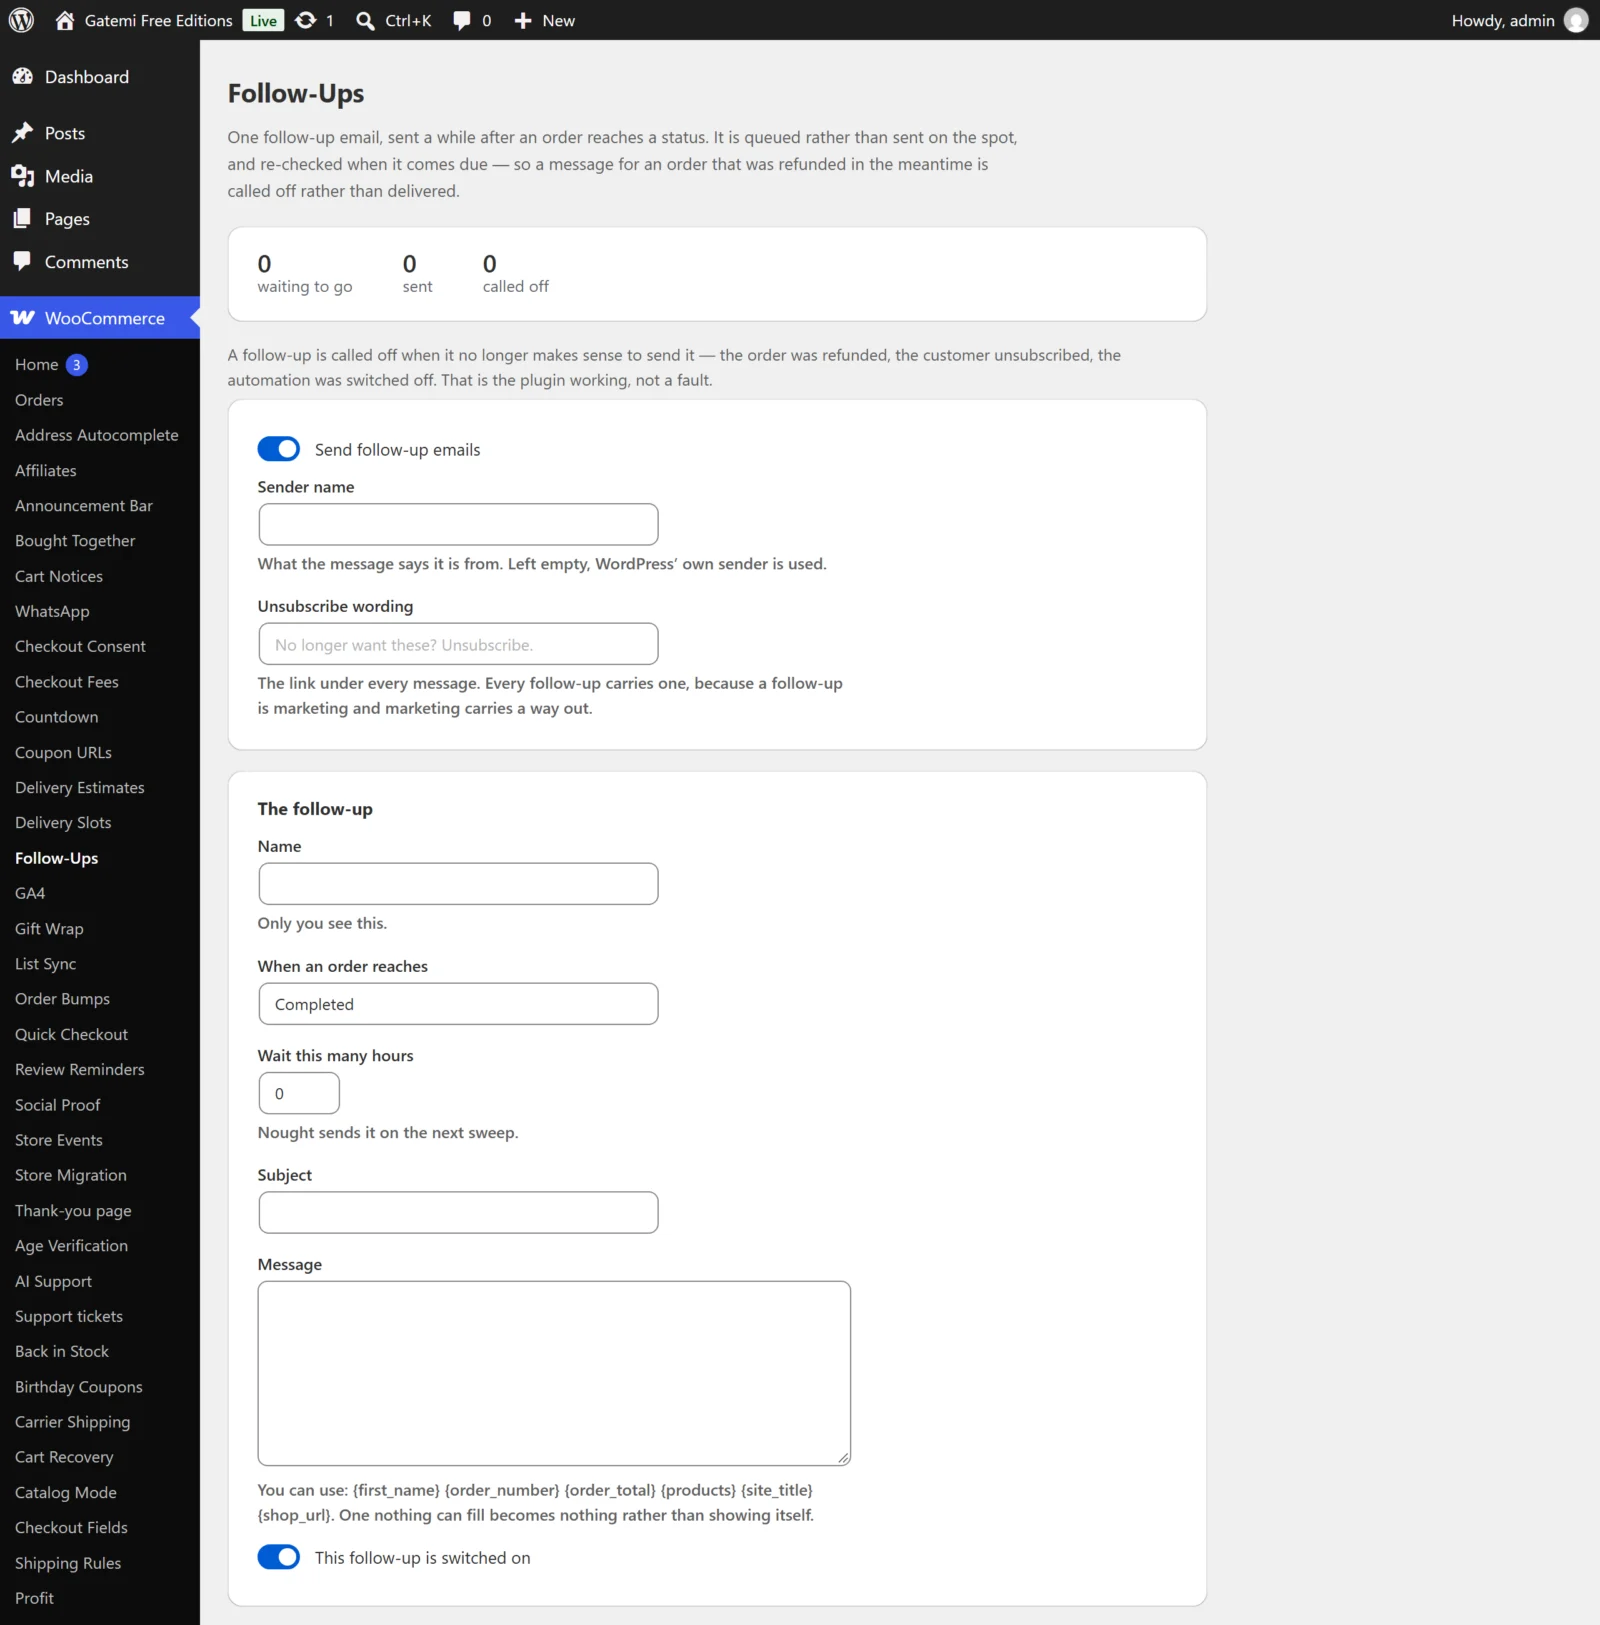
Full edition. The same fields sit in an automation card: What you call it, When (choose "An order reaches a status"), Status (completed), Then wait (hours), Subject and Message. Add more with Add another automation.
Check it works
- Place a test order using an address you can read, then mark it Completed under WooCommerce → Orders.
- Back on WooCommerce → Follow-Ups, the outbox now shows 1 waiting to go. Nothing is emailed at this point — that is deliberate.
- To test without waiting a day, set Wait this many hours to
0, complete another test order, and wait for the next hourly sweep (a tool such as WP Crontrol can rungmfuf_sweep— full editiongmfu_sweep— at once). - The message arrives with an unsubscribe link at the bottom, and the outbox counts it under sent.
Next: Settings · How it works · FAQ and troubleshooting