
Gatemi Distance Shipping adds a shipping method called Distance rate to WooCommerce. It asks Google how far the shopper's address is from yours and charges by the band that distance falls in — "0 to 5 km: 3.00, 5 to 15 km: 5.00". The lookup uses your own Google Cloud key, it is asked from your server and never from the shopper's browser, and each answer is remembered so one checkout does not cost a dozen paid calls.
There are two editions:
- Gatemi Distance Shipping — the free edition. Distance bands with a flat cost and an optional cost per kilometre or mile, driving distance, the test lookup, and your own "no rate" message.
- Gatemi Distance Shipping for WooCommerce — the full edition, sold on gatemi.com. It adds bands measured in driving time, refusal bands with your own sentence ("we do not deliver beyond 30 km"), a label per band, motorbike, bicycle and on-foot journeys, and logging of failed lookups. See the product page.
Both editions share the settings, the remembered distances and the shipping method itself, so a zone set up under the free edition keeps working after upgrading.
Requirements
- WordPress 6.4 or later
- PHP 7.4 or later
- WooCommerce 8.0 or later (tested up to 10.9)
- A Google Cloud project with the Routes API enabled, billing set up, and an API key. Google charges for lookups on your account.
- Both editions declare compatibility with HPOS and the Cart & Checkout blocks.
Install
Free edition. Gatemi Distance Shipping is coming to wordpress.org. Until then, install it from its zip:
- Go to Plugins → Add New Plugin → Upload Plugin.
- Choose
gatemi-distance-shipping.zip, click Install Now, then Activate.
Full edition.
- Download the zip from your gatemi.com account.
- Upload and activate it the same way.
- Go to WooCommerce → Distance Shipping, find License & updates, paste your licence key and click Activate.
If both editions are active, the free edition stands down and the full edition handles the method.
First setup
1. Your Google key
- In Google Cloud Console, enable the Routes API for your project and create an API key.
- Restrict the key by IP address (your server's), not by HTTP referrer. The plugin only ever calls Google from your server, so a referrer restriction would block it.
- In WordPress, go to WooCommerce → Distance Shipping, paste the key into API key.
2. Where deliveries leave from
Leave Deliveries leave from empty to use WooCommerce's own store address (WooCommerce → Settings → General), or type a different address, for example your warehouse.
3. Unit, then save
Choose Kilometres or Miles and click Save changes.
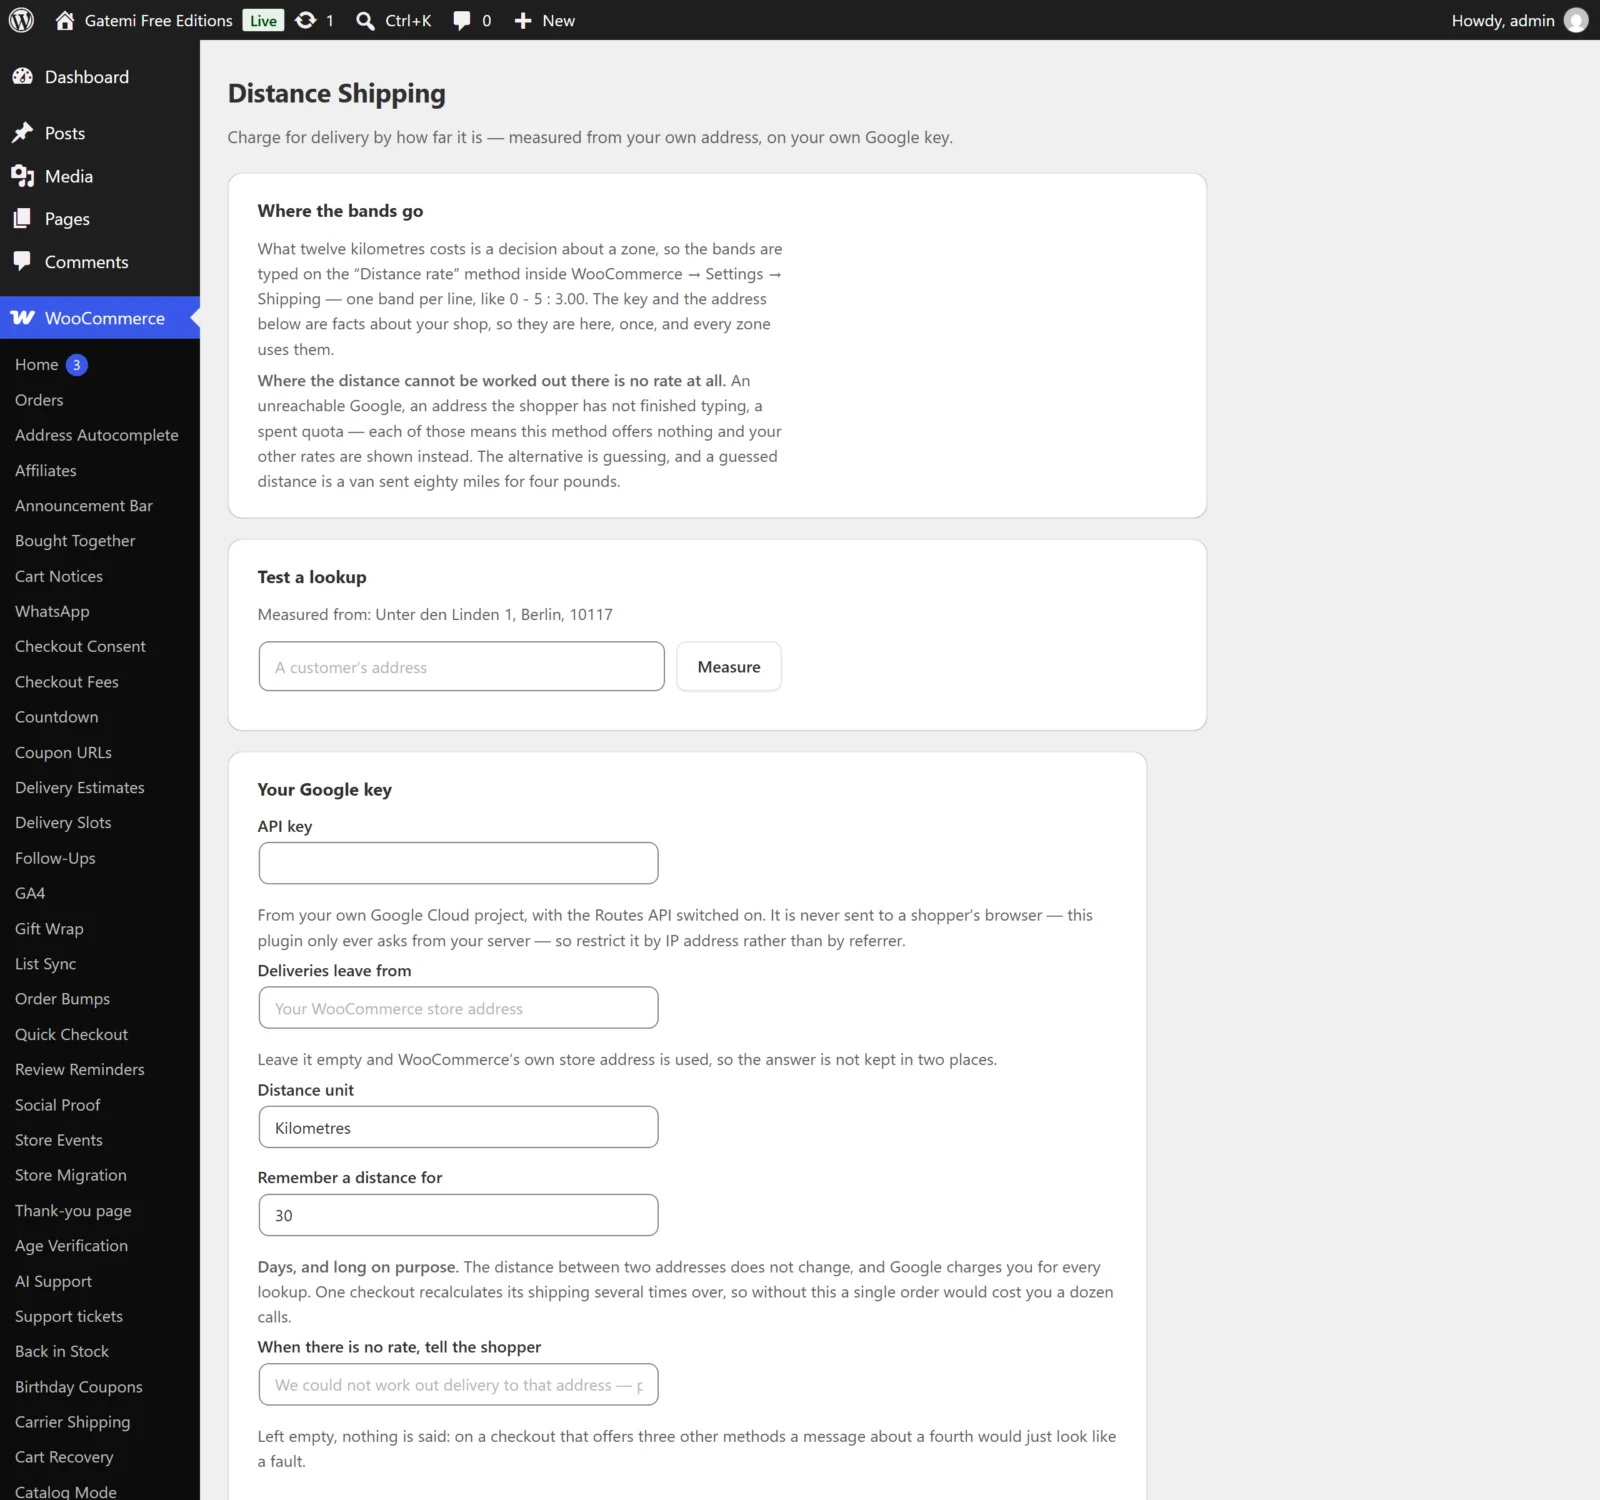
4. Test a lookup
Under Test a lookup, type a customer's address and click Measure. You should see "address is 12.4 km away, about 18 minutes' drive." If no distance comes back, the screen lists the usual reasons — a key restricted to the wrong thing, the Routes API not switched on, a spent quota, or an address nobody can find.
5. Add the method to a zone
- Go to WooCommerce → Settings → Shipping → Shipping zones and open the zone your local customers fall into.
- Click Add shipping method, choose Distance rate, and edit it.
- Set Name (what shoppers see, default "Delivery") and Tax status.
- Type your Bands, one per line, for example:
0 - 5 : 3.00
5 - 15 : 5.00 + 0.40
15 - 40 : 12.00
- Save.
The second line means 5.00 plus 0.40 for every kilometre of the whole journey. See How it works for the full band syntax.
Check it works
- In a private window, add a product to the cart.
- On the cart or checkout, enter an address inside the zone — with at least a postcode, street or city.
- Delivery appears with the band's price.
- Enter an address beyond your last band: Distance rate disappears and the zone's other methods are shown instead — that is on purpose.
Next: Settings · FAQ and troubleshooting