
Gatemi Delivery Estimates shows an "arrives by" date — "Arrives between 14 March and 18 March" — on product pages, in the cart and at the checkout. The date is worked out from three facts about your warehouse: how many working days an order takes, the time you stop packing for the day, and which days you work. It is counted on your store's own clock, not the shopper's.
There are two editions, and this manual covers both:
- Gatemi Delivery Estimates — the free edition. A store-wide lead time, a lead time on any product, the cutoff time and your working days.
- Gatemi Delivery Estimates for WooCommerce — the full edition, sold on gatemi.com. It adds lead times per product category, a list of holidays, a choice of where the date shows, your own wording and date format, and a shortcode.
Both editions store settings, lead times and the date recorded on each order in the same place, so upgrading keeps everything.
Requirements
| Free edition | Full edition | |
|---|---|---|
| WordPress | 6.4 or later | 6.4 or later |
| PHP | 7.4 or later | 7.4 or later |
| WooCommerce | 8.0 or later (tested up to 10.9) | 8.0 or later (tested up to 10.9) |
There is no outside service: the date is plain arithmetic on your own settings.
Install
Free edition: coming to wordpress.org. Once it is listed, go to Plugins → Add New, search for "Gatemi Delivery Estimates", install and activate.
Full edition:
- Buy it on the Delivery Estimates product page.
- Download the zip from your gatemi.com account.
- Plugins → Add New → Upload Plugin, upload, Activate.
- Go to WooCommerce → Delivery Estimates, paste your licence key in License & updates and press Activate. The plugin works without a key; the key switches on one-click updates and support.
If both editions are active, the free edition stands down and says so in a row under its entry on the Plugins screen.
Before you start: check your time zone
Every date is counted in your site's time zone. Open Settings → General and make sure Timezone is your warehouse's, not UTC. A 15:00 cutoff in the wrong zone is a cutoff at the wrong hour.
First setup
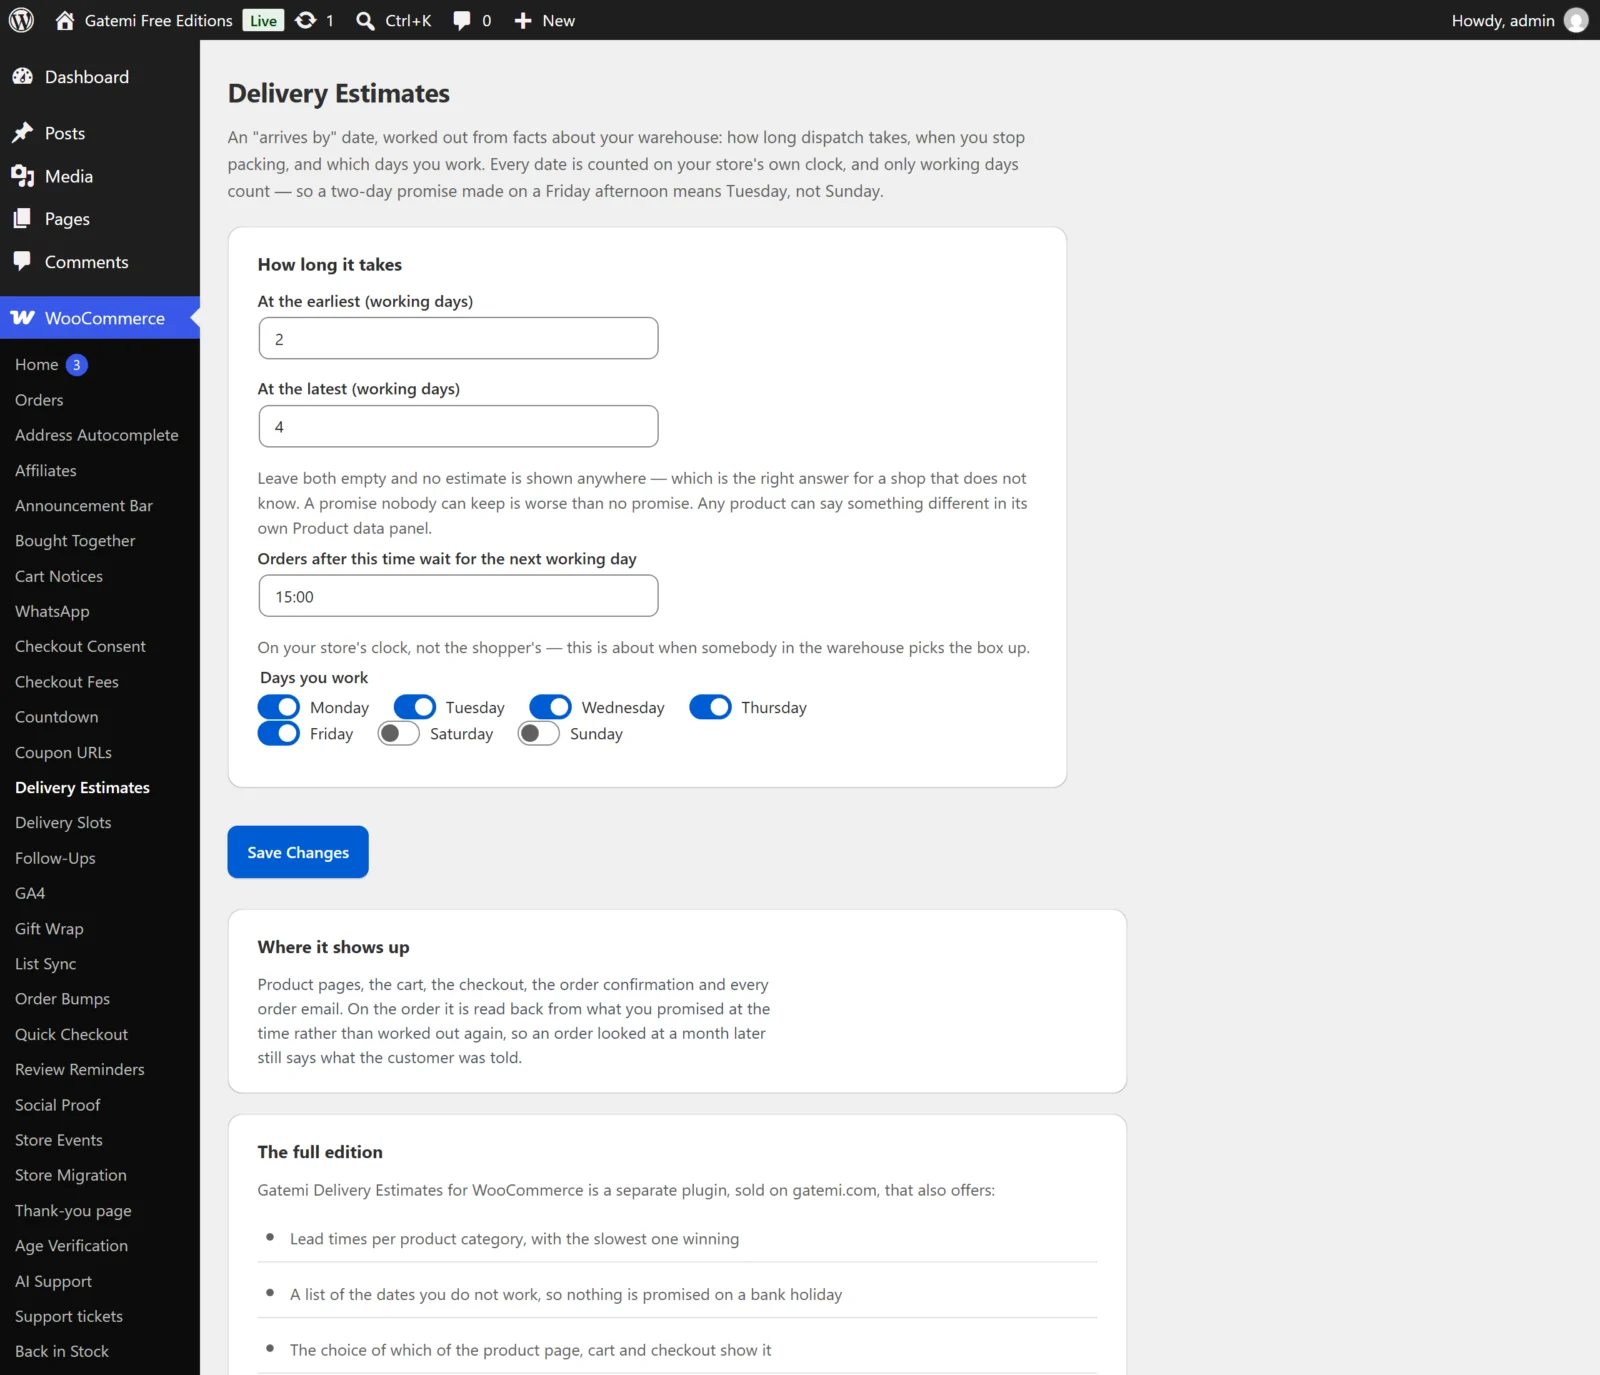
- Go to WooCommerce → Delivery Estimates.
- Under How long it takes, fill in At the earliest (working days) and At the latest (working days) — for example
2and4. This is the time from packing to the door. - In Orders after this time wait for the next working day, type your cutoff in 24-hour time, for example
15:00. - Under Days you work, tick the days somebody packs orders.
- Full edition: list your bank holidays under Days you do not, one per line as
2026-12-25. - Press Save changes.
Until you type a lead time, nothing is shown anywhere. That is deliberate: a shop that has not said how long it takes gets no invented "3–5 days".
A product that takes longer
For a made-to-order product among stocked ones:
- Edit the product and open Product data → Inventory.
- Fill in Dispatch: earliest (days) and Dispatch: latest (days).
- Update the product.
Leave both empty and the product follows the shop's setting. Full edition: a category can have its own lead time too — Products → Categories, edit the category, and fill in the same two fields.
Check it works
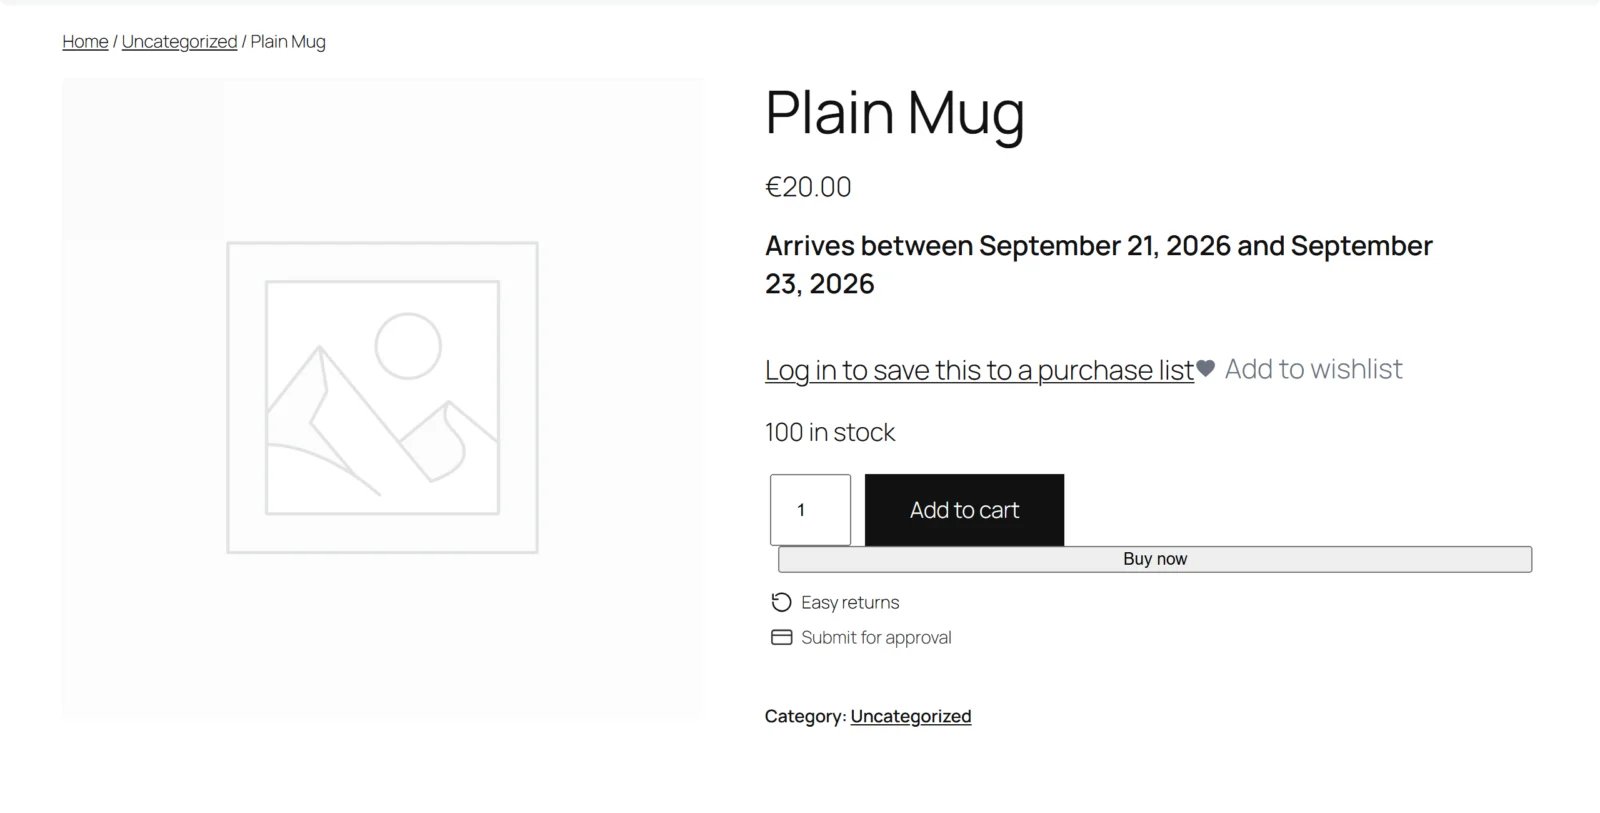
- Open a product page. Below the price and short description you see "Arrives between … and …".
- Add it to the cart. The cart totals show the same sentence above the order total; the checkout shows it in the order review.
- Place a test order. The order confirmation page and the order emails show the date that was promised.
A worked example: a shop working Monday to Friday, cutoff 15:00, lead time 2–4 days. A shopper visits on Friday at 16:30. The cutoff has passed, so packing starts on Monday; two working days later is Wednesday, four is Friday. The shopper reads "Arrives between Wednesday and Friday" — in your site's date format.
The date appears on the classic cart and checkout, and just after the Cart and Checkout blocks.