
These docs cover both editions:
- Gatemi Checkout Fields — the free edition, coming to wordpress.org. Rename, reorder, require and hide any checkout field, and add text fields of your own.
- Gatemi Checkout Fields for WooCommerce — the full edition, sold on gatemi.com. It adds eight more field types, sends your fields to the order emails, and registers them with the block checkout.
Anything marked Full edition is only in the paid plugin.
Requirements
| Free edition | Full edition | |
|---|---|---|
| WordPress | 6.4 or later | 6.4 or later |
| PHP | 7.4 or later | 7.4 or later |
| WooCommerce | 8.0 or later (tested up to 10.9) | 8.0 or later (tested up to 10.9) |
Both editions declare HPOS compatibility. Edits to WooCommerce's own fields apply to the classic checkout and the Checkout block alike; for your own fields on the block see FAQ.
Install
Free edition: coming to wordpress.org. Once it is listed, go to Plugins → Add New, search for "Gatemi Checkout Fields", install and activate.
Full edition: download the zip from your gatemi.com account, upload it at Plugins → Add New → Upload Plugin and activate. On WooCommerce → Checkout Fields, paste your licence key into License & updates and press Activate to switch on updates and support.
Both editions keep their field edits in the same option, gmcf_fields, so switching keeps every edit. While the full edition is active, the free edition stands down.
The screen
Go to WooCommerce → Checkout Fields. It lists every field your checkout really has — WooCommerce's own and those other plugins add — in three tables: Billing fields, Shipping fields and Additional fields (the order notes area).
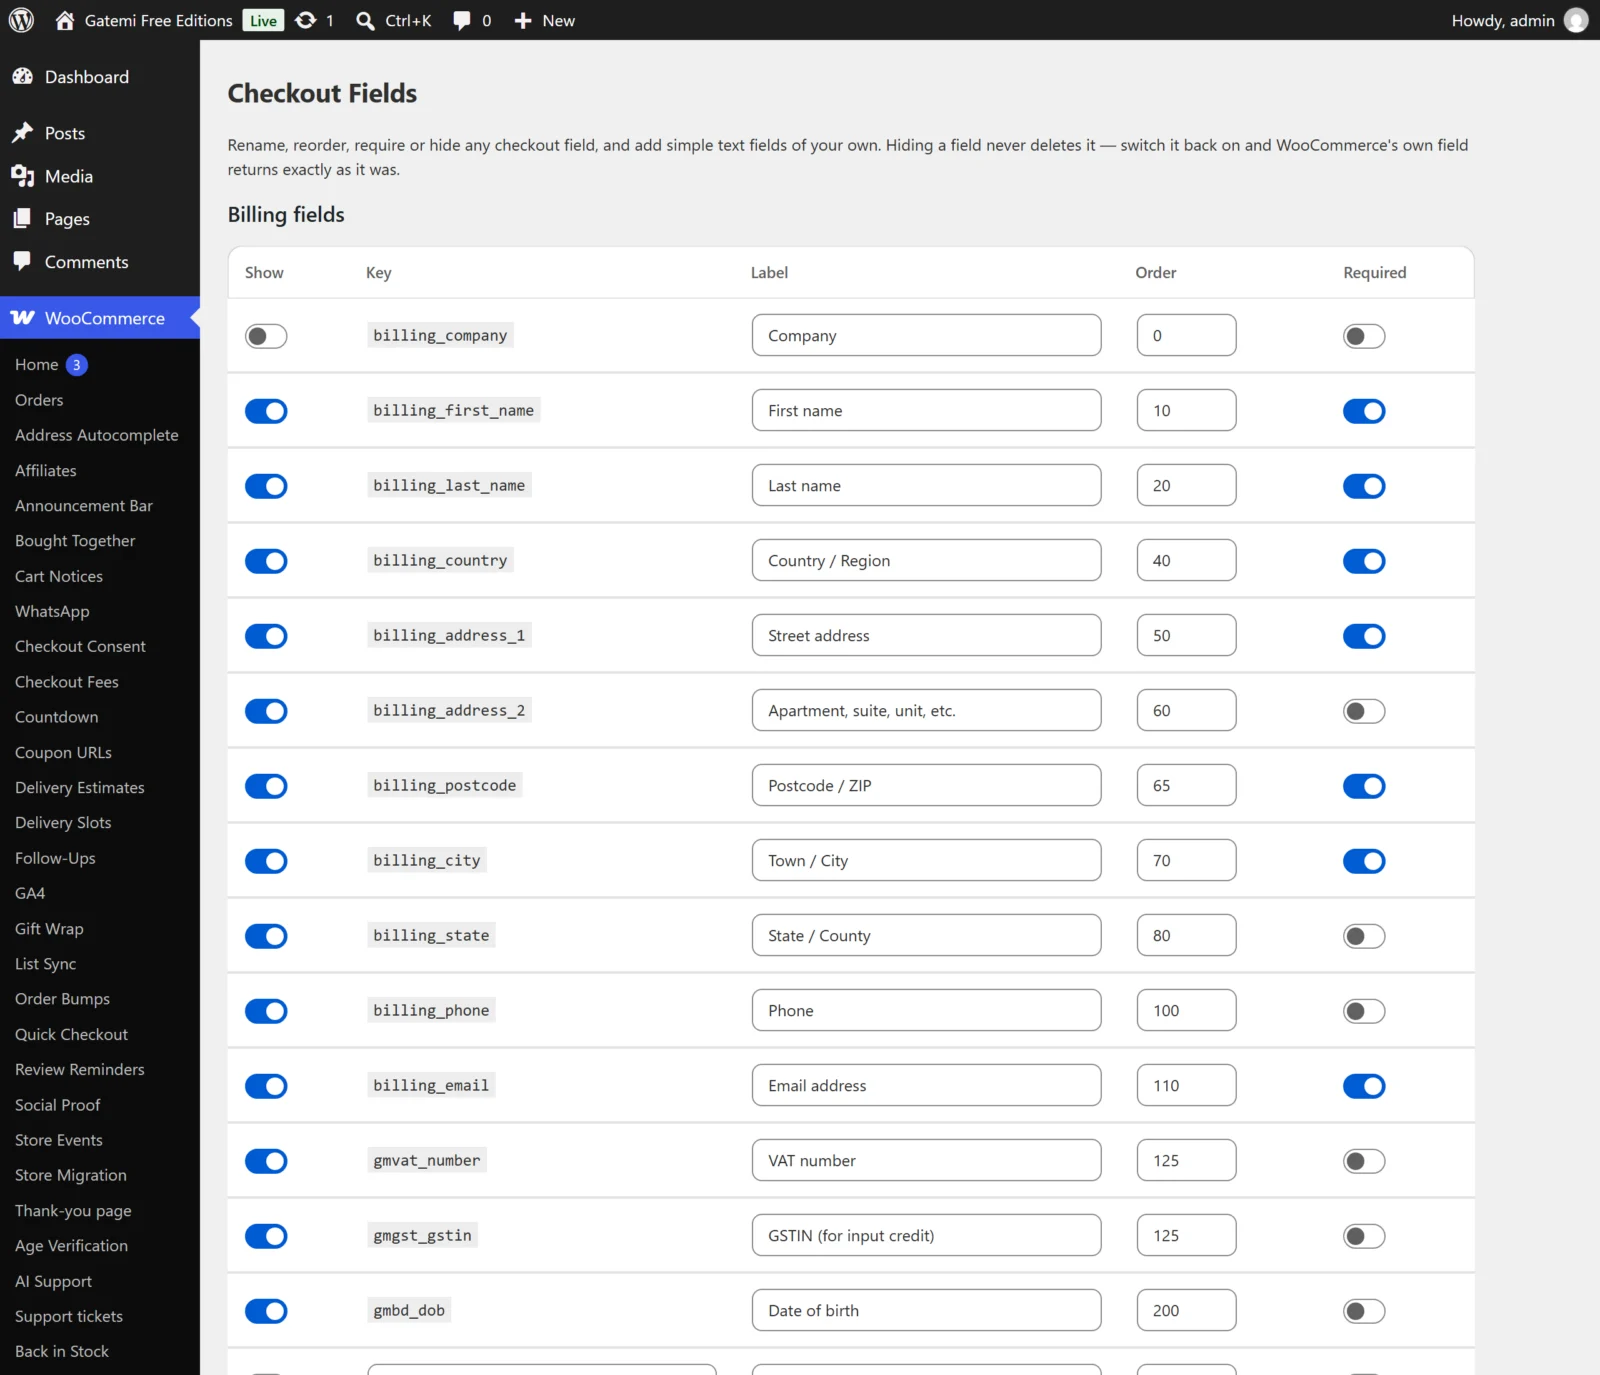
First change: hide the Company field
- In Billing fields, find the row with the key
billing_company. - Untick Show.
- Press Save changes.
The field is now taken out of the checkout, not just hidden with CSS, so it is not posted, not validated and not saved. Tick Show again and WooCommerce's own field comes back exactly as it was.
Add a field of your own
The last row of each table is empty and is for a new field.
- In Additional fields, in the empty last row, type a key such as
delivery_instructions. It is saved asgmcf_delivery_instructions. - Type a Label: "Delivery instructions".
- Set Order to place it — fields are sorted by this number, low to high; WooCommerce's own fields use steps of 10.
- Tick Required if the shopper must fill it in.
- Tick Show — a new row starts unticked, and an unticked field is not on the checkout.
- Full edition: choose its Type, and under Show it on tick Emails to add it to the order emails.
- Press Save changes.
Check it works
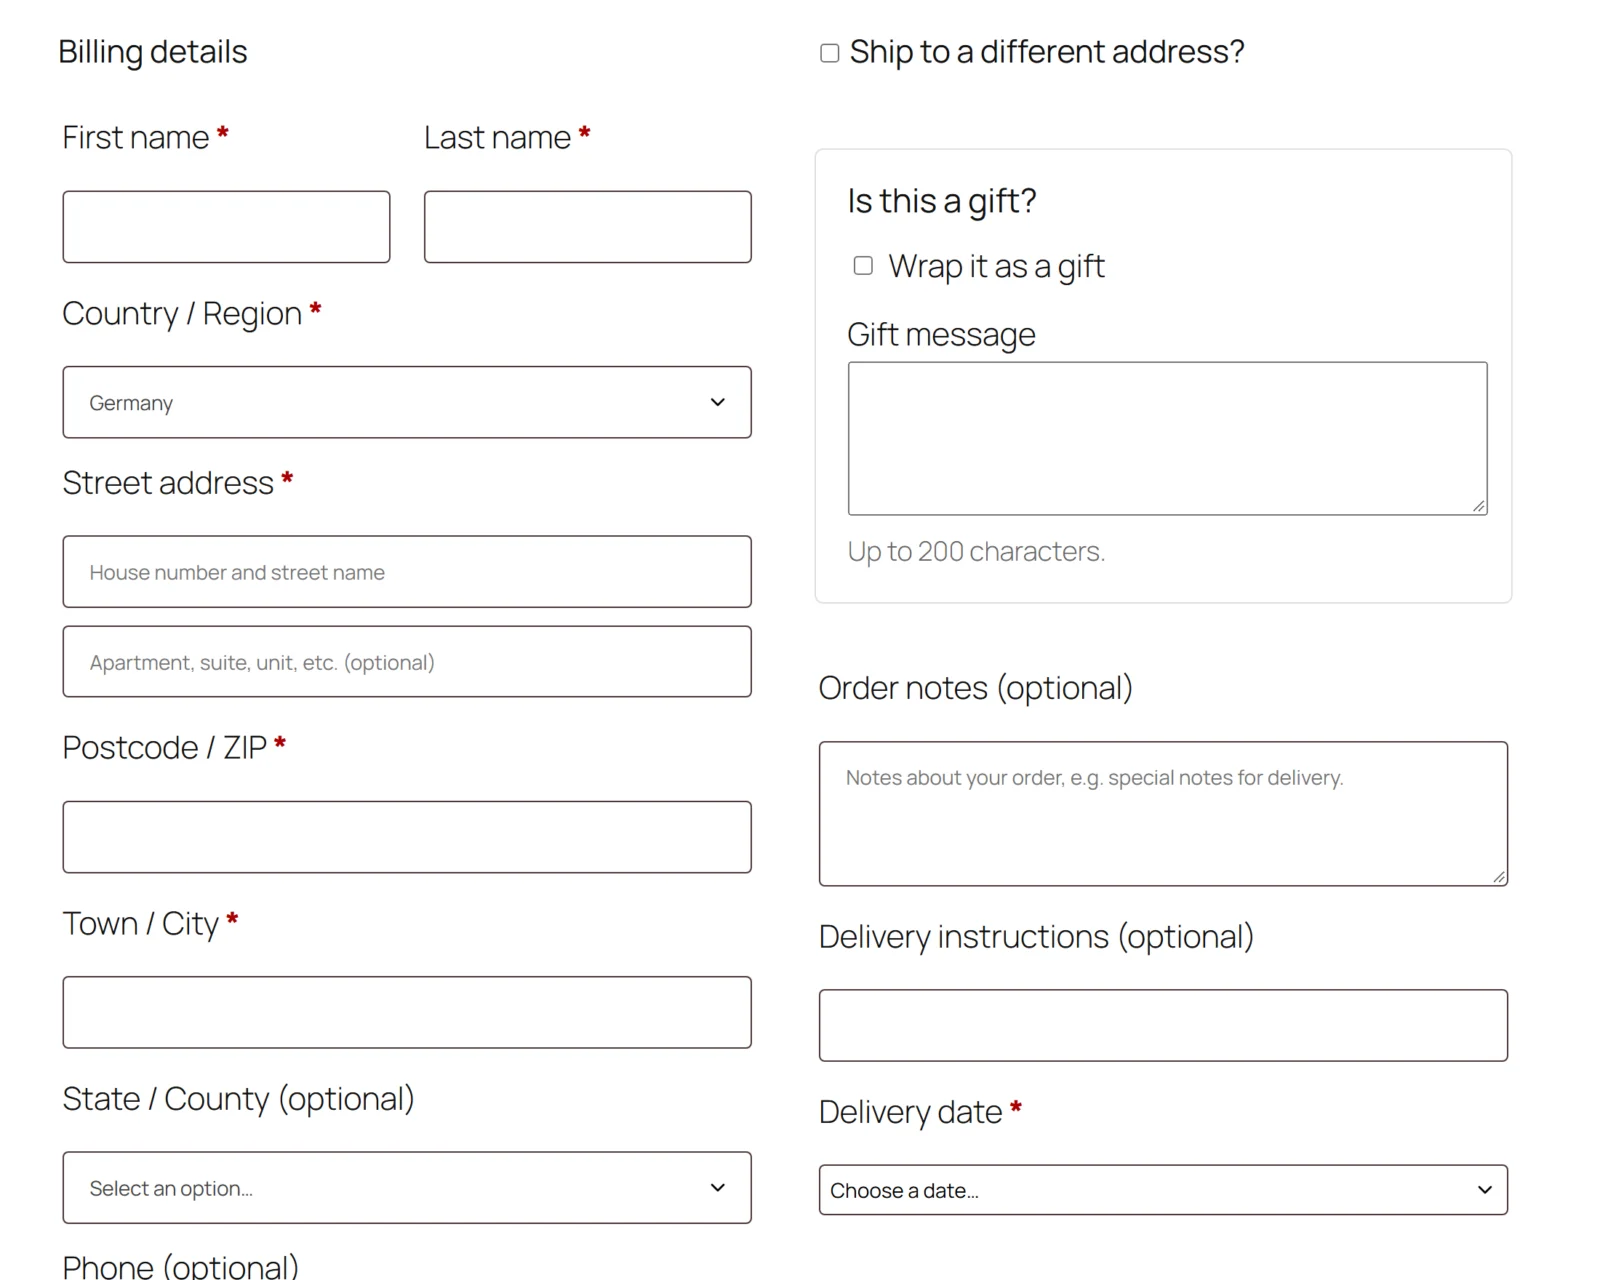
- Open the checkout in a private window. The Company field is gone and "Delivery instructions" is there.
- If you made it required, try to place an order with it empty: the checkout says "Delivery instructions is a required field."
- Place a test order with something typed in it.
- Open the order in WooCommerce → Orders. Under the billing address you see Delivery instructions: and what was typed.
Next
- Settings — every column and what it stores.
- How it works — the patch rule and where values go.
- Developer reference — filters, the option shape and order meta.