
These docs cover both editions:
- Gatemi Carrier Shipping — the free edition: live USPS rates. Coming to wordpress.org.
- Gatemi Carrier Shipping for WooCommerce — the full edition, sold on gatemi.com: USPS, UPS, FedEx, Australia Post and Canada Post in one plugin.
Anything marked Full edition is only in the paid plugin.
Both editions quote with your own carrier account, straight from the carrier's modern REST API. There is no proxy and no shared vendor key: your store asks the carrier, the carrier answers your store.
Requirements
| Free edition | Full edition | |
|---|---|---|
| WordPress | 6.4 or later | 6.4 or later |
| PHP | 7.4 or later | 7.4 or later |
| WooCommerce | 8.0 or later (tested up to 10.9) | 8.0 or later (tested up to 10.9) |
| Store currency | USD (USPS prices in dollars) | The currency each carrier quotes in |
| Carrier account | A free app in the USPS Developer Portal | An API account with each carrier you use |
Both declare compatibility with HPOS and with the Cart and Checkout blocks.
Every product that ships should have a weight and dimensions (Product data → Shipping). Carriers price parcels by weight and size, and a cart holding a product with no weight is not quoted live at all.
1. Install
Free edition: coming to wordpress.org. Until then it cannot be installed from Plugins → Add New.
Full edition: download the zip from your gatemi.com account, go to Plugins → Add New → Upload Plugin, upload and activate. Then enter your licence key under WooCommerce → Carrier Shipping in the License & updates card for one-click updates.
If both editions are active, the free edition stands down and says so under its entry on the Plugins screen. The two editions keep separate settings and separate shipping methods; on its first run the full edition copies your USPS credentials and ZIP across and adds its own USPS method beside each free one in your zones — see the FAQ.
2. Get USPS credentials
- Go to the USPS Developer Portal (developer.usps.com) and sign in or register.
- Create an app. USPS shows a consumer key and a consumer secret for it.
3. Enter them once
Go to WooCommerce → Carrier Shipping.
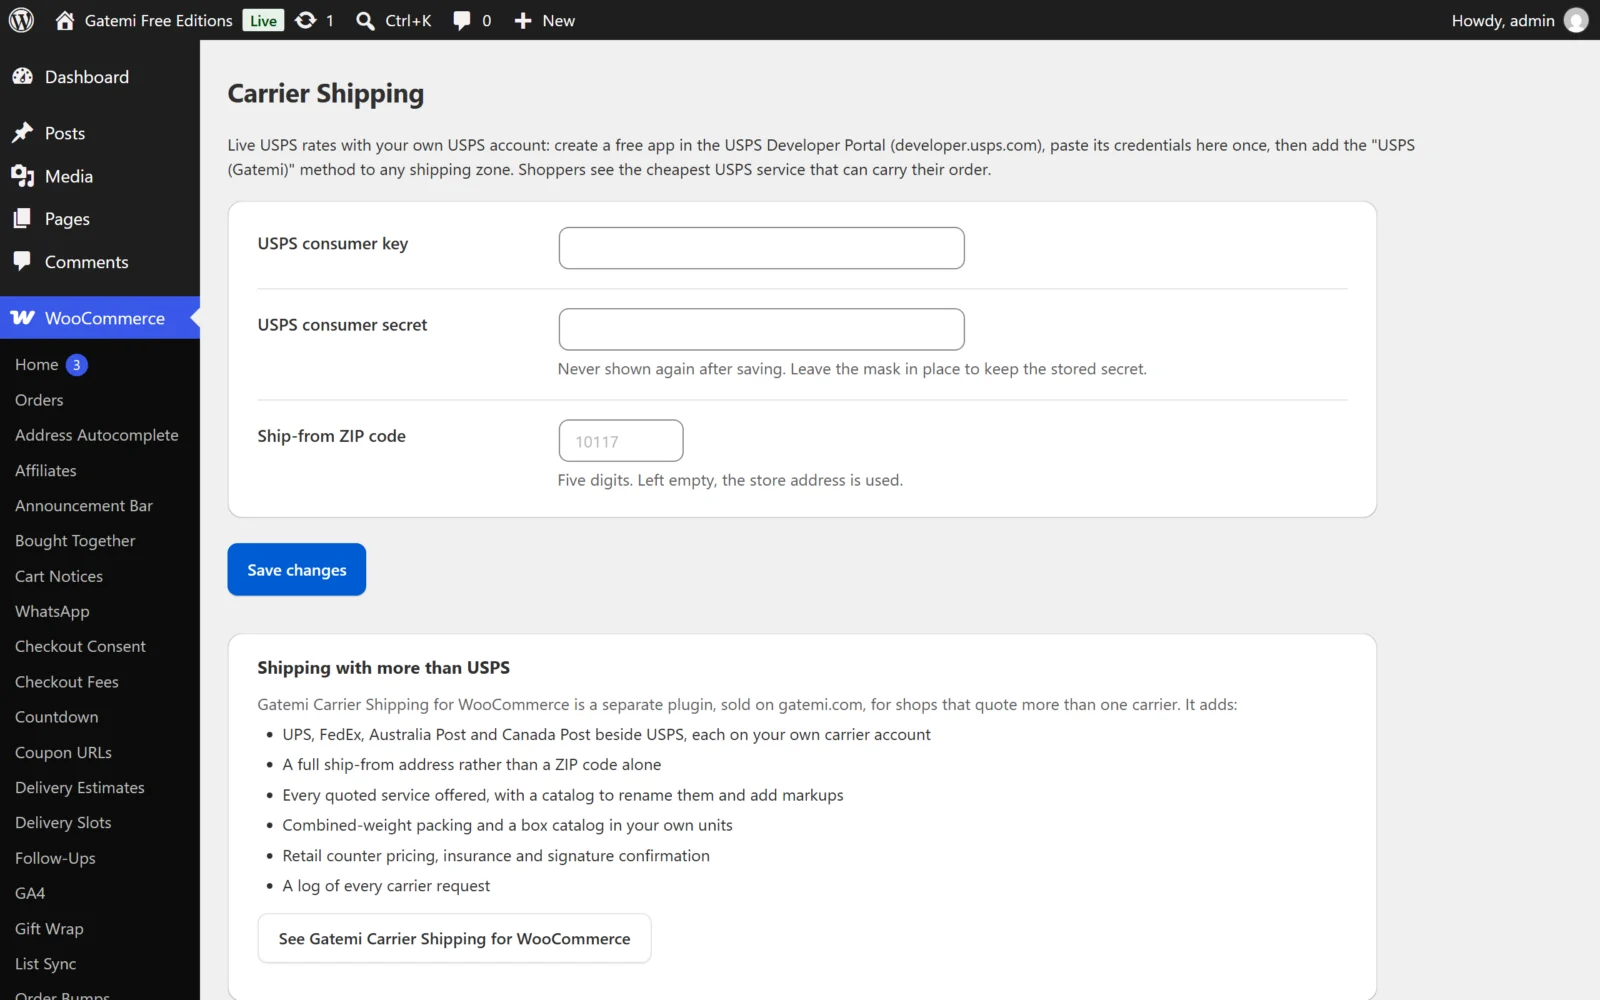
Free edition:
- Paste the USPS consumer key and USPS consumer secret.
- Type your Ship-from ZIP code (five digits), or leave it empty to use the postcode of your WooCommerce store address.
- Click Save changes. The secret is shown as dots from now on.
Full edition: the screen has a General tab (ship-from address, packing, boxes, logging) and one tab per carrier. On the USPS tab, tick Quote USPS rates, enter the Consumer key and Consumer secret, and press Test connection. Do the same on each other carrier's tab you want. See Settings.
Credentials are entered here once, not in each shipping zone.
4. Add the method to a shipping zone
- Go to WooCommerce → Settings → Shipping → Shipping zones.
- Edit a zone you ship to, for example "United States".
- Click Add shipping method and choose USPS (Gatemi) (free) or USPS, UPS, FedEx, Australia Post or Canada Post (full).
- Optionally edit its Method title. In the full edition you also choose Rates to offer, a Cheapest-rate label, Tax status and a Fallback price.
- Save the zone.
5. Check it works
- In a private window, add a product with a weight to the cart.
- On the cart or checkout, enter a destination with a ZIP/postcode.
- Free edition: one rate appears, for example "USPS — USPS Ground Advantage $8.40": the cheapest USPS service priced for the whole order. Full edition: each enabled service the carrier returned appears (or the cheapest only, if you chose that).
No rate? That is deliberate when something is missing — see FAQ and troubleshooting. The plugin offers no rate rather than a wrong one.