
Gatemi Trust Badges puts a small row of reassurance under the button a shopper is about to press. It has two halves:
- Seals — short promises in your own words: Secure checkout, Easy returns, Fast dispatch and so on.
- The payment row — the payment methods your checkout actually offers right now, named exactly as your checkout names them.
It is a free plugin with no paid edition. Everything in these docs is in the plugin on wordpress.org.
Requirements
- WordPress 6.4 or later
- PHP 7.4 or later
- WooCommerce 8.0 or later (tested up to 10.9)
- Declared compatible with High-Performance Order Storage and with the Cart and Checkout blocks
The header carries Requires Plugins: woocommerce, so WordPress 6.5 and later will not activate it without WooCommerce. If WooCommerce is later switched off, the plugin does nothing and says so in a row under its entry on the Plugins screen.
The plugin makes no external requests, loads no images from anybody else and ships no JavaScript.
1. Install
- Go to Plugins → Add New Plugin.
- Search for Gatemi Trust Badges.
- Press Install Now, then Activate.
Or download the zip from wordpress.org/plugins/gatemi-trust-badges and upload it through Plugins → Add New Plugin → Upload Plugin.
2. What you get straight away
The plugin works the moment it is active. Out of the box it shows:
- under the add-to-cart button on product pages, and under the pay button at the checkout;
- the seals Secure checkout (only if your site is on HTTPS) and Easy returns;
- the payment row, built from your enabled gateways.
The cart placement is off until you turn it on.
3. Open the screen
Go to WooCommerce → Trust badges. You need the manage_woocommerce capability.
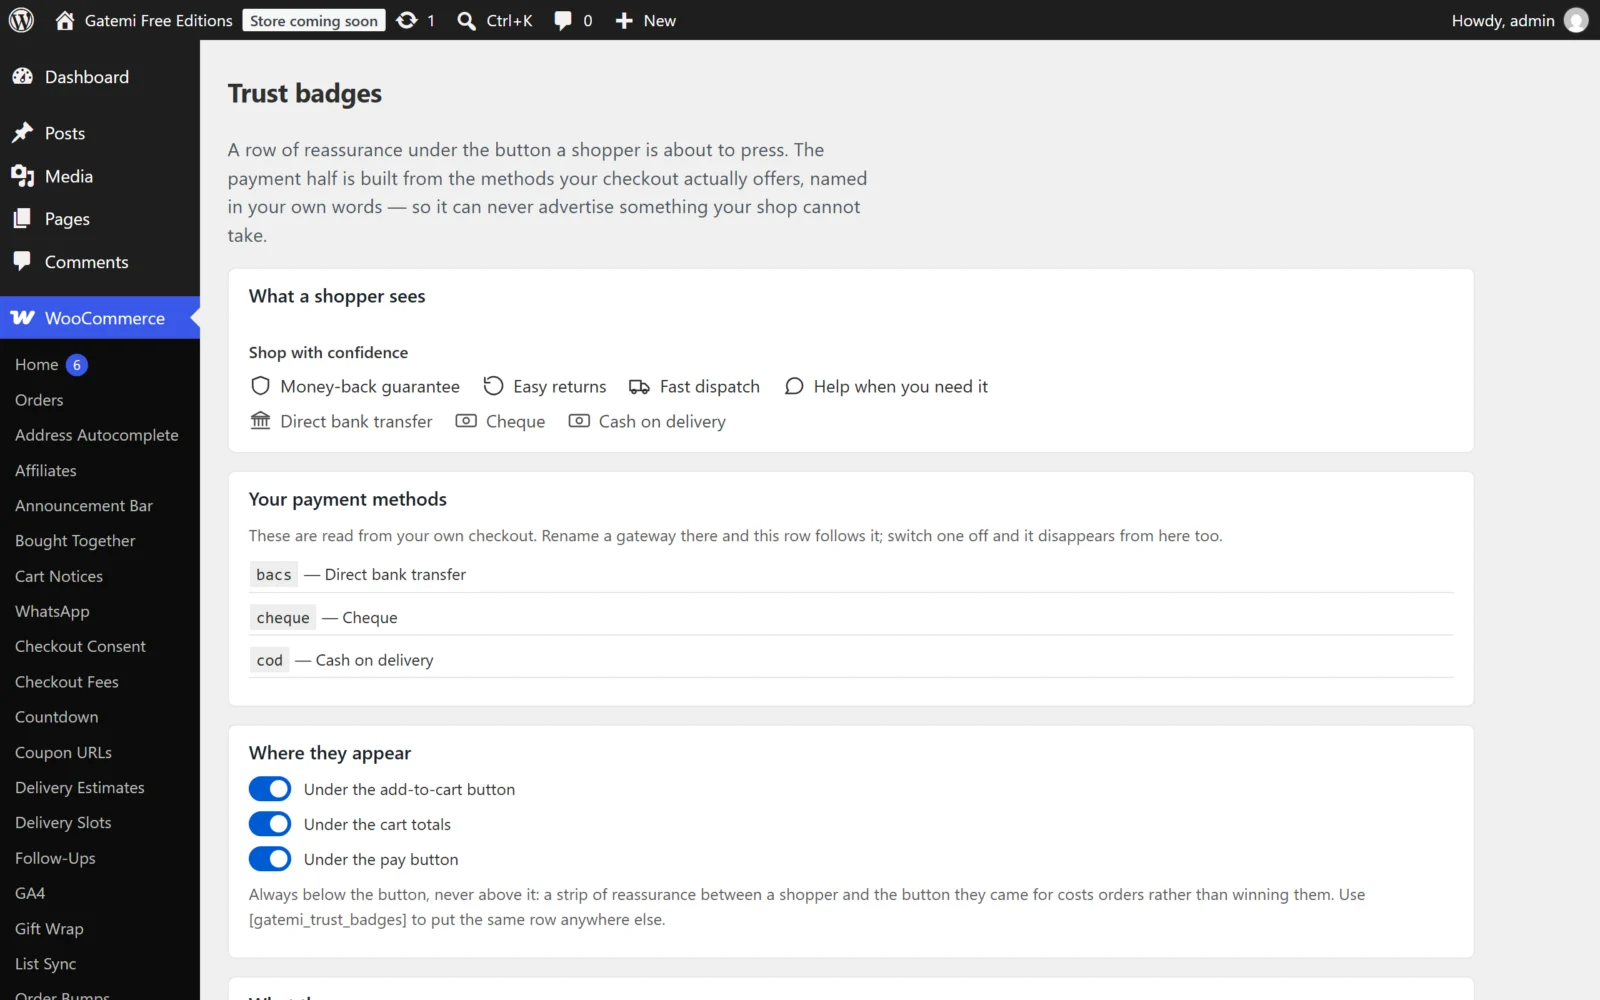
At the top, What a shopper sees is a live preview drawn with the storefront's own stylesheet. Below it, Your payment methods lists what the payment row will name. Then come the settings, described on Settings.
4. Set it up
- Under Where they appear, tick the places you want the row: Under the add-to-cart button, Under the cart totals, Under the pay button.
- Under What they say, tick the seals your shop can honestly promise, and change the wording of any of them in the text box beside it. Leave a box empty to keep the default wording.
- Leave Show the payment methods your checkout offers ticked unless you want seals only.
- Under How they look, add an optional line above the badges (for example Shop with confidence) and an accent colour such as
#2f6f4f, or leave the colour empty to use your theme's text colour. - Press Save changes. The screen answers Settings saved. and the preview updates.
5. Check it works
- Open a product page in a private window. The row is directly under the add-to-cart button.
- Add the product to the cart and go to the checkout. The row is under the pay button — inside the payment box on the classic checkout, and directly beneath the Checkout block on a block checkout.
- The payment row should list the same methods your checkout offers, in the same words.
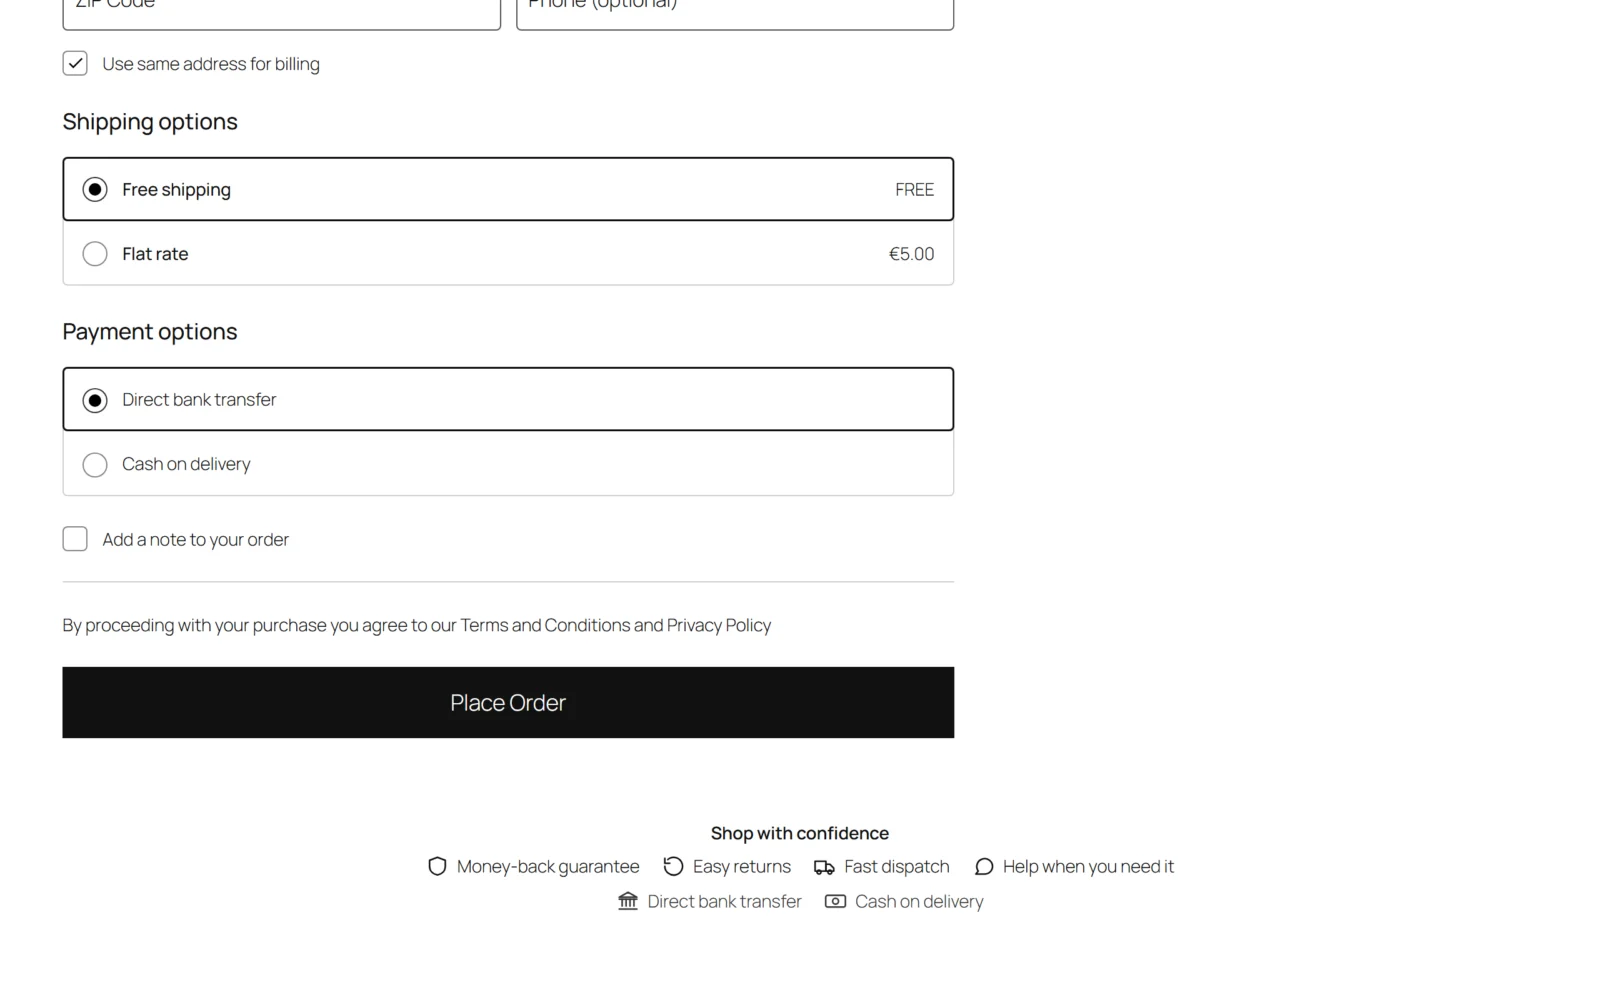
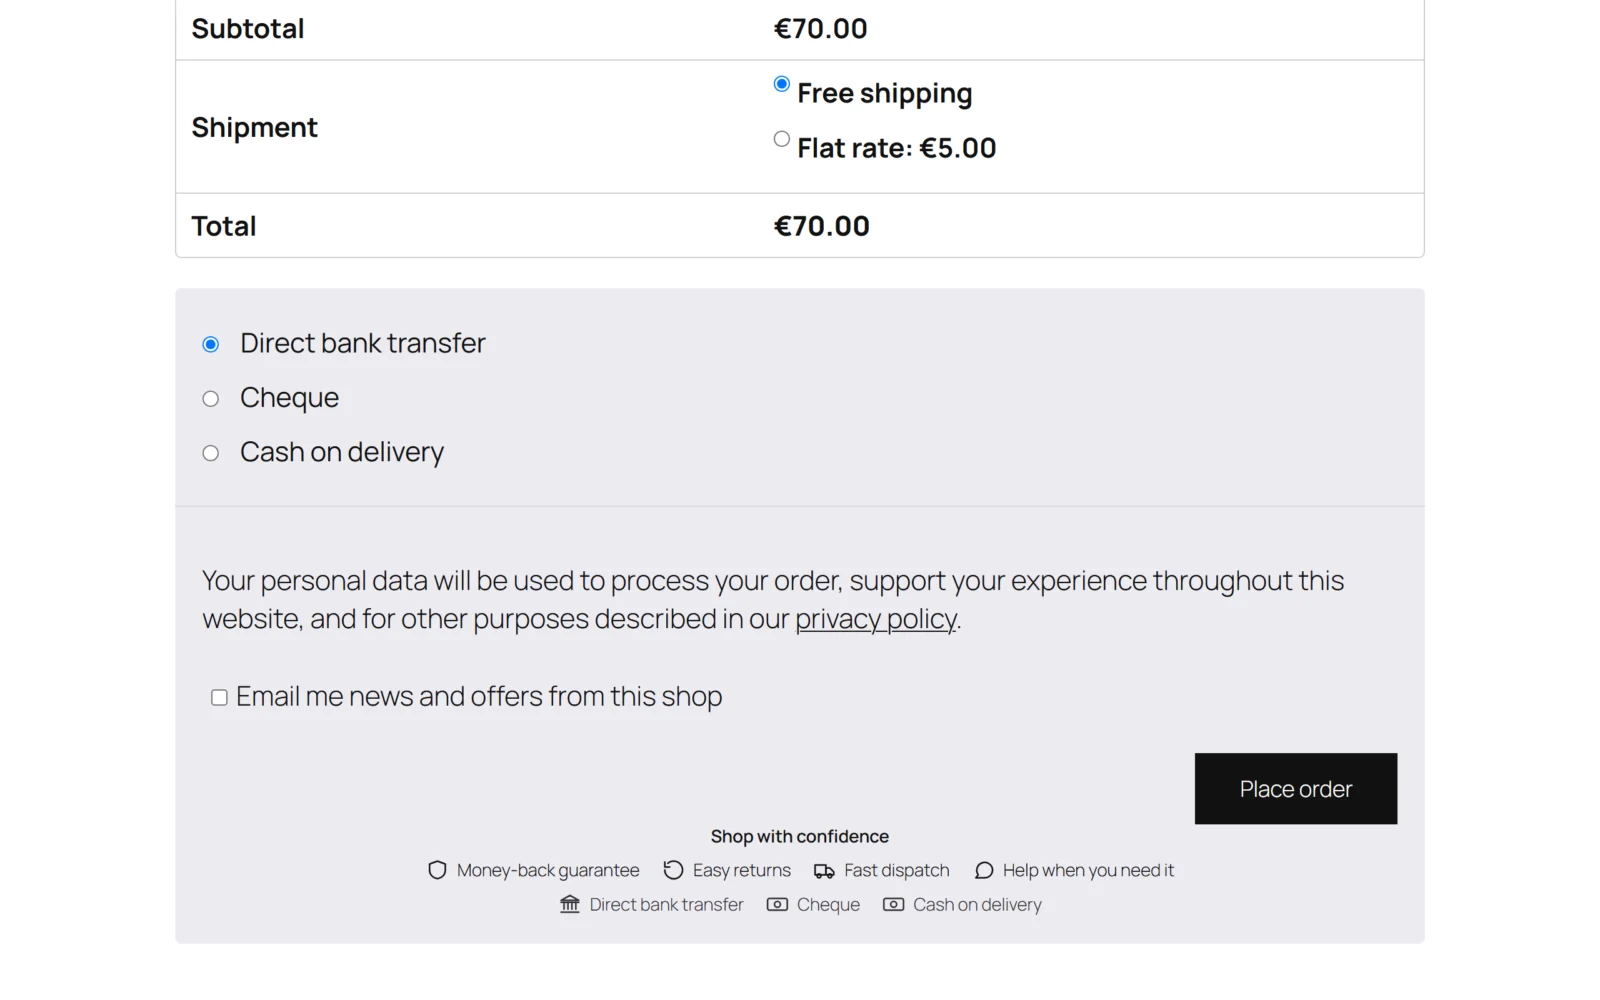
If something is missing, see FAQ and troubleshooting. The three usual answers: the site is not on HTTPS (no padlock), no gateway is enabled (no payment row), or the placement is unticked.
Anywhere else
Put [gatemi_trust_badges] in any page, post or widget to draw the same row there. The shortcode always draws the row, whichever placements are ticked.