
Gatemi Product Badges puts a short word on product images — "Sale", "Sold out", "Handmade" — on the shop pages and on the product page. Each badge says what it reads and why it appears; the plugin decides which products wear it.
These docs cover both editions:
- Gatemi Product Badges — the free edition, coming to wordpress.org. Three badges, for products on sale, products out of stock, or products and categories you choose.
- Gatemi Product Badges for WooCommerce — the full edition, sold on gatemi.com. As many badges as you like, the new, low stock and featured conditions, start and end dates, corners, shapes and colours, and the option to remove WooCommerce's own sale flash.
Anything marked Full edition is only in the paid plugin. Everything else is in both.
Requirements
| Free edition | Full edition | |
|---|---|---|
| WordPress | 6.4 or later | 6.4 or later |
| PHP | 7.4 or later | 7.4 or later |
| WooCommerce | 8.0 or later | 8.0 or later |
Both editions declare compatibility with High-Performance Order Storage (HPOS) and with the Cart and Checkout blocks. No JavaScript is loaded on your storefront.
1. Install
Free edition: coming to wordpress.org. Until it is listed, install the zip through Plugins → Add New → Upload Plugin and activate it.
Full edition: download the zip from your gatemi.com account, go to Plugins → Add New → Upload Plugin, upload and activate. Then open WooCommerce → Product Badges and enter your licence key in the License & updates card. The key switches on one-click updates; the plugin works without one.
You only need one edition. If both are active, the free edition stands down and says so in a row under its entry on the Plugins screen. Both store badges in the same option, so nothing is lost either way.
2. Create a badge
- Open WooCommerce → Product Badges (capability
manage_woocommerce). - In the first row, type What it says, for example
Sale. - Choose It appears when:
- the product is on sale,
- the product is out of stock, or
- I choose the products or categories — then type the Product ids and/or Category ids, separated by commas.
- Press Save changes.
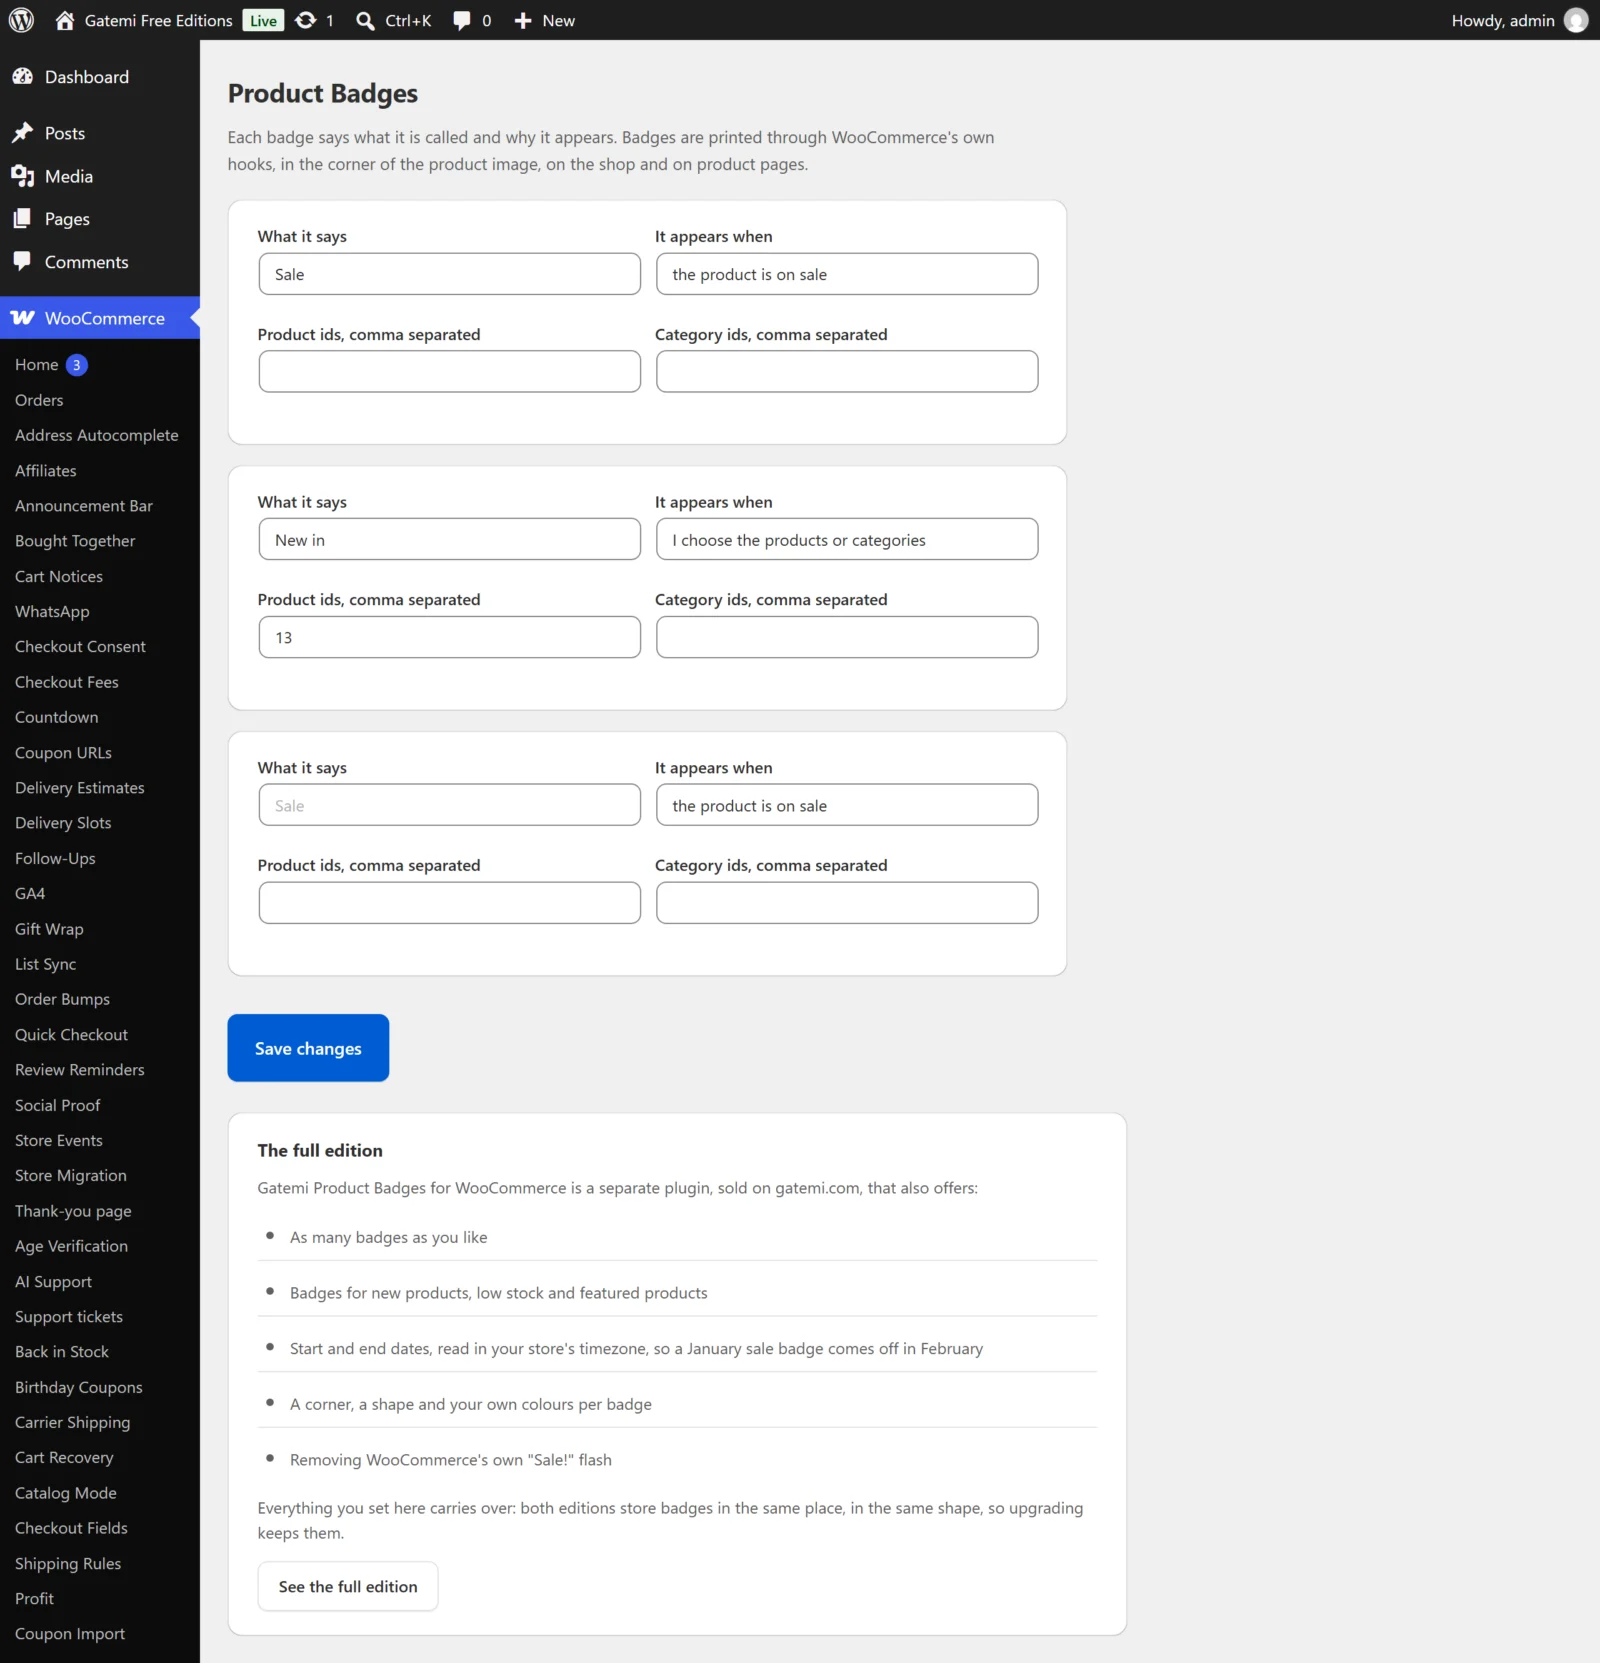
Full edition: press Add a badge for each badge you need, and set its Corner, Shape, Background and Text colour, and optionally Starts and Ends dates. See Settings.
A row with nothing in What it says is not saved: a badge with no words would be an empty coloured box.
3. Check it works
- Put a product on sale (give it a sale price).
- Open your shop page. The product's image carries the "Sale" badge in the top-left corner.
- Open the product page. The badge is there too, beside the gallery.
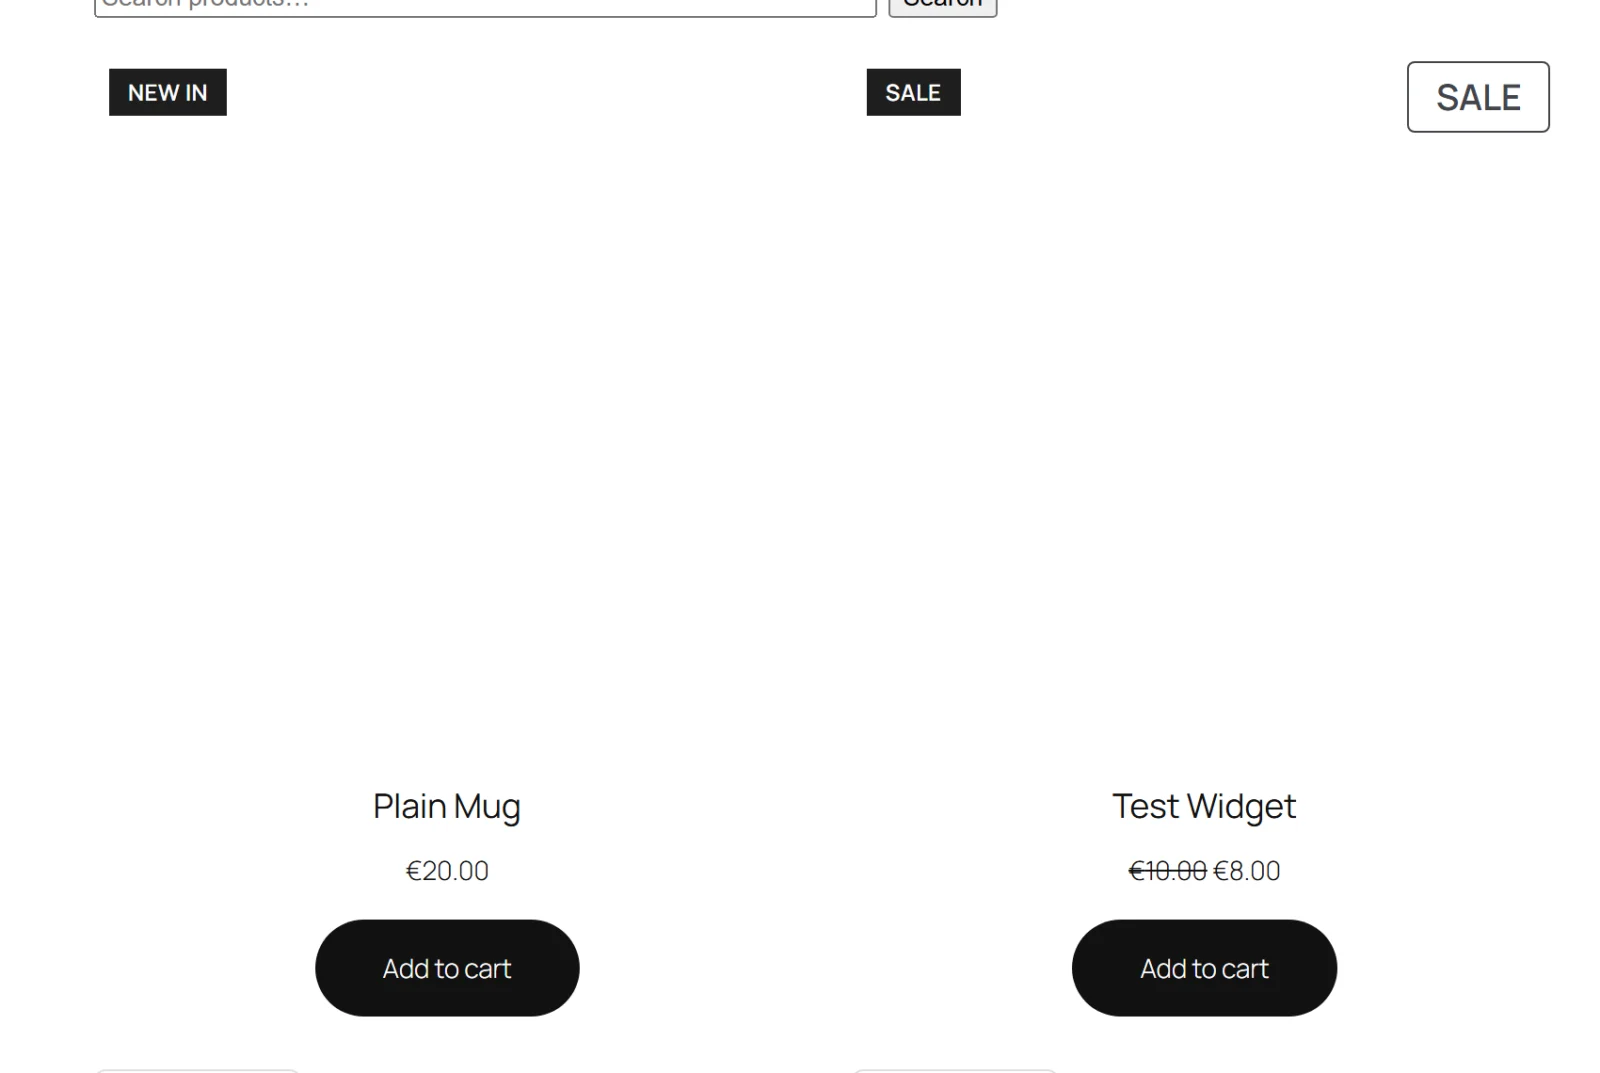
WooCommerce prints its own "Sale!" flash as well. Full edition: tick Remove WooCommerce's own sale flash if you made a sale badge of your own, so a product on sale does not wear two.
Where badges appear
Badges are printed through WooCommerce's own hooks — the same places it prints its sale flash:
- on shop, category and search listings, through
woocommerce_before_shop_loop_item_title; - on the product page, through
woocommerce_before_single_product_summary.
A theme or page builder that draws product cards or the product page without those hooks shows no badges there.