
Gatemi Pick & Pack prints two warehouse documents from your orders screen:
- a pick list — every order you ticked, pooled into one row per product, so the warehouse is walked once rather than once per order;
- packing slips — one page per order, to go in the box.
Both are ordinary web pages with a print stylesheet. Your browser prints them, or saves them as PDF.
These docs cover both editions:
- Gatemi Pick & Pack — the free edition, coming to wordpress.org.
- Gatemi Pick & Pack for WooCommerce — the full edition, sold on gatemi.com.
Anything marked Full edition is only in the paid plugin. Everything else is in both.
Requirements
| Free edition | Full edition | |
|---|---|---|
| WordPress | 6.4 or later | 6.4 or later |
| PHP | 7.4 or later | 7.4 or later |
| WooCommerce | 8.0 or later | 8.0 or later |
Both editions work with High-Performance Order Storage (HPOS) and with the legacy order storage: the bulk actions are added to both orders screens. The plugin creates no database tables, generates no files and adds nothing to your storefront.
1. Install
Free edition: coming to wordpress.org. Until it is listed, install the zip through Plugins → Add New → Upload Plugin and activate it.
Full edition: download the zip from your gatemi.com account, go to Plugins → Add New → Upload Plugin, upload and activate. Then open WooCommerce → Pick & Pack and enter your licence key in the License & updates card. The key switches on one-click updates; the plugin works without one.
You only need one edition. If both are active, the free edition stands down and says so in a row under its entry on the Plugins screen. Both use the same settings and print the same paper.
2. Look at the screen
Open WooCommerce → Pick & Pack (capability manage_woocommerce). It tells you where the two bulk actions are and holds the few settings described in Settings. The defaults are sensible; you can print straight away.
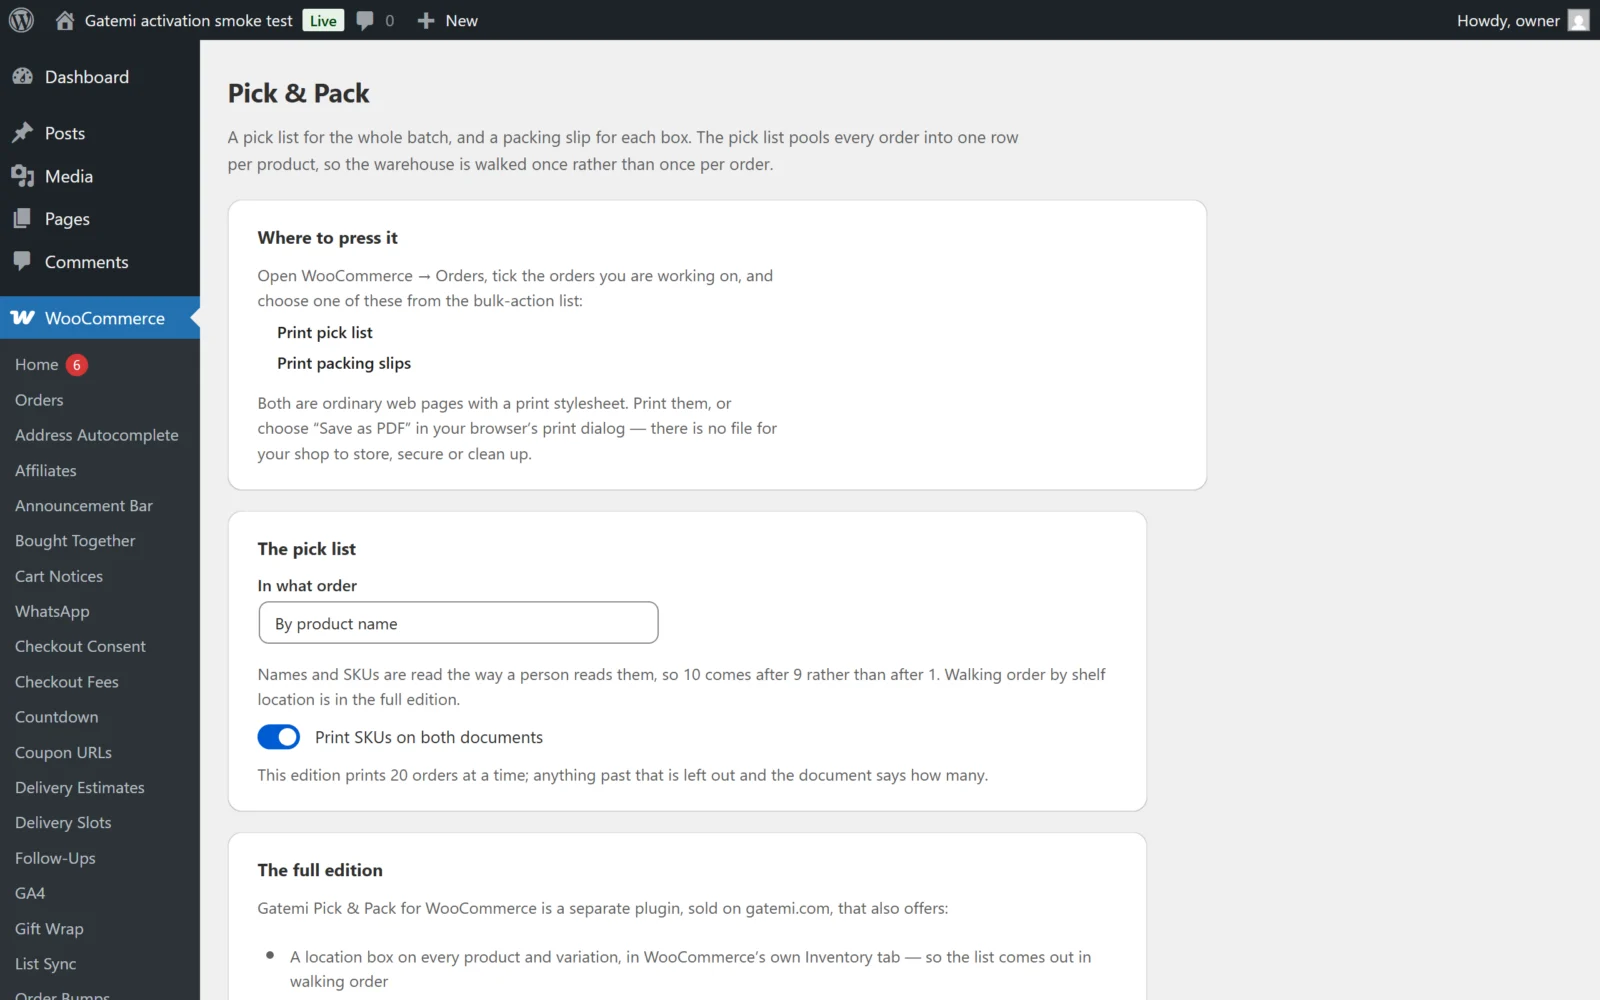
Full edition: give your products a shelf location. Open a product, go to Product data → Inventory and fill in Location (for example A-12-3). A variation has its own Location box; left empty, it uses the product's. With locations in place, the pick list comes out in walking order.
3. Print a pick list
- Go to WooCommerce → Orders.
- Tick the orders you are working on — for example everything in Processing.
- From Bulk actions, choose Print pick list and press Apply.
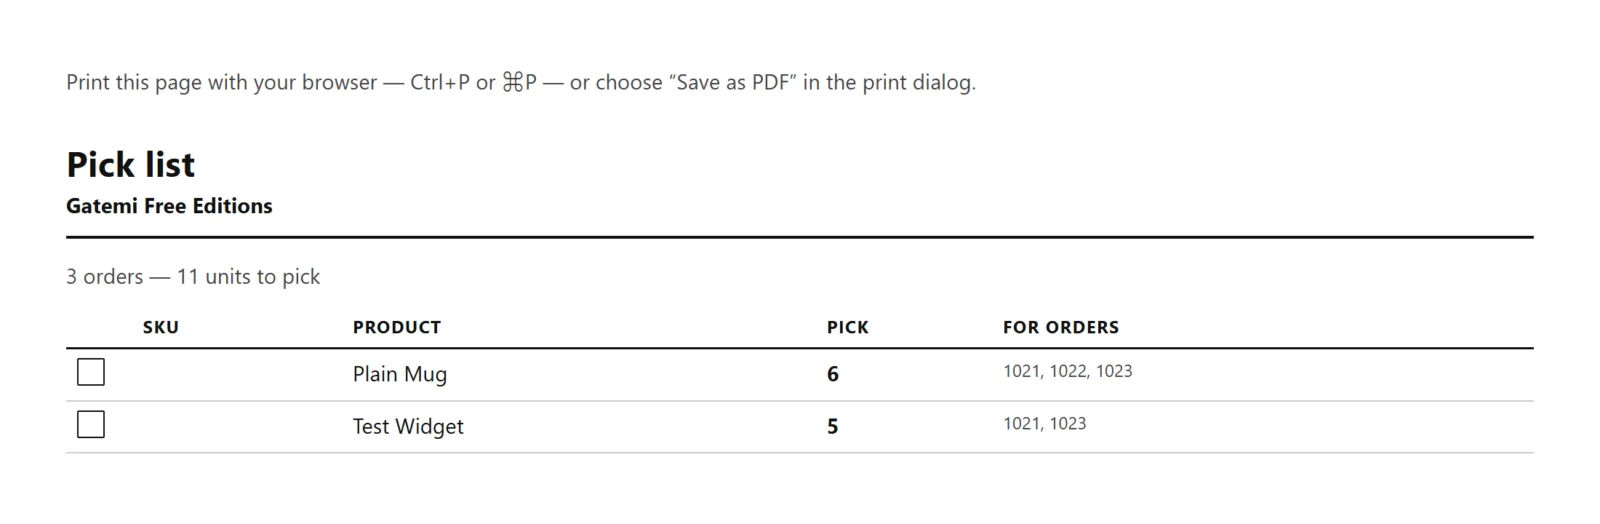
- A new page opens with one table: a tick box, the location (Full edition), the SKU, the product, how many to pick, and which orders the units are for.
- Print it with Ctrl+P (⌘P on a Mac), or choose Save as PDF in the print dialog.
4. Print the packing slips
- Back on WooCommerce → Orders, keep the same orders ticked.
- Choose Print packing slips and press Apply.
- You get one page per order with the order number and date, the shipping address (or the billing address on an order with no shipping address), the lines and their quantities, and the customer's note if there is one.
- Print. Each order starts on a new sheet.
Prices are not printed on the slip unless you ask for them (Full edition). The slip goes in the box, and boxes go to gift recipients and offices.
How many orders at once
- Free edition: 20 orders per document. If you tick more, the first 20 are printed and the pick list says how many were left out.
- Full edition: 200 by default, up to 2,000 — set under How many orders one document covers. Tick more and the document says how many were left out.
Check it works
Pick two orders that both contain the same product, one unit each. Print a pick list: that product should appear once, with Pick 2 and both order numbers beside it. That is the pooling rule, explained in How it works.