
Gatemi My Account changes the menu customers see in WooCommerce's My Account page: rename a tab, move it, hide it, or add a tab of your own with your own content. It changes WooCommerce's real menu rather than replacing it, so every tab another plugin adds — Subscriptions, Bookings, Memberships, a theme's own — stays where it is.
There are two editions, and this manual covers both:
- Gatemi My Account — the free edition. Rename, reorder and hide any tab, and add one tab of your own with text you write.
- Gatemi My Account for WooCommerce — the full edition, sold on gatemi.com. As many tabs of your own as you need, icons (a Dashicons class or an emoji), tabs and menu items shown only to certain user roles, tabs whose content is a page built in the block editor, a note at the top of the account dashboard, and a choice of who may edit the screen.
Requirements
Both editions need:
- WordPress 6.4 or later
- PHP 7.4 or later
- WooCommerce 8.0 or later (tested up to 10.9)
Both declare compatibility with High-Performance Order Storage (HPOS) and the Cart and Checkout blocks.
Install
Free edition
The free edition is coming to wordpress.org. Once it is listed, install it from Plugins → Add New by searching for "Gatemi My Account", then click Activate.
Full edition
- Sign in to your gatemi.com account and download the plugin zip.
- Go to Plugins → Add New → Upload Plugin, choose the zip, click Install Now, then Activate.
- Go to WooCommerce → My Account, find License & updates at the bottom, paste your licence key and click Activate. The key switches on one-click updates and support; the plugin works without it.
If the free edition is active too, it stands down while the full edition runs and a line under it on the Plugins screen says so. Both read the same stored menu, so nothing has to be set up again.
First setup
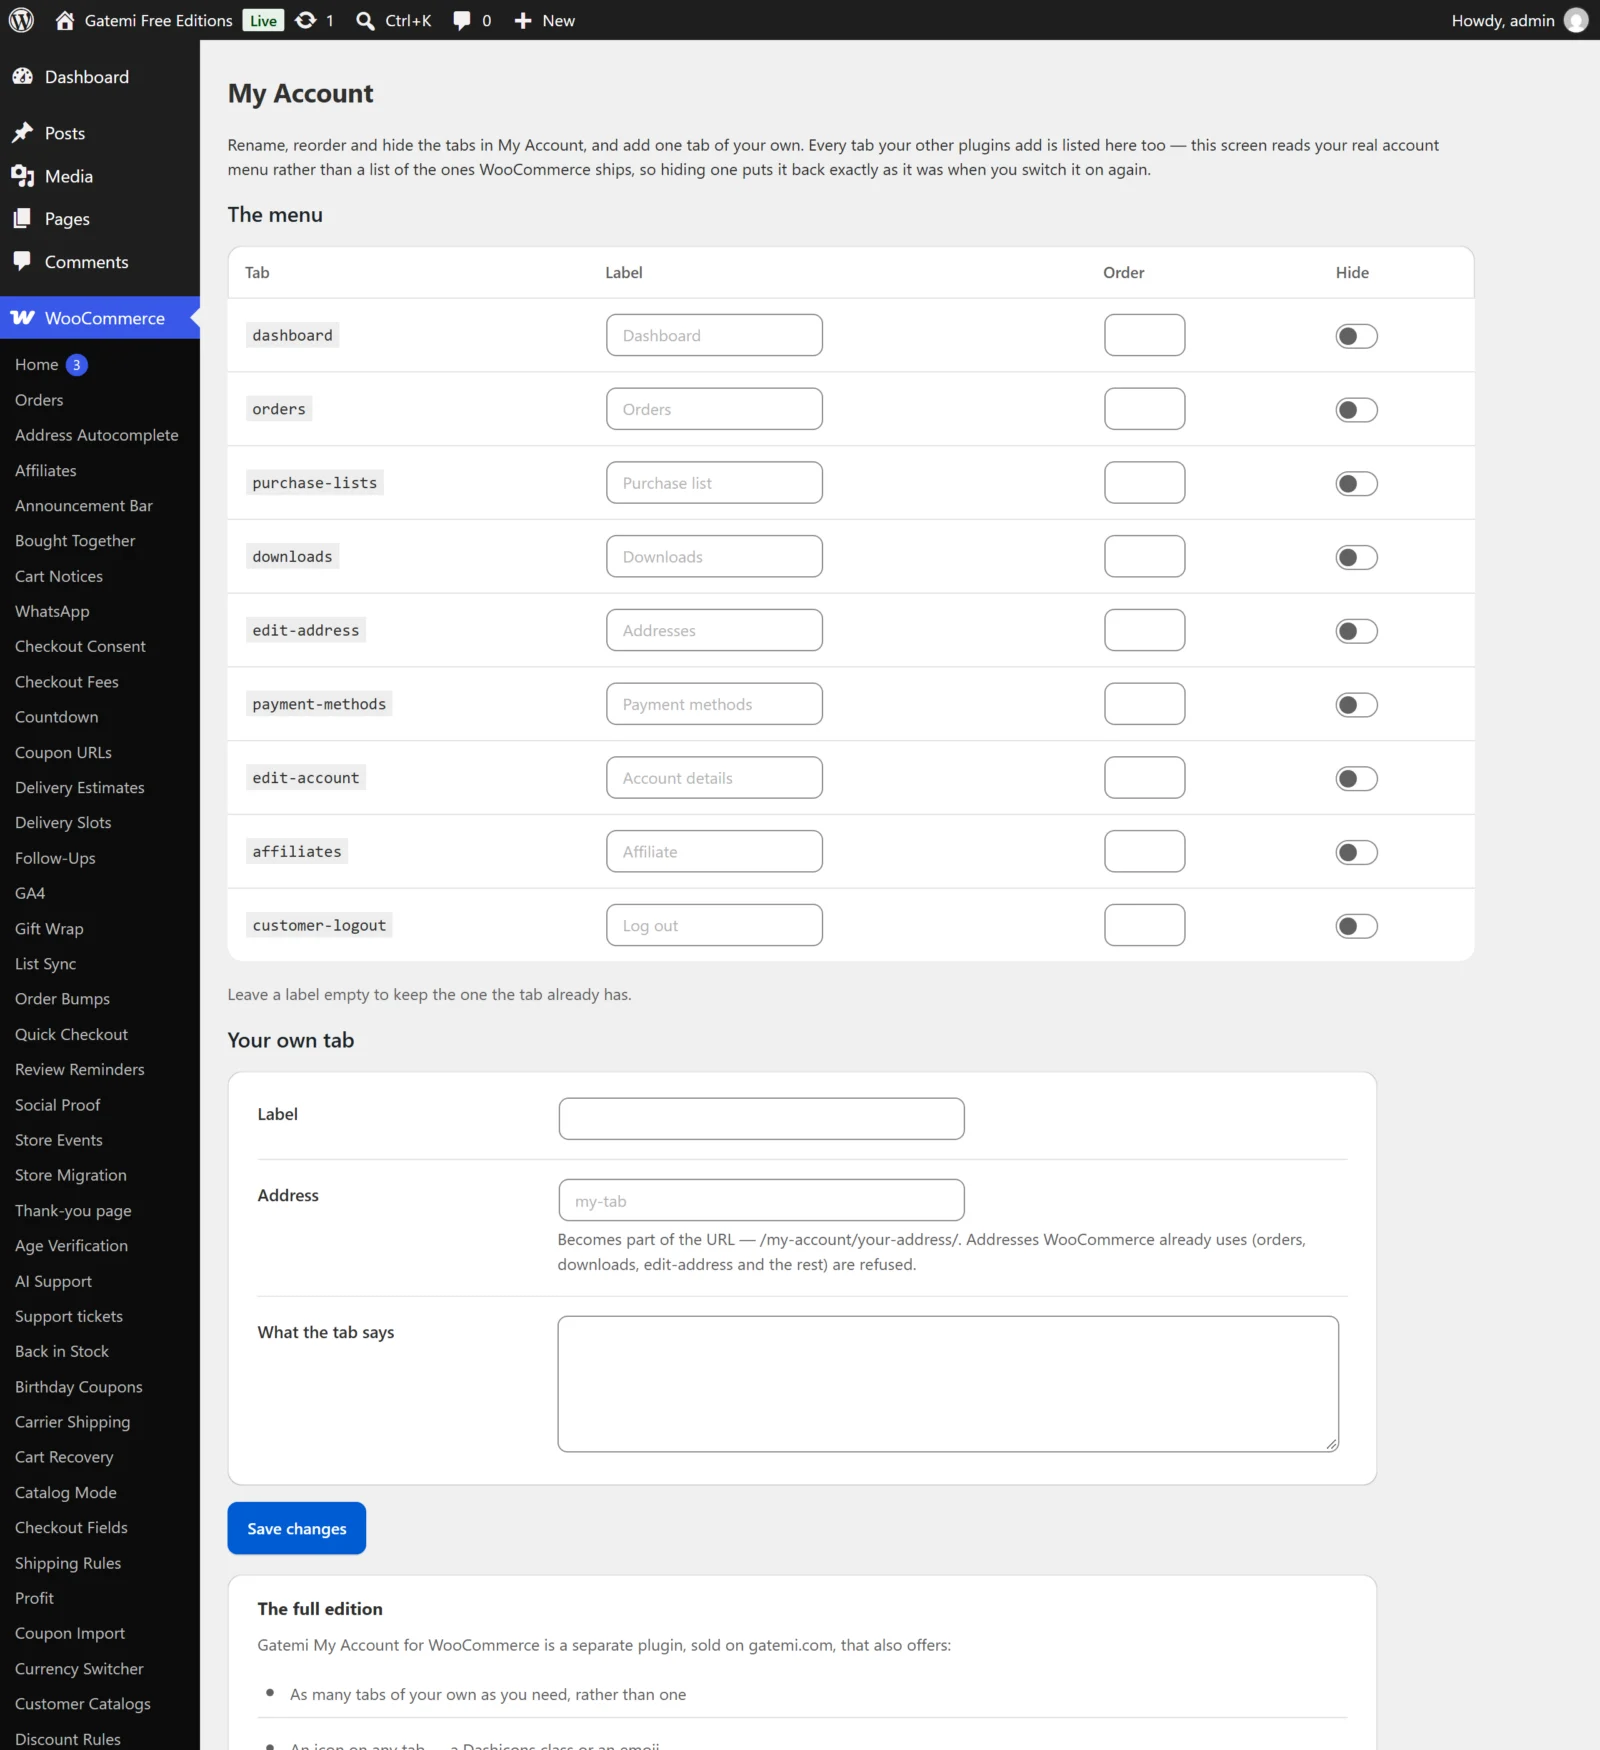
- Go to WooCommerce → My Account. The menu table lists every tab your store's account menu has right now, including other plugins' tabs.
- To rename a tab, type the new name in Label. Leave it empty to keep the tab's own name.
- To move a tab, give it a number in Order. Lower numbers come first. Tabs you leave without a number keep WooCommerce's order, after the ones you numbered.
- To remove a tab from the menu, tick Hide.
- To add your own tab, fill in Your own tab (full edition: Your own tabs, with Add another tab):
- Label — the menu text, for example "Trade prices".
- Address — the end of the URL, for example
trade-prices, giving/my-account/trade-prices/. Addresses WooCommerce already uses are refused. - What the tab says — the content. Basic HTML and shortcodes work.
- Click Save changes.
Full edition: each row can also have an Icon and Only these roles, your own tabs can show a page instead of text (Or show a page instead), and the Settings section has the dashboard note. See Settings.
Check that it works
- Open your shop in a private window and sign in as a customer (or use your own account).
- Go to My Account. The menu shows your labels, in your order, without the hidden tabs.
- Click your own tab. It opens at the address you chose and shows your content inside the account page, with the menu beside it.
If your own tab gives a "page not found" error, see FAQ and troubleshooting.