
Gatemi License Manager sells license keys through WooCommerce: every unit of a product you mark gets its own key when the order completes, delivered by email, on the order page and in the customer's account. Keys are either generated at random or drawn from a pool you upload — and a pool counts as the product's stock.
There are two editions, and this manual covers both:
- Gatemi License Manager — the free edition. A key per unit, generated or from a pool, delivered on every surface, revoked on a full refund.
- Gatemi License Manager for WooCommerce — the full edition. Adds activation limits and terms, an activate/deactivate/check/update/sync REST API your own software calls, uploaded releases served through signed, short-lived download links, product identifiers and bundles, per-site deactivation and a key reset in My Account, admin extend and revoke, a CSV export and an append-only audit log.
Requirements
Both editions need:
- WordPress 6.4 or later
- PHP 7.4 or later, with libsodium or OpenSSL (one of them is in almost every PHP build). Keys are stored encrypted; without either, no key is issued and the screen says so.
- WooCommerce 8.0 or later (tested up to 10.9)
Both declare compatibility with High-Performance Order Storage (HPOS) and the Cart and Checkout blocks.
Install
Free edition
The free edition is coming to wordpress.org. Once it is listed, install it from Plugins → Add New by searching for "Gatemi License Manager", then click Activate. Activating creates the plugin's database tables.
Full edition
- Sign in to your gatemi.com account and download the plugin zip.
- Go to Plugins → Add New → Upload Plugin, choose the zip, click Install Now, then Activate.
- Go to WooCommerce → License Manager, find License & updates, paste your gatemi.com licence key and click Activate to switch on updates.
The full edition reads the same tables, settings and product fields as the free edition. While it is active the free edition stands down, so one order is never licensed twice.
First setup
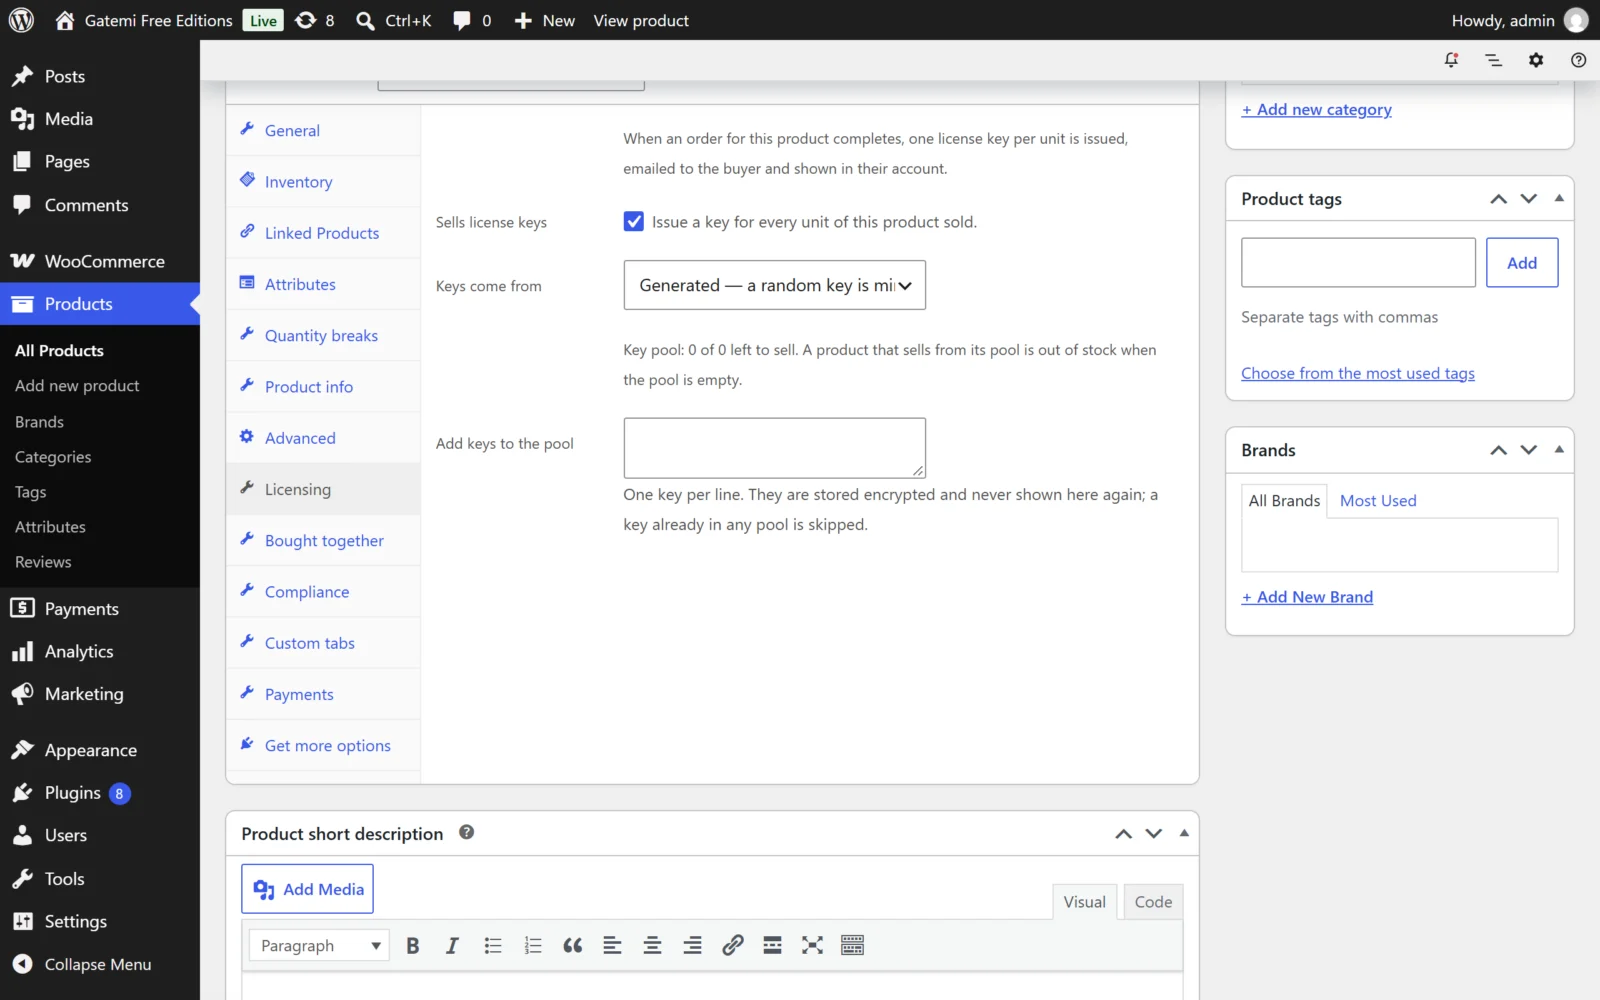
- Edit the product you sell keys for: Products → All Products → Edit. Most license products are Virtual (and often Downloadable).
- Open the Licensing tab in Product data and tick Sells license keys.
- Choose Keys come from:
- Generated — a random key such as
GM-7K2QD-RT9WM-4HXPA-ZN3CB-8YFJEis minted for each unit. - A pool — paste your own keys into Add keys to the pool, one per line. They are stored encrypted and never shown on that screen again.
- Generated — a random key such as
- Full edition: fill in Product identifiers (what the key unlocks, as your software names it), Activation limit and Term (days). See Settings.
- Click Update.
Check that it works
- Place a test order for the product and pay for it.
- Mark the order Completed (WooCommerce does this itself for orders that contain only virtual, downloadable products). Keys are issued at Completed, never before.
- Open the order in WooCommerce → Orders. A note says how many keys were issued, and the keys are listed with their status below the order details.
- The customer's completed-order email carries a Your license keys section, and the keys appear on the order page and in My Account → Licenses.
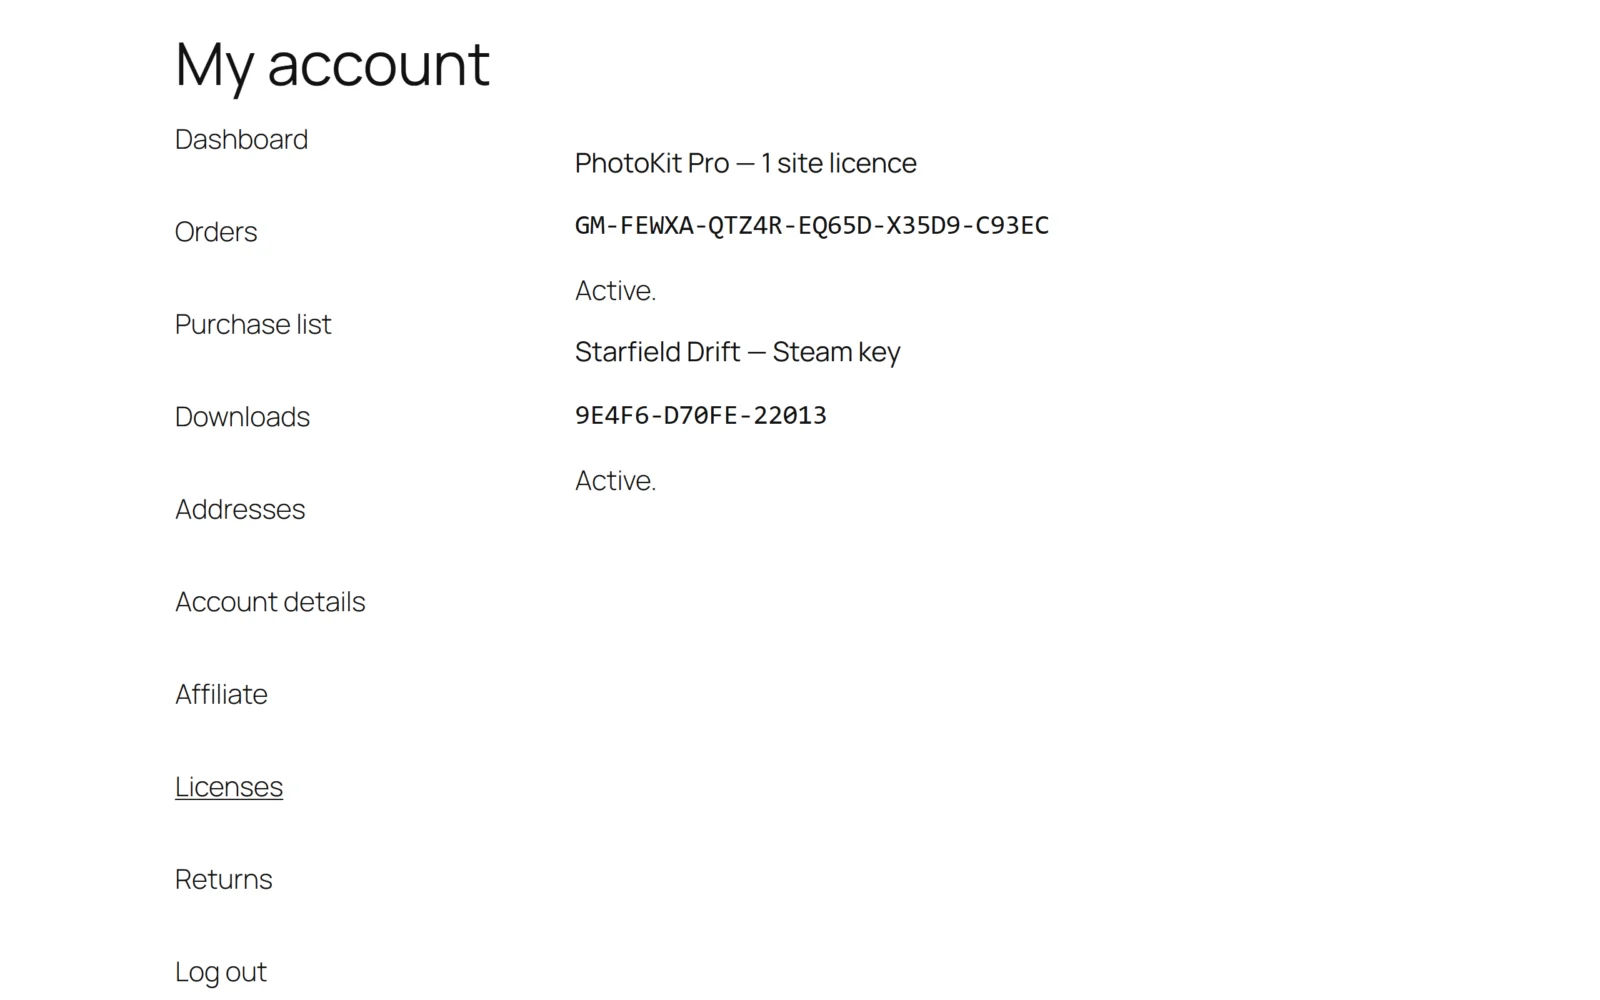
Complete the same order again and nothing changes: every unit has exactly one key, whatever happens.
If a note says a key could not be issued, the pool ran out or the server has no cipher — see FAQ and troubleshooting.