
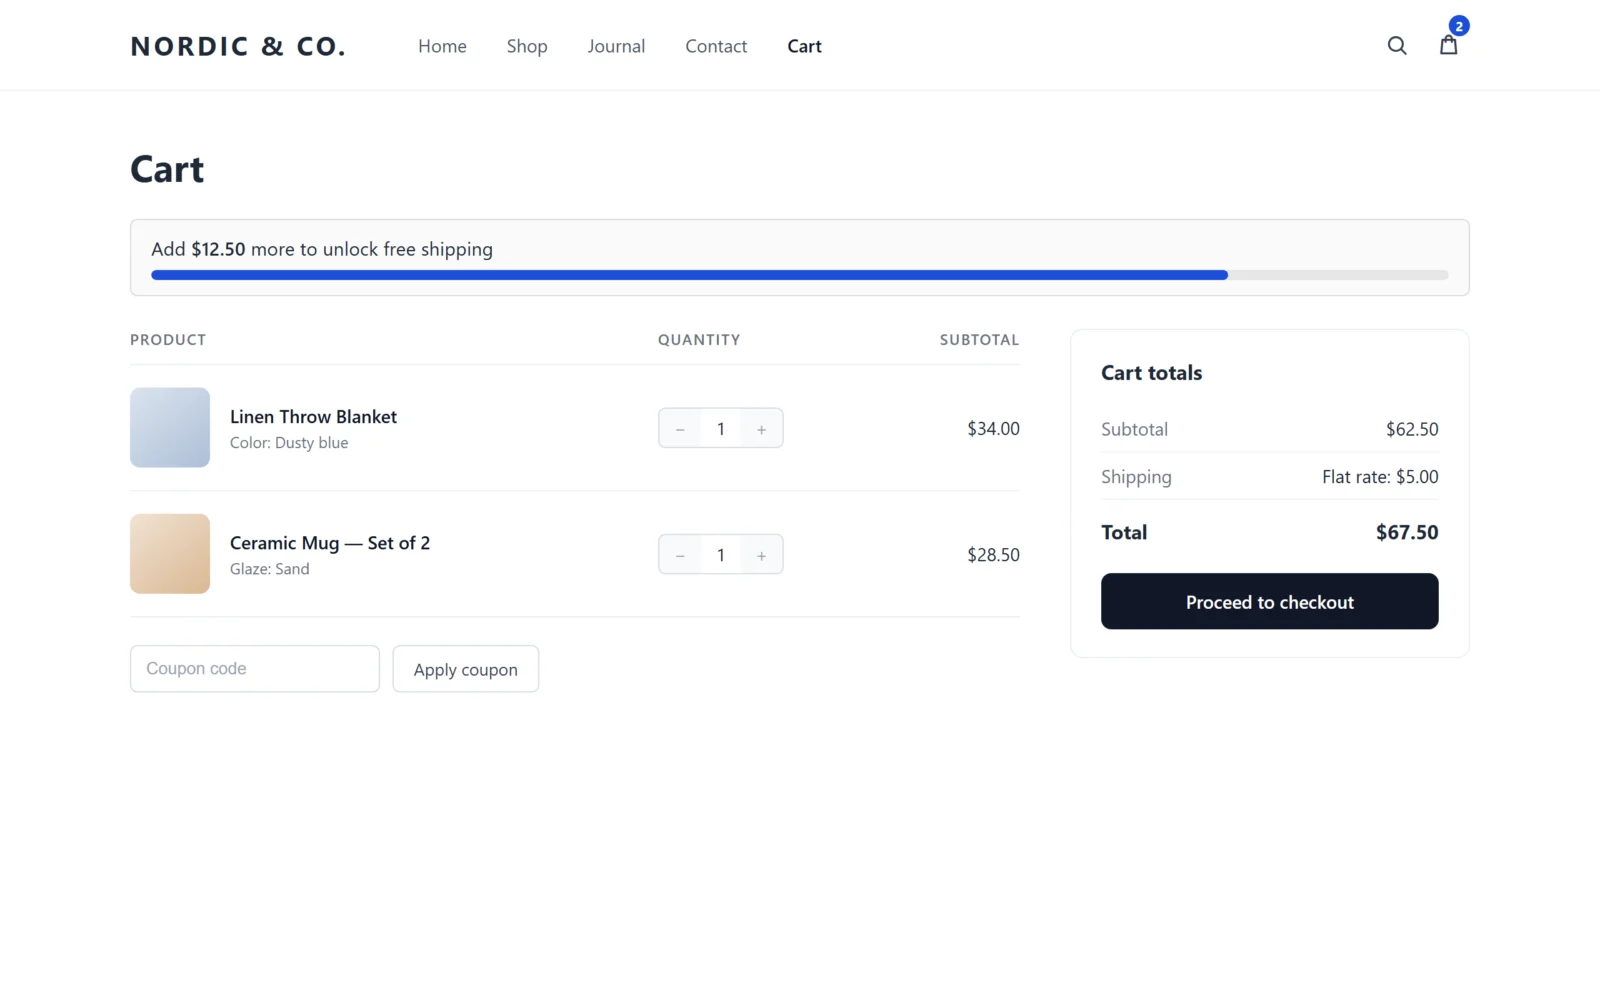
Gatemi Free Shipping Bar shows a progress bar — "Add £12.50 more to unlock free shipping" — on your shop and cart. It has no threshold setting of its own: it reads the Free shipping method you already set up in WooCommerce's shipping zones. Change the minimum there and the bar follows.
There are two editions:
- Gatemi Free Shipping Bar — the free edition, on wordpress.org. The bar on shop and category pages and on the cart, from a minimum-amount free-shipping rule, in your theme's own styling.
- Gatemi Free Shipping Bar for WooCommerce — the full edition, sold on gatemi.com. It adds the mini-cart and checkout placements, your own wording with placeholders, two brand colours with a live preview, a bar that refreshes without a page reload on the classic cart, coupon-based free-shipping rules, and a block and a shortcode for placing the bar anywhere. See the product page.
Requirements
- WordPress 6.4 or later
- PHP 7.4 or later
- WooCommerce 8.0 or later (tested up to 10.9)
- Both editions declare compatibility with High-Performance Order Storage (HPOS) and the Cart & Checkout blocks. The bar stores nothing on orders.
Install
Free edition.
- Go to Plugins → Add New Plugin and search for "Gatemi Free Shipping Bar".
- Click Install Now, then Activate.
Full edition.
- Download the zip from your gatemi.com account.
- Go to Plugins → Add New Plugin → Upload Plugin, choose the zip, click Install Now, then Activate.
- Go to WooCommerce → Free Shipping Bar, find License & updates, paste your licence key and click Activate. The key switches on one-click updates and support; the bar works without it.
If both editions are active, the free one stands down and shows nothing — a line under it on the Plugins screen says so — so the shop never gets two bars. You can deactivate the free edition.
First setup
The bar needs a free-shipping rule with an amount to count towards.
- Go to WooCommerce → Settings → Shipping → Shipping zones.
- Open the zone your customers ship to (or "Locations not covered by your other zones").
- Add a Free shipping method, or edit the one there.
- Set Free shipping requires… to A minimum order amount and type the amount, for example
50. Decide whether Apply minimum order rule before coupon discount should be ticked — the bar measures the cart the same way. - Save the zone.
- Go to WooCommerce → Free Shipping Bar. If no zone has a usable rule, a notice at the top says so, with a link back to the shipping zones. Otherwise, leave Show the free shipping bar ticked and choose where it appears under Show automatically on.
- Click Save changes.
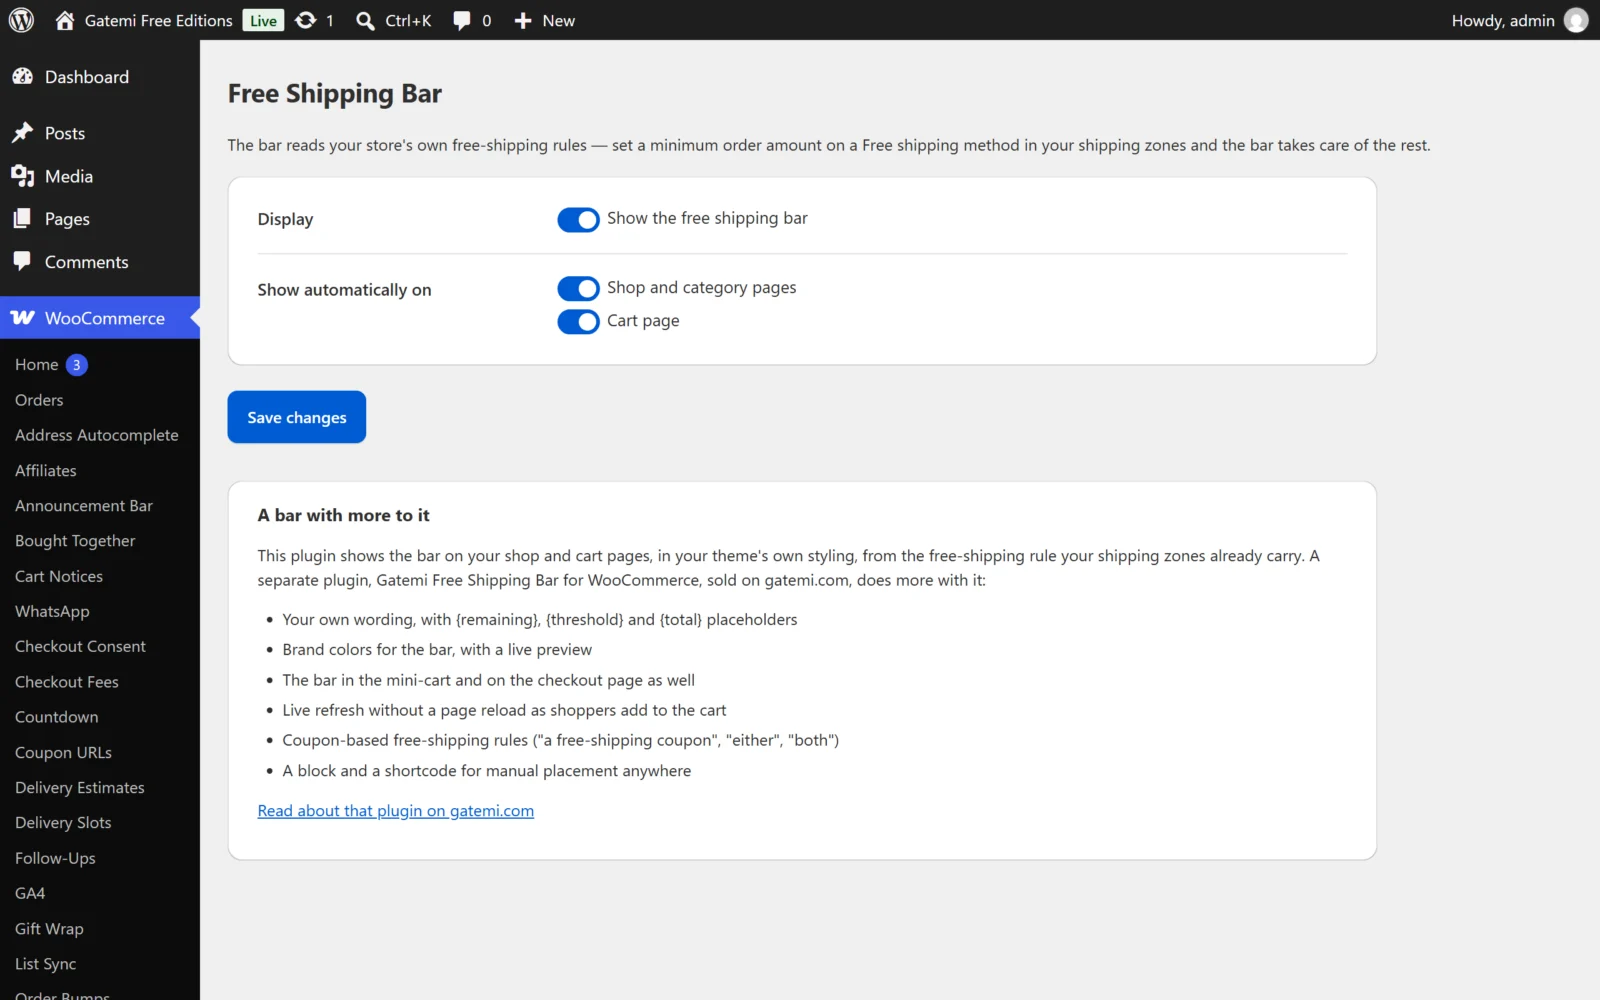
Check it works
- In a private browser window, add a product worth less than your minimum to the cart.
- Open the cart page. Above the cart you should see the bar with the amount still missing, and a track filled in proportion.
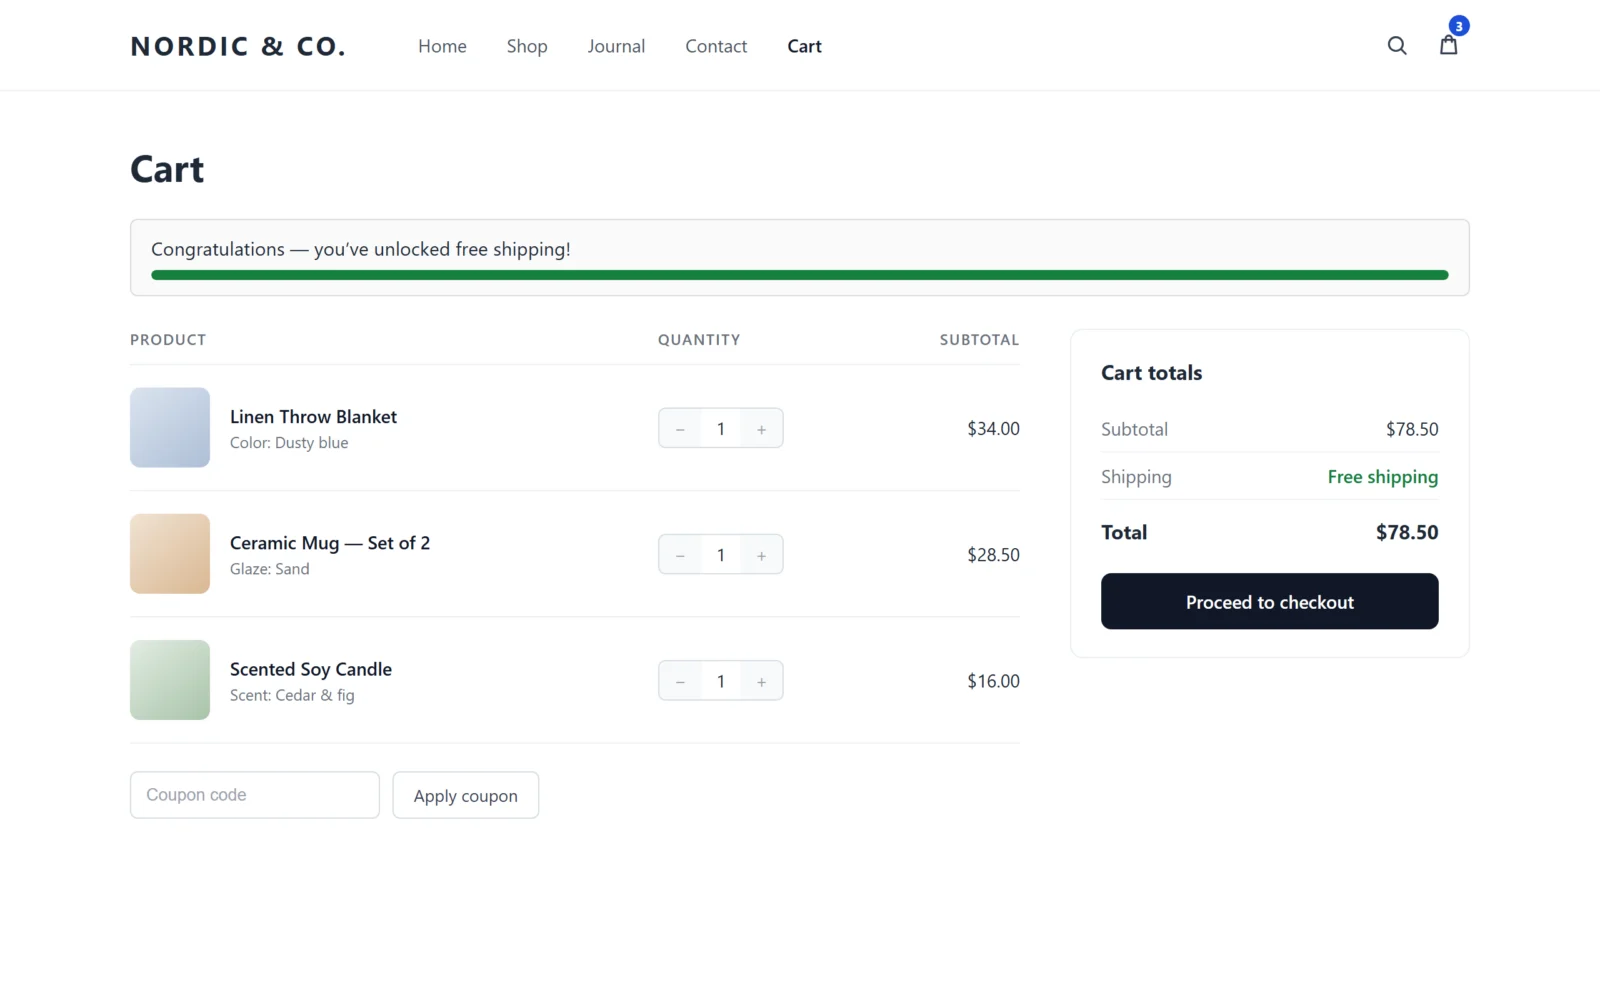
- Add more until the cart passes the minimum. The bar changes to its congratulations state.
- Visit the shop page: the bar shows above the product list too, if Shop and category pages is ticked.
If the bar does not appear, see FAQ and troubleshooting — the usual cause is a shipping zone that does not match the shopper's address, or a cart with nothing that needs shipping.
Next: Settings · How it works