
Gatemi Coupon URLs gives a WooCommerce coupon an address of its own, such as https://yourshop.com/coupon/spring-sale/. Put that link in an email, a post or on a flyer. A shopper who follows it arrives with the coupon already applied to their cart.
There are two editions, and this manual covers both:
- Gatemi Coupon URLs — the free edition. A link on any coupon, and a choice of where the shopper lands: the home page, the shop, the cart or the checkout.
- Gatemi Coupon URLs for WooCommerce — the full edition, sold on gatemi.com. It adds products that the link puts in the cart, a landing page of your own, a message in your own words when the discount is applied, and a list of every live link on one screen.
Both editions store links in the same place, on the coupon itself, so a link you hand out under one keeps working under the other.
Requirements
| Free edition | Full edition | |
|---|---|---|
| WordPress | 6.4 or later | 6.4 or later |
| PHP | 7.4 or later | 7.4 or later |
| WooCommerce | 8.0 or later (tested up to 10.9) | 8.0 or later (tested up to 10.9) |
Both editions declare compatibility with WooCommerce's High-Performance Order Storage (HPOS) and with the Cart and Checkout blocks. Pretty permalinks are needed for an address like /coupon/spring-sale/, because the plugin adds a real WordPress rewrite rule.
Install
Free edition
The free edition is coming to wordpress.org. Until it is listed there, it cannot be installed from Plugins → Add New.
Full edition
- Buy the plugin on the Coupon URLs product page.
- Download the zip from your gatemi.com account.
- In WordPress, go to Plugins → Add New → Upload Plugin, choose the zip and click Install Now, then Activate.
- Go to WooCommerce → Coupon URLs. In the License & updates card, paste your licence key (it looks like
GM-XXXXX-XXXXX-XXXXX-XXXXX-XXXXX) and click Activate.
The plugin works without a key. The key switches on one-click updates and support. Without a key the full edition makes no requests to gatemi.com.
If you have the free edition installed, it stands by while the full edition is active. Its row on the Plugins screen says so, and you can deactivate it.
Your first link
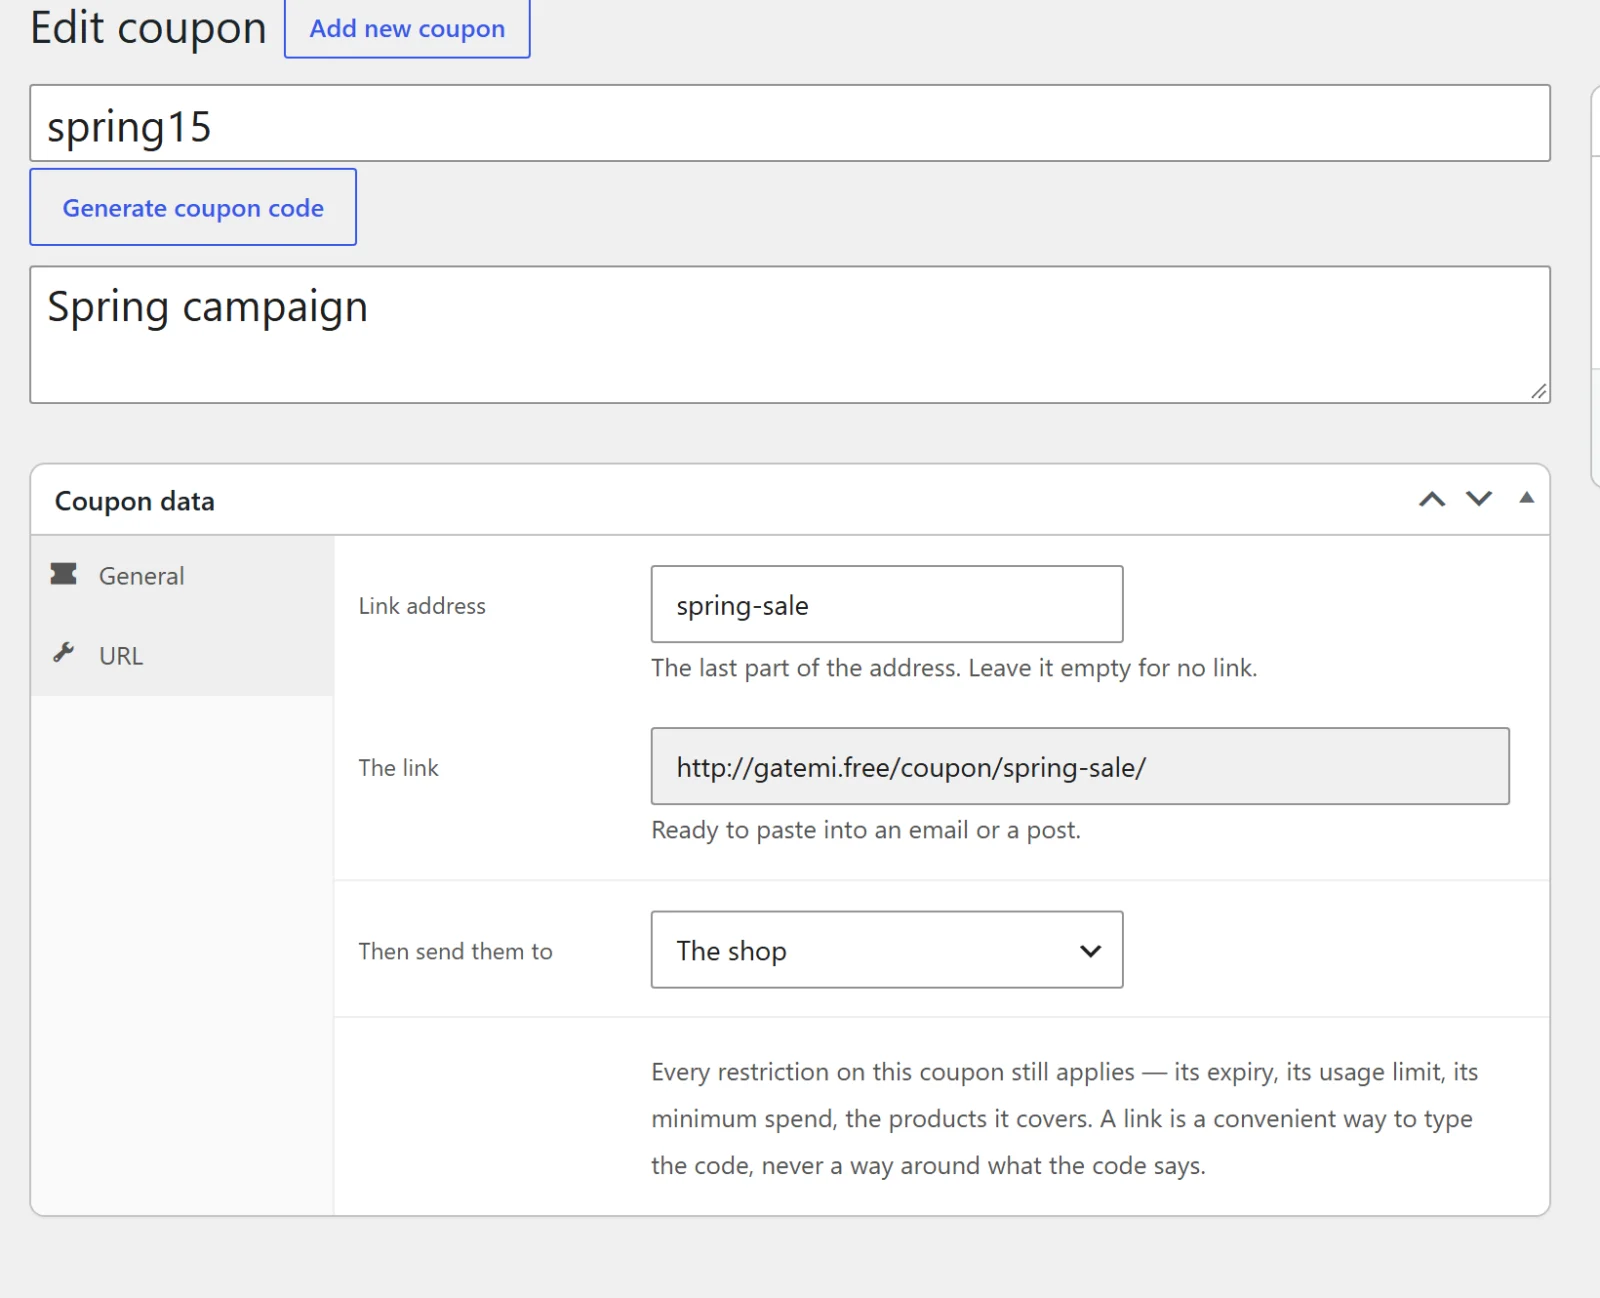
- Go to Marketing → Coupons and open a coupon, or add a new one. Set its discount, expiry and usage limits on the General, Usage restriction and Usage limits tabs as usual. Make sure the coupon is published — a draft coupon has no live link.
- In the Coupon data box, click the URL tab.
- In Link address, type the last part of the address, for example
spring-sale. - In Then send them to, choose where the shopper lands: The home page, The shop, The cart or The checkout. Full edition: you can also choose A page of my own and type its address in That page, and list product ids in Also add to the cart.
- Click Update (or Publish) to save the coupon.
- Open the URL tab again. The link now shows the finished address, ready to copy.
The first part of the address (coupon by default) is set once for the whole store under WooCommerce → Coupon URLs. See Settings.
Check it works
- Copy the link from The link.
- Open a private browser window, so you start with an empty cart.
- Paste the link and press Enter.
You should be redirected to the page you chose, and the cart should show the coupon. WooCommerce shows its own message, "Coupon code applied successfully." If the coupon's rules are not met — it has expired, the cart is below its minimum spend, it has reached its usage limit — WooCommerce says why instead, in its own words, and no discount is applied. That is deliberate; see How it works.
If the link shows a "page not found" error instead, see FAQ and troubleshooting.