
These docs cover both editions:
- Gatemi Chat Button — the free edition, coming to wordpress.org.
- Gatemi Chat Button for WooCommerce — the full edition, sold on gatemi.com.
Anything marked Full edition is only in the paid plugin. Everything else is in both.
The plugin puts a "Chat with us" button on your shop. Pressing it opens WhatsApp — the app on a phone, WhatsApp Web on a desktop — with a message already typed, addressed to your number. The button is an ordinary link to https://wa.me/…. Nothing is loaded from WhatsApp, Meta or anybody else, so the button works before any script has run and a page cache can serve it.
Requirements
| Free edition | Full edition | |
|---|---|---|
| WordPress | 6.4 or later | 6.4 or later |
| PHP | 7.4 or later | 7.4 or later |
| WooCommerce | 8.0 or later | 8.0 or later |
| JavaScript on the storefront | none | one small script, only for the agent panel |
Both editions declare compatibility with HPOS (custom order tables) and the Cart & Checkout blocks. Without WooCommerce active, either edition does nothing and says so in a line under its own row on the Plugins screen.
You do not need a WhatsApp Business API account for the chat button. You only need one for the full edition's automatic order updates.
Install
Free edition
The free edition is coming to wordpress.org. When it is listed, install it from Plugins → Add New by searching for "Gatemi Chat Button", then activate it.
Full edition
- Sign in to your account on gatemi.com and download the plugin zip.
- In WordPress, go to Plugins → Add New → Upload Plugin, choose the zip and press Install Now, then Activate.
- Go to WooCommerce → WhatsApp, paste your licence key into License & updates and press Activate. The key switches on one-click updates; the plugin works without it.
If the free edition is also active, it stands down on its own — it shows no button and says on the Plugins screen that the full edition is running. You can deactivate it. Your settings are kept, because both editions use the same stored options.
First setup
- Go to WooCommerce → WhatsApp.
- Under The chat button, leave Show the chat button ticked, and choose where it goes: Under the add-to-cart button on product pages, Floating, in the corner of every page, or both. Both are on by default.
- Under Who answers, type a Name (for example "Sarah") and, optionally, a Job (for example "Sales").
- Type the WhatsApp number with its country code — for example
+44 7700 900123. Spaces, brackets and a leading+or00are fine. - Read the line that appears under the number after you save. It says either "WhatsApp will receive +447700900123" or that the number cannot be used. A number that cannot be used gets no button at all.
- Tick the days this person answers and set From and To (24-hour
HH:MM, default 09:00–17:00). These are your shop's clock, set in Settings → General → Timezone. - Press Save changes.
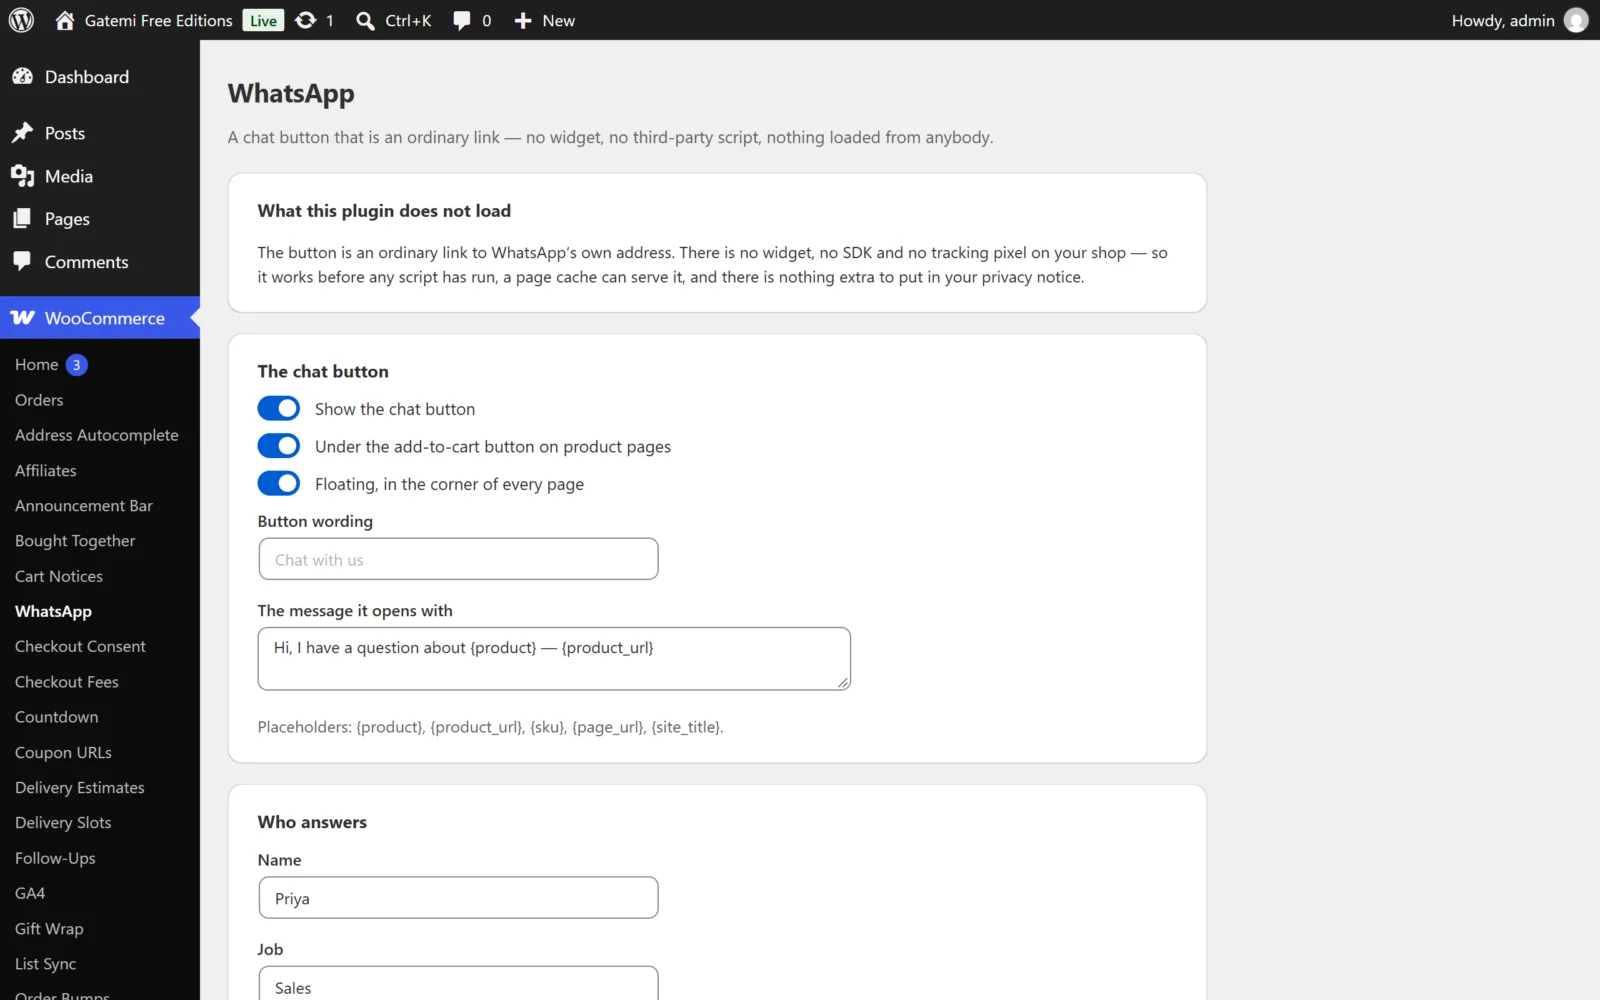
Full edition: under Who answers press Add another to add more people, each with their own number, job, hours and an optional greeting of their own.
Check it works
- Open a product page in a private browser window.
- Under the add-to-cart button you should see a button reading the name you typed — "Sarah · Sales" in the example above. If no name is set, it reads "Chat with us" (or your own Button wording).
- The same button floats in the bottom-right corner of every page.
- Press it. WhatsApp should open on your number with the message "Hi, I have a question about product name — product address".
- Outside the hours you set, the button carries a line: "We are away right now — send a message and we will reply when we are back."
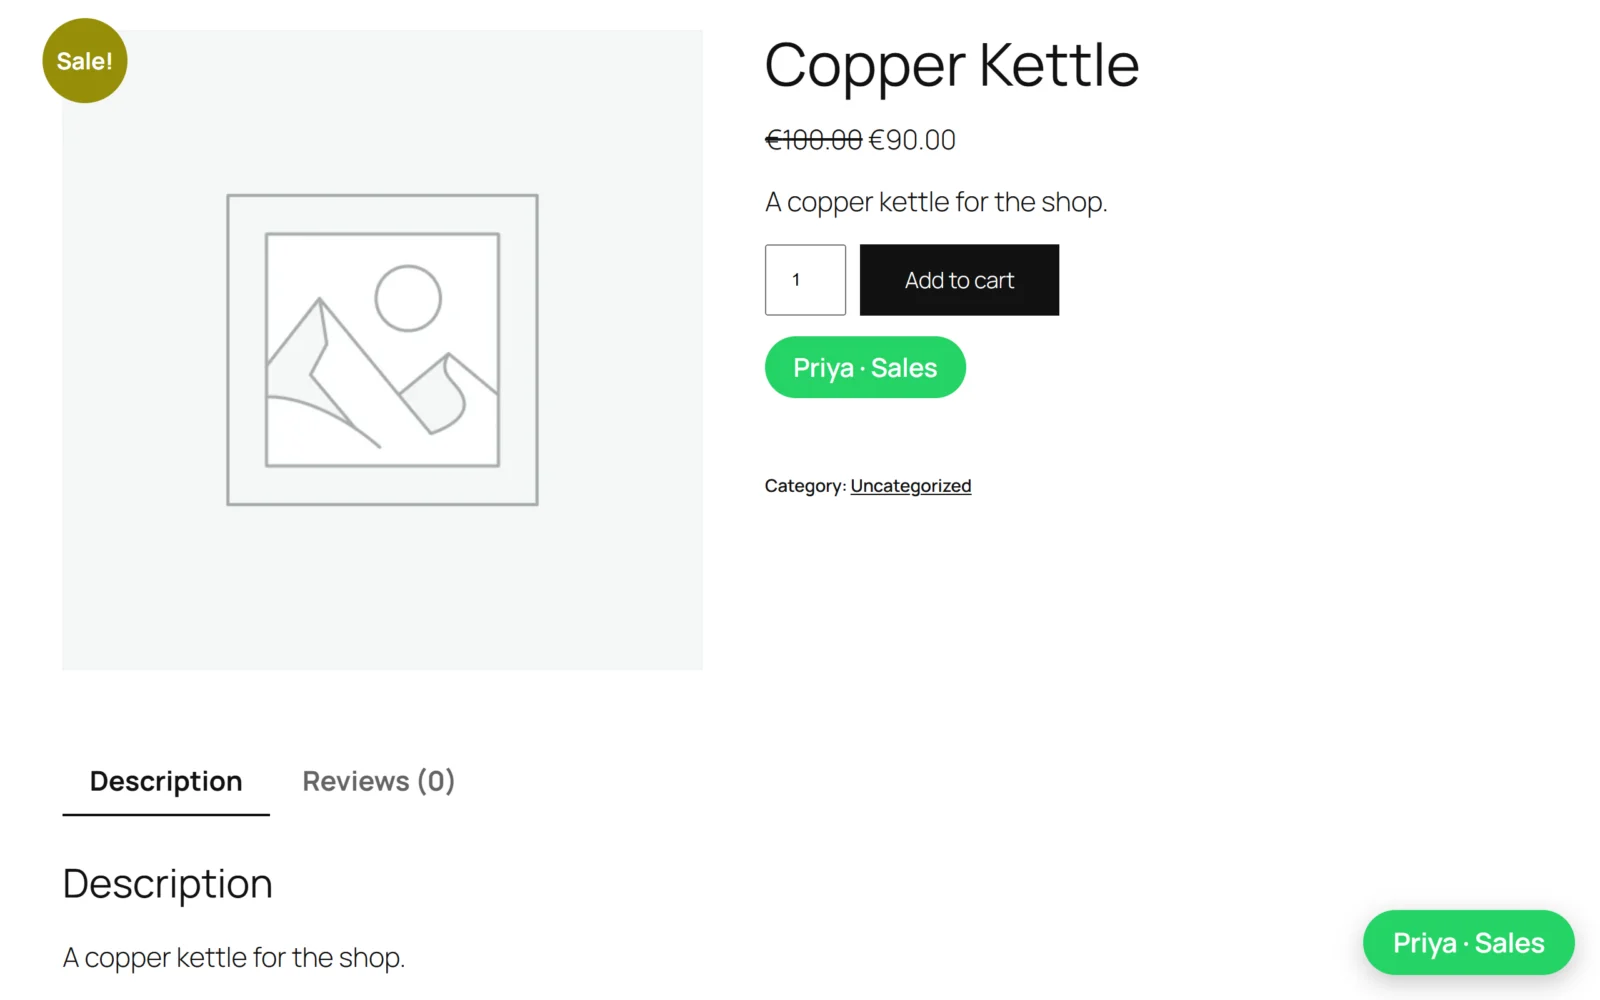
If no button appears, see FAQ and troubleshooting.
Next
- Settings — every setting, its key and its default.
- How it works — the number rule, working hours, placeholders and the full edition's order updates.
- Developer reference — filters, options, order meta and CSS classes.